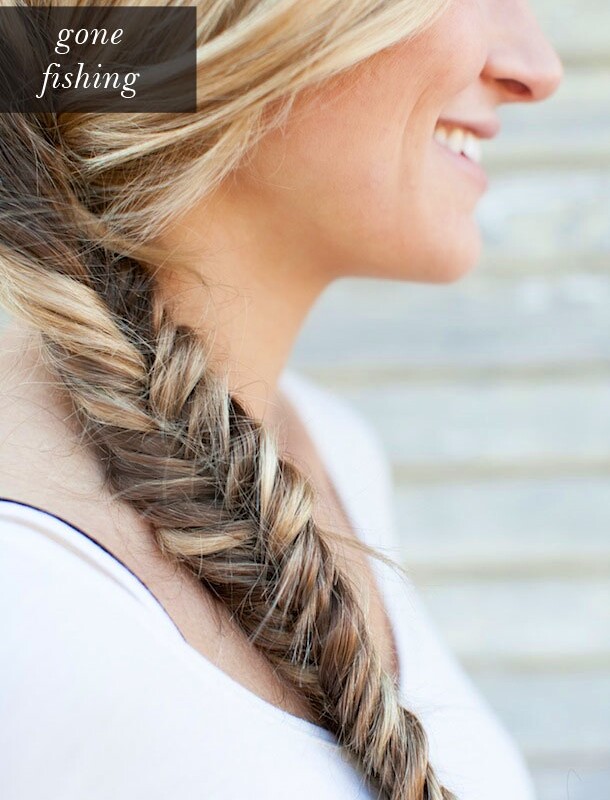
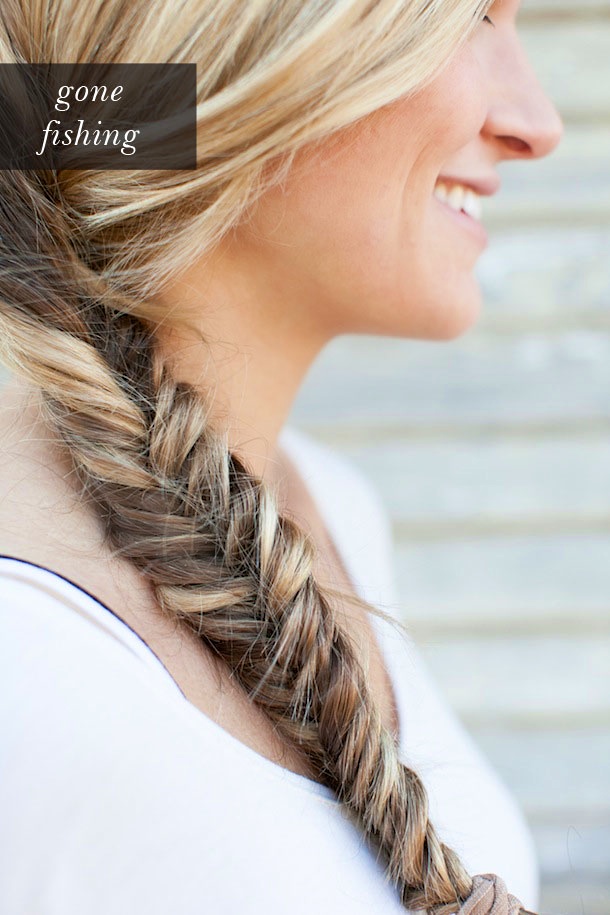
Ever since we instagramed a photo of Claire’s ever-so-flawless braid several months ago, we’ve received countless requests from all of you asking for a beauty tutorial that covers exactly how to achieve the same look. So while you typically know her from her Transformed series, for this week’s Pretty Simple we thought we’d invite Claire to cross contributor lines and give the world some insight into how she makes her fishtail braid so very perfect. Keep reading for the step-by-step!


- Separate hair into 2 equal side-by-side sections. If you’d like your braid to be on the side, pull the two sections in the direction of your choice. note: if you want the top of your braid to be tighter, you can start with your hair pulled into a ponytail and leave the rubber band in place until the very end.
- From the back of one section (we’ll call this Section A), take a small piece of hair (1/4″-1/2″) and wrap it in front of and across Section A. Then merge the small piece with the opposite section (Section B).
- Take a small piece of hair from the back of Section B, and wrap it in front of an across Section B. Then merge the small piece with the hair in Section A.
- Repeat, working your way down. For a messier look, you can mix up pulling smaller and larger piecers from section to section. note: to occasionally tighten while braiding, pull Sections A & B apart from each other periodically. This is a slow process but gets easier with practice.
- Once you have finished the braid, secure the fishtail at the end with a hair band. If you chose to begin with your hair in a ponytail, carefully cut the elastic band at the top of the braid. If you are going for a messier look, gently pull the braid apart so that tightness varies. Strands falling out & bumps make the look even better in my opinion!
*photos by Kate Stafford of Peacock Photography