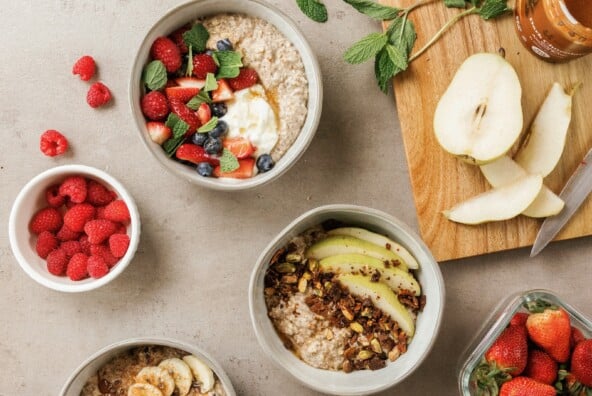
There’s nothing quite like the smell of a pumpkin pie baking in the oven to declare the arrival of cozy season. Hands down, the creamy and sweet squash mixed with autumnal spices and cream gives us all the fall feels. But in the spirit of ensuring that everyone can indulge in the deliciousness, we came up with this gluten-free pumpkin pie recipe that’ll delight all eaters at your Thanksgiving table. (Bonus: It’s dairy-free, too!)
And while we’re certainly not in the business of not enjoying a few indulgences during the season, we find that things are all the more celebratory if everyone can join in. That’s why we made sure that this twist on the holiday classic retained all the festive flavors and the spicy-sweet bite everyone knows and loves. Definitely don’t skimp on the homemade cashew cream either. We promise you’ll want more than one slice—it’s that good!
And if you’re a newbie at this, don’t stress. We purposefully kept this recipe pretty simple with minimal ingredients so you shouldn’t have too much trouble pulling it off for Thanksgiving dessert. It’s also a great option for a potluck because it satisfies every tastebud and dietary requirement, too. It’s really a win-win!
Ready to get started? Keep scrolling for the complete dairy- gluten-free pumpkin pie recipe. We can’t wait to hear what you think, so please tag us on Instagram @camillestyles when you do so we can see your finished pie.


The Perfect Gluten-Free Pie Crust Recipe
If you’re intimidated by pie crust, I have two words: don’t be! Especially when folks catch wind of the fact that this is a gluten-free crust, I’m sure they head straight for a store-bought version. Instead of rolling out the dough and fitting it to your pie dish, this recipe uses a simple press-in dough.
As I mentioned earlier, this gluten-free pumpkin pie recipe is foolproof. When it comes to holiday baking, it’s important to have recipes you can rely on. Because as any Thanksgiving baker knows if something’s going to go wrong, it’s usually the pie crust. The almond meal gives your crust a nice, nutty bite, the vanilla extract and maple syrup bring just enough sweetness, and the egg and egg white bind everything beautifully. Once it’s pressed into your pan, dock your dough to keep it from puffing up and pre-bake. It holds up to the filling and offers a nice contrast in texture.
How To Make This Gluten-Free Pumpkin Pie Recipe
Whereas other recipes that use alternative flours can be complex and unreliable, this gluten-free pumpkin pie recipe couldn’t be easier. (In fact, we’d call it foolproof!) We’re highlighting a few instructions to help you master this pie recipe. Here’s how it comes together:
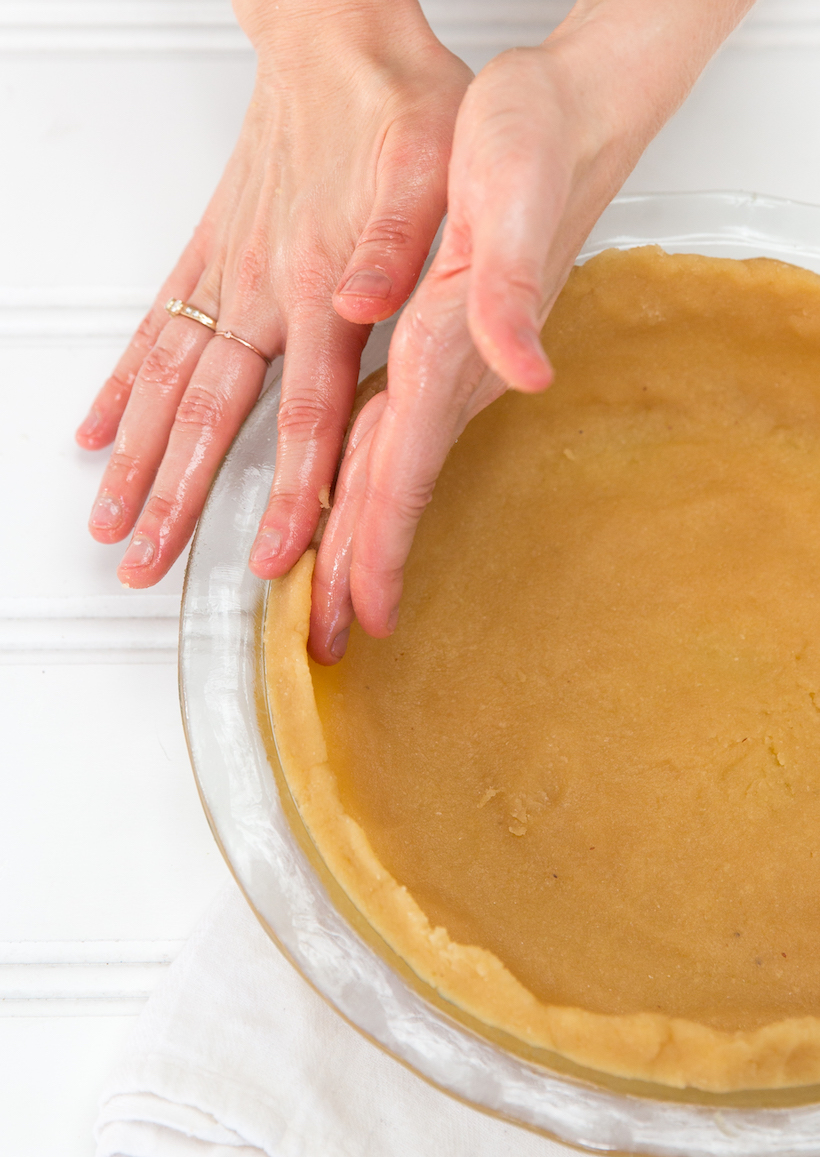
- Knead the pie dough and press it into your pie pan, similar to a graham cracker crust. Tip: Because this is a grain-free pie crust, it’ll behave differently than regular dough. Keep your hands wet as you shape the dough in the pie pan.
- Flute the edge of the crust by placing your thumb and index finger together on your left hand and placing on the outside of the dough. Using your right hand, press your index finger against your other hand on the inside of the dough. You should see that you are able to make to make a small triangle shape. Repeat this pattern around the entire edge of the crust. Dock and pre-bake your crust.
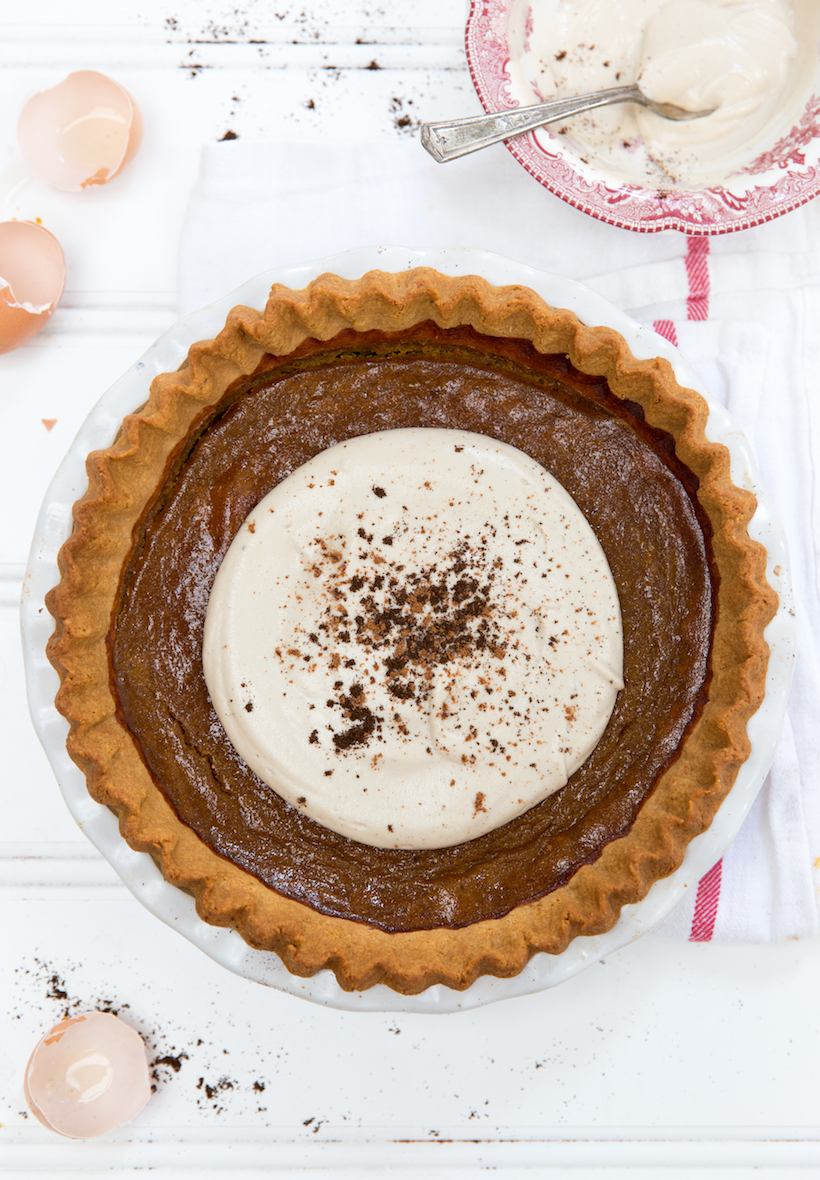
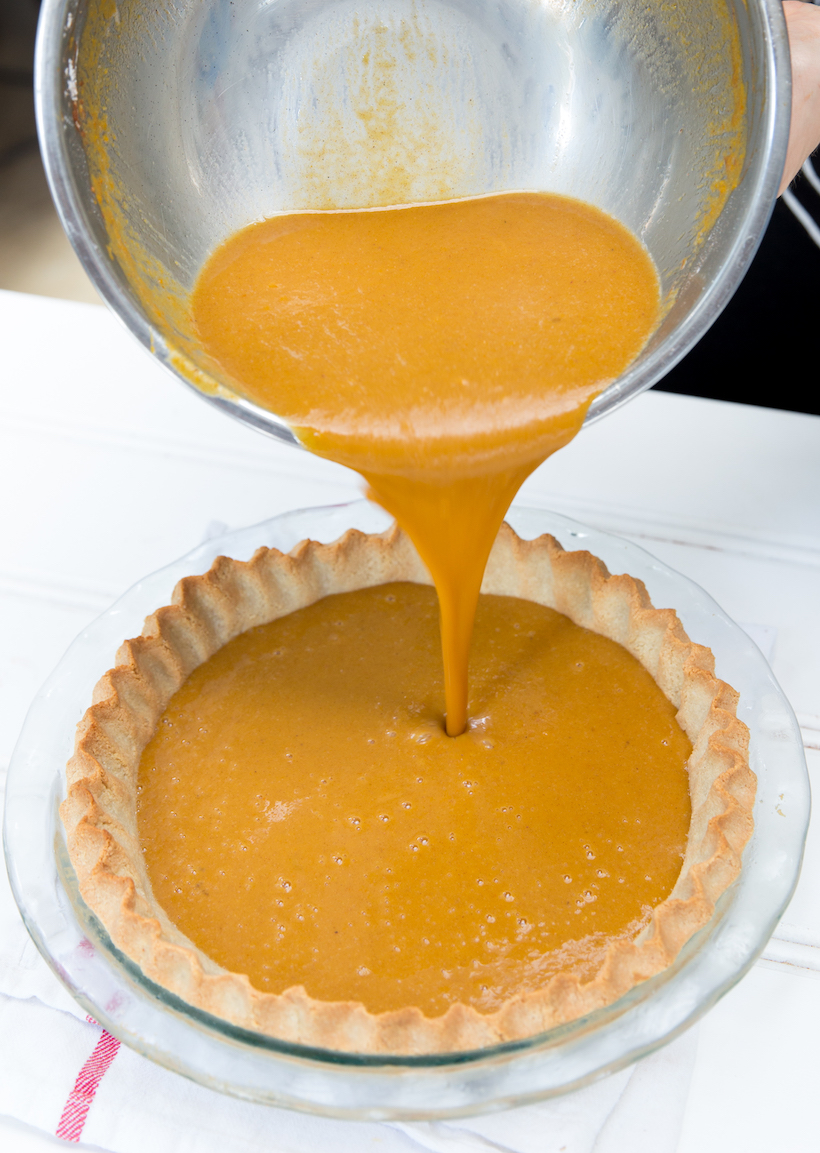
- Whisk the filling ingredients together in a large bowl. Thankfully, this recipe uses an entire can of pumpkin puree (so you don’t have to worry about what to do with the leftovers). Pour the mixture into the crust and bake at 350 degrees for an hour, checking after 30 minutes. If your edges appear to be browning too quickly, you can wrap aluminum foil around the crust or use a pie shield to keep it from cooking further. You want the filling to be set and the crust lightly browned.
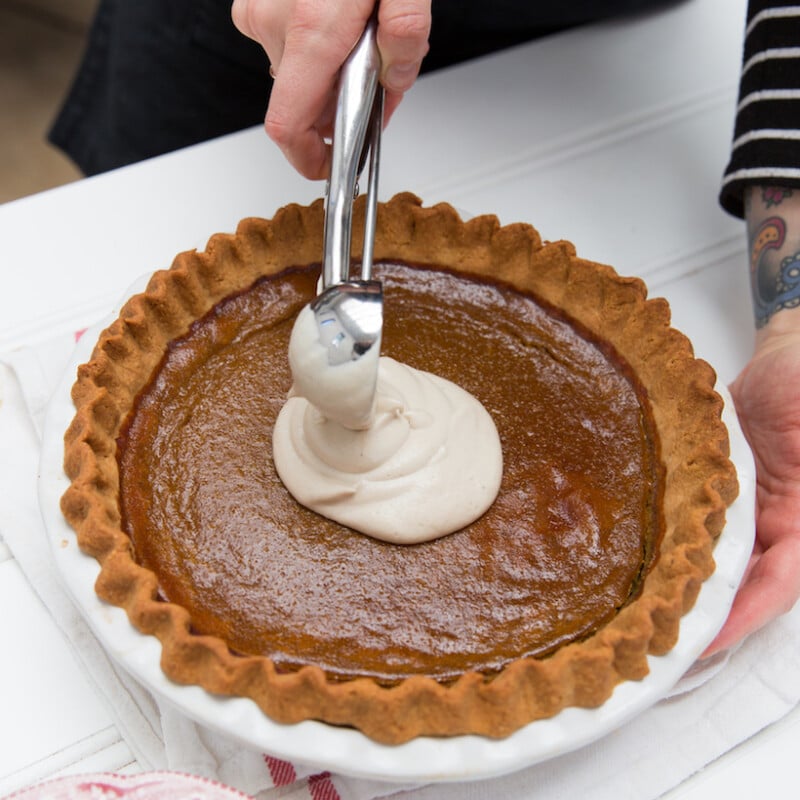
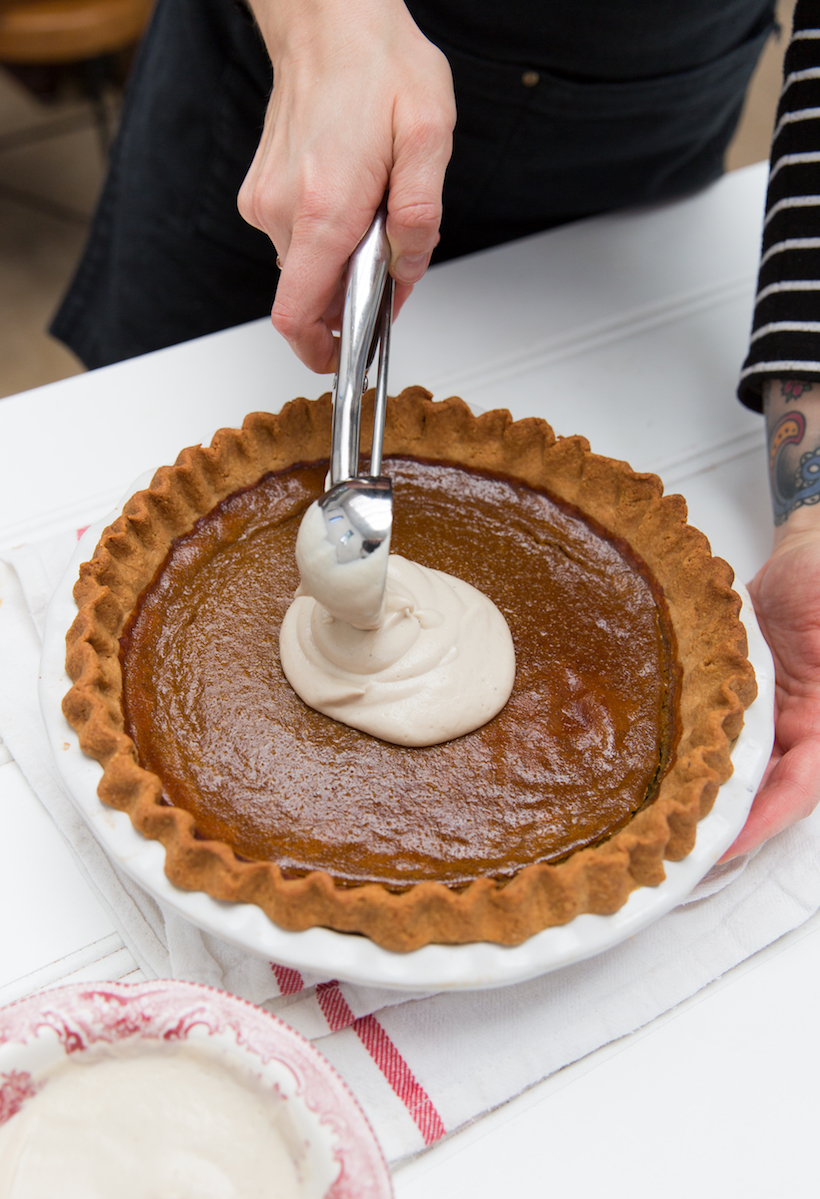
- This is so good topped with a dollop of whipped cream. Or, if you want to keep things dairy-free, try our cashew “whipped cream” recipe below!
- To store: Cover pie loosely with plastic wrap. Place the pumpkin pie in the refrigerator. Eat within four days.
Keep reading for our favorite gluten-free pumpkin pie recipe. It’s perfect for the Thanksgiving table or anytime you want to satisfy your seasonal cravings.
Gluten-Free Pumpkin Pie
Serves 6-10
This foolproof pumpkin pie satisfies everyone's sweet, seasonal cravings—without any grains or dairy in sight.
Categories
Ingredients
- 2 1/2 cups almond meal
- 1/4 teaspoon baking soda
- 1/4 cup melted avocado oil (can use melted butter or coconut oil instead)
- 1/2 teaspoon vanilla extract
- 1/8 cup maple syrup
- 1 large egg, room temp
- 1 large egg white, room temp
for the filling:
- 1 can of pumpkin puree
- 3 eggs
- 1/2 cup coconut milk
- 1/3 cup maple syrup*
- 1 1/2 tablespoons pumpkin pie spice*
- 1-2 tablespoons tapioca starch
*I make my own spice blend, but Primal Palate and other companies carry Pumpkin Pie Spice. You should be able to find it easily at your local grocery. In addition, I don’t always have my pumpkin pie super sweet because I love real whipped cream with powdered sugar, but if you like to eat your pie naked, feel free to increase your maple syrup to 1/2 cup.
for the cashew "whipped cream":
- 1 1/2 cups cashews
- 1/2 cup filtered water
- 1/8 teaspoon Himalayan sea salt
- 3/4 teaspoon vanilla extract
- 5 tablespoons maple syrup
- lemon juice to taste (optional)
Instructions
make the crust:
- Preheat oven to 350 F.
- Mix the dry ingredients together in a bowl. In a separate bowl, mix the wet ingredients and add to the dry ingredients. Combine with a fork and knead with your hands to fully incorporate all ingredients. Mixture should be slightly wet to the touch, not dry and crumbly. You should be able to easily form into a ball where it is slightly shiny (appears to have some moisture). If dough it too dry, add an additional egg white.
- Press dough into pie pan as if it is a graham cracker crust. Using your palm, press the dough against the bottom of the pan and up the sides. If dough is sticky, wet your hands with water during the process and wash often.
- Level the edge of the crust and make sure it is all even thickness all the way around. Flute the edge around the entire edge of the crust.
- Using a fork, dock your crust by poking it several times to keep it from rising in the oven. You can also place dried beans or pie weights in the center of the pan.
- Pre-bake crust for 15 min.
make the filling:
- Mix all ingredients together. Pour mixture into pre-baked crust.
- Put filling in pre-baked crust and bake for 1 hour, checking to make sure the crust hasn't browned too quickly about halfway through. Filling will be set when the center jiggles slightly, but appears set.
make the cashew "whipped cream":
- Soak cashews in filtered water overnight. If you missed this step, you can always boil water and soak cashews like tea for 30 minutes to soften.
- Add all ingredients to a high-powered blender. Transfer to a container and chill until ready to serve.