There’s something so inherently terrifying about the woods. Take me on a hike any day of the week, but as soon as that trail starts to taper off, I’m backtracking faster than you can say trick-or-treat. Since there’s nothing we love more than letting our imaginations run wild this time of year (remember last year’s Clue themed dinner party, and our The Birds themed bash the year before?) we took this year’s Halloween shoot to the one place where none of us feel safe: the woods. With party elements inspired by everything wild and foraged, plus two hauntingly gorgeous models, we designed an All Hallow’s Eve bash that would send even the bravest of thrill-seekers running. Click through for all the details, and be sure to stop by later this week as we unveil recipes, DIY projects and printables from the shoot.
*photography by Melanie Grizzel

The wickedly talented Liz of The Nouveau Romantics created this gorgeous graphic using real fresh flowers and foliage. It perfectly captured the spirit of our project, and when printed onto the right material, it can be used countless ways, from invitations, to party signage to a photo booth backdrop.

We headed out to the woods behind Camille’s house. The area is wild and totally untamed, making it the perfect place to bring our creepy concept to life.

To transform the woods into a party ready space, we grabbed some favorite interior pieces and brought them into a new environment. We paired Camille’s Martini Side Table in antique brass with Jenn’s gorgeous French brasserie table, but just about any mixed-and-matched side tables can work to create an impromptu drinks buffet.

Inspired by foraged berries and fresh herbs, Camille whipped up a devilishly good gin cocktail, perfect for serving up at any Halloween party.

Be sure to stop by this Wednesday for the details on how to make Camille’s Poison Berry Smash!

For a decorative detail that’s just as effective — yet way spookier — than a lush flower arrangement, pack colorful herbs and foliage into glass decanters, and cluster them on any surface in your party space. We love this one, this one and this one.

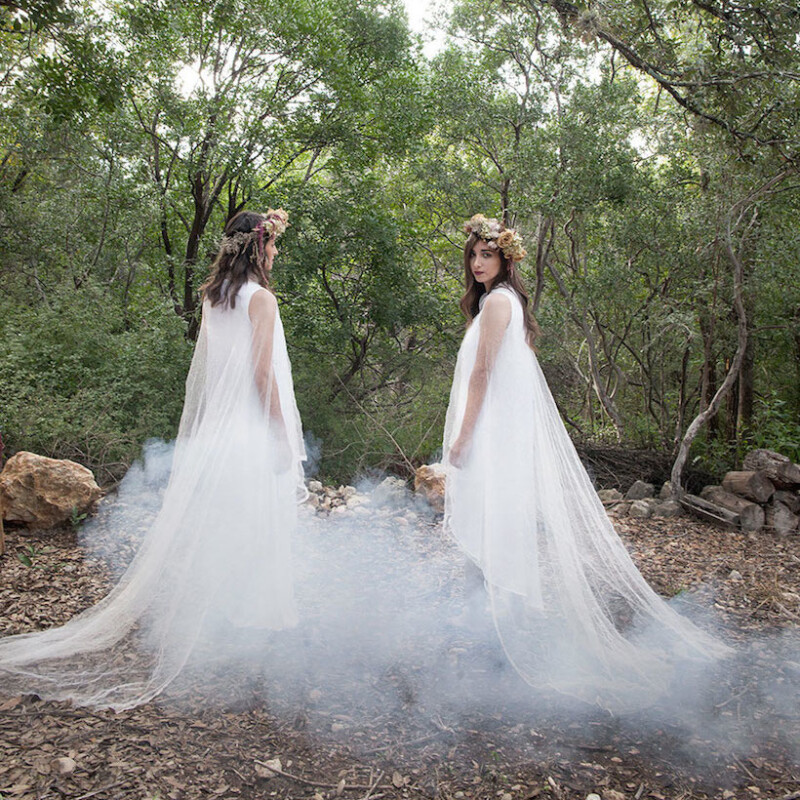
One ghostly girl is creepy, but two identical spirits are downright chilling. We got our models ready for the festivities by dressing them up as spooky (albeit gorgeous) sisters. We incorporated some of our favorite elements — flower crowns, flowy ensembles and striking makeup — but gave them a creepy spin.

A vintage candle holder with a handle is the perfect accessory for this costume… the drippier the melted candle wax, the better.

The girls wore muted, matte makeup with smudged black eyeliner and this Color Lip Last in deep mauve.

… and of course, they were total team players and braved the woods barefoot.

For a floral display that’s truly to die for, we created custom poison labels and adhered them to used empty glass bottles and jars. We then filled the bottles with dead and dried up blooms… an arrangement that’s as easy to make as it is scary!
To make your own, be sure to stop by later this week for all the free printables and DIY instructions.

Just because a costume is spooky doesn’t mean it can’t still be pretty. We avoided dressing our models in anything too gory, and instead created an ensemble with flowy white dresses that we already owned, and a do-it-yourself cloak made of inexpensive textured tulle and satin ribbon.

When given the task of creating “dead” flower crowns, the girls of Sweet Magnolia Floral knocked it out of the park. And lucky for us, they decided to share the step-by-step instructions…
Supplies:
• Grapevine wreath
• Floral wire
• Dead or dried flowers
• Floral clippers
Instructions:
1. Break the grape vine wreath down with your floral clippers, and measure around the circumference of your head.
2. Wire the grapevine wreath to the desired size. Loop floral wire around a few times in 4 different spots on the wreath to ensure the desired size stays in place.
3. Cut down the flowers so there is about a 3 inch stem, then group together clusters of 3 or 4 flowers. Wire them directly to the grapevine.
4. Continue to layer the flower clusters on top of each other and around the circumference of the crown until you have the desired end look.

Pumpkin flavored macarons are a great addition to any halloween party, but we wanted ours to look the part too. Making this party treat is as simple as coloring in the lines, and we’ll be sharing all the details on how to make your own on the blog later this week.

Create your own creepy tabletop pumpkin patch by arranging all the macarons on a single serving platter atop tufts of moss, then set it out for guests to help themselves.

Instead of sending friends home with bags of candy, create a thoughtful favor that’s both on-theme, yet worth keeping long after October 31st. Simply spray paint small tins or pots in any rusty shade and fill with a small ivy plant (of the non-poisonous variety!). Stop by later this week to print these “Poison Ivy” tags that can be glued to a wooden stick and inserted directly into the plant.

Be sure to stop by all month long for the details needed to recreate this party, as well as tons more fright-filled tips and tricks to help you prepare you for All Hallows’ Eve!
Special thanks to Melanie Grizzel, The Nouveau Romantics and Sweet Magnolia Floral for helping to bring another wild Halloween shoot to life.