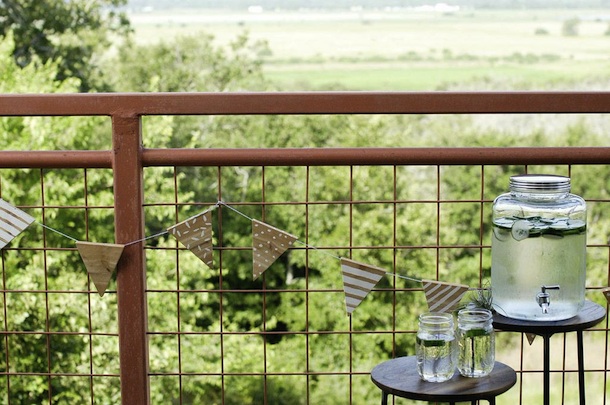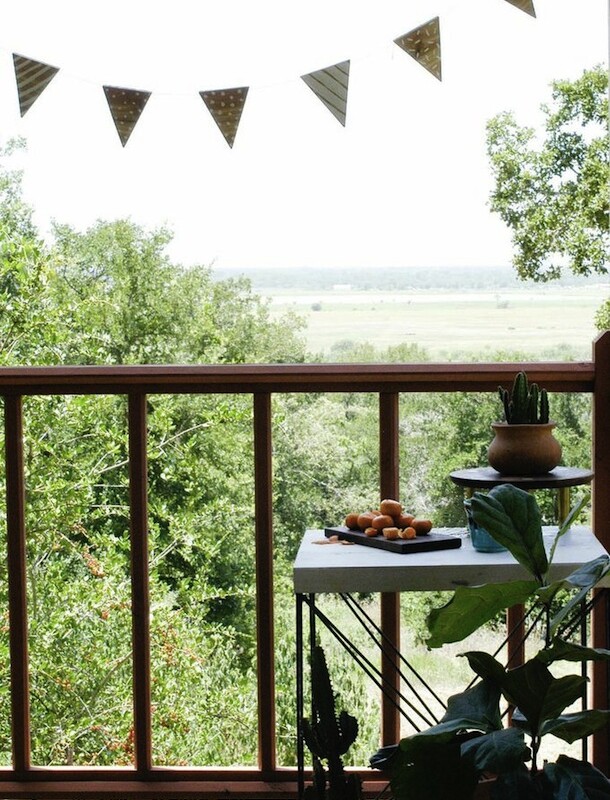

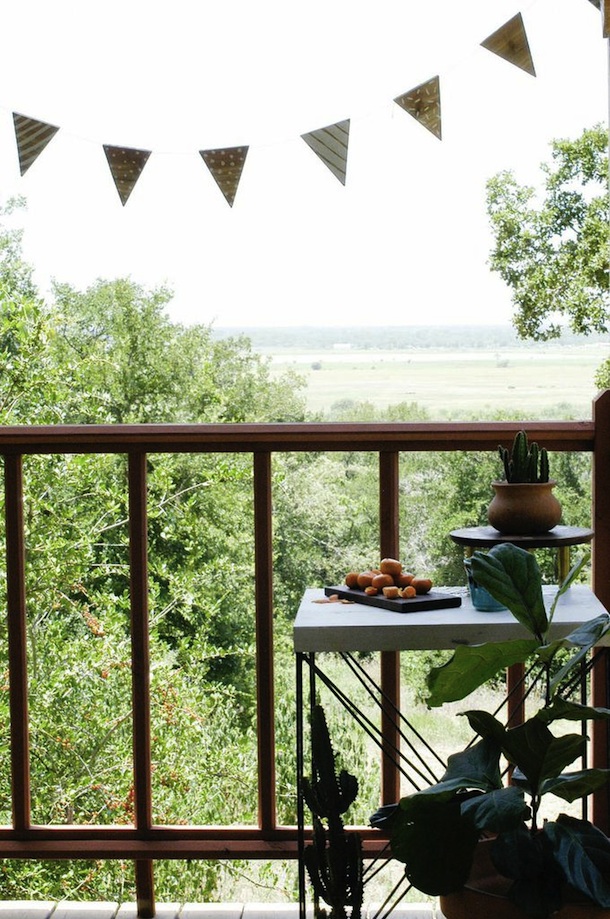
While I could find reasons to argue each season as my favorite, I have a real soft spot for summer. I love the imagery of summertime: crystal clear swimming holes in the heat of the day, watermelon out on the back porch and cracking open a few cold beers on a warm summer evening with my closest pals; it’s all pure bliss for me. To ensure that the great joy of summer lingers on into fall and beyond, I decided to take one of summer’s beautiful emblems, pennant-shaped bunting, and create a version that will hold up year-round. Below I’ll teach you how to construct bunting made from solid cedar wood, perfect for indoors or out.
The term “bunting” traditionally referred to the lightweight wool flags that were used onboard Royal Navy ships as a form of communication between vessels. Nowadays, most people associate bunting with festive decorations, but typically still constructed from fabric or paper. Because I’m a woodworker, I decided to try out making my own bunting out of wood. For this tutorial I chose cedar because it’s readily available at most hardware stores, it’s easy to work with since it’s a softwood, and it does well outdoors if you decide to hang your bunting outside.
Very special thanks to my dear friend Lindsay Frantz who helped me out in the woodshop for this tutorial. To learn more about Kelly DeWitt and her woodshop, visit KKDW.co.
![]()
- Lengths of cedar fence posting (each 6-foot board makes about 24 pennants)
- Miter saw (if you don’t own one or have a pal to borrow one from, I recommend this one. It’s a good saw to start out with and will get you through many projects. This is also a fine beginner saw.)
- Orbital sander
- Screw eyes at ½” (you’ll need two per pennant)
- Paints (be sure to use weather-proof paint if you’ll be hanging your bunting up outside)
- String

![]()
- Measure the area you’d like your bunting to cover. Each pennant will be 4 inches in length, plus 4 inches of space for the string. I’m covering about 15 feet of linear space with 24 pennants, which amounts to roughly 1.5 pennants per foot (round up if you’re left with a partial number). Keep in mind that this is a good rule of thumb, but ultimately your pennants per foot will depend on how much slack you put in the bunting when you hang it up.
- Set your miter saw to 22.5°.
- Set your board up against the fence with the bulk of the wood to the left of the saw blade.
- Make your initial cut, remembering all your saw safety—tie back your hair if it’s long, remove all dangling jewelry, and don’t wear any clothing that could get caught in the saw. Safety glasses and gloves are recommended. Hold your wood firmly against the fence with your left hand and make the cut fluidly with your right hand. Discard the first cut. This is just your initial cut to get your angle started.
- Measure 4 inches from the left side of the saw blade and make a pencil mark on the fence. Use this mark to line up your board for future cuts so that each pennant will be exactly the same size.
- Flip the board lengthwise and relocated the bulk of the board to the right of the saw blade. The angled cut you just made should still be closest to the blade.
- Make another cut to produce one isosceles triangle. In making this cut, be very firm with your left-hand grip holding the wood against the fence and always make sure the entire board is flat, pushed up against the fence. Because this cut is on a relatively small piece of wood, be sure you feel comfortable using the saw before this step.
- Continue flipping the board widthwise and cutting in this way until you have all the pennants you need.
- Sand each of the pennants with your sander. If you don’t have an orbital sander, just ease the edges of the pennants with a piece of sandpaper to get rid of splinters.
- Here’s the time for you to paint your wooden pennants! I used white outdoor paint. Keep in mind that if the bunting is left indoors the wood will darken slightly, and if you string it up outside it will take on a more silvery look—think cedar fences that have aged.
- Attach two screw eyes to each side of the top of each pennant.
- Arrange the pennants in the order you want them hung up.
- Weave your string through the first screw eye on the first pennant and tie a knot. Tie a knot on the same pennant’s second screw eye.
- Measure 4 inches from the corner of that pennant to the closest corner of the next pennant and weave your string through, tying knots on each screw eye as you go. This will keep your pennants spaced equally and permanently once you hang up the bunting.
- Continue weaving and tying until you’ve attached all your pennants.
- Hang up your bunting! I was able to use the same screw eyes and string to affix the bunting to my porch.