
We all know a gorgeous invitation suite when we see one… just the right combination of calligraphy and print, perfect color choices, and design that can bring an entire party theme to life. But if you ask me, what really sets show-stopping paper products apart from the rest is great styling. And if you’ve ever tried your hand at styling an invitation, you know that it’s not nearly as easy as it looks. In an attempt to “up” our paper styling game, we turned to the invitation gurus themselves — Emma and Bailey of Antiquaria. We always love getting an insider peak into this design duo’s secrets (like their entertaining style and Emma’s baby shower), and today is no exception. Keep reading to see what goes into each beautifully styled photo that they produce…

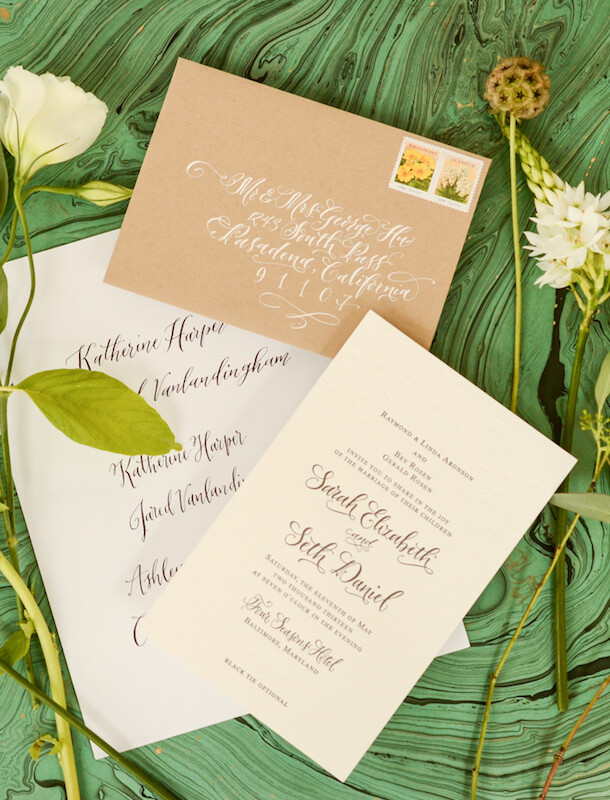
Beauty Props: Items that add aesthetic detail and make sense contextually with the paper subject. For example, if shooting a travel-inspired invitation, consider including ticket stubs, vintage keys, luggage tags or an old compass. Other beauty props can include:
- twine or ribbon
- vintage postage
- writing tools
- washi taps
- flowers and plants Tip: Avoid large flowers that will be much taller than your paper subject (which will make it hard for your camera to focus on the invitation). Think outside the box by using beautifully arranged petals or snipping flower heads off of stems so they lay flat.
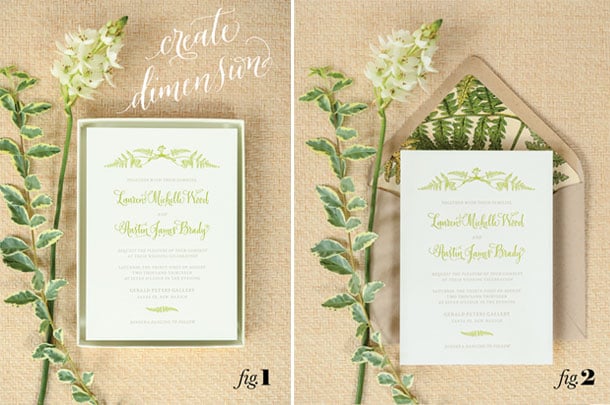
Utility Props: These are things that help create dimension in your shot. For utility props, choose either items that will be part of the styling, like vintage books or boxes (fig.1), or items that will remain unseen and simply add dimension (fig.2).
- Books and boxes add visual interest to an image. They are considered both beauty and utility props, and for this reason, are a favorite go-to styling option.
- Unseen items can create dimension when placed under cards to lift them off of the background, adding shadows and depth. Use rolls of tape, mailing tube caps, post-it notes, or anything else that will do the trick! Make sure that when cards are rested on these items, they are totally flat and not sagging anywhere.
Backgrounds: A textured, neutral background always a safe bet, especially if there is a lot going on in the paper design and styled layout. Make sure that the background is large enough for the shot (we recommend 18″ x 24″). Some materials we love using:
- woven jute papers
- textured linens (ironed!)
- matte colored boards
- patterned paper or wrapping paper
- vintage table linens

Setting up and styling the shot:
Arranging your paper pieces to be styled is a little bit like a puzzle. Each piece of every suite has different dimensions, a different number of components and varying styles. As a general rule of thumb, the focal point (main piece that you’re featuring) to be toward the center of the design, and elevated high than the rest. This is where you will focus your camera, and therefore, it will be the most crisp part of your photo. Supporting pieces should be arranged around the focal design. Experiment with overlapping and angling them.
Tip: Let the paper design inform your styling. For example, if the design is linear and modern, it makes sense to lay out and style your shot this way as well.
The props that you’ve selected can be used throughout your shot or simply around the edges. Things like books can be styled as a background across the shot, while ribbons, stamps and floral elements are placed in strategic spots and used to fill “holes”.
Balance is the most important piece of the equation. Start off simple and add more elements and complexities as you get more comfortable styling your shots.

Take a test shot and continue to tweak your arrangement as needed. Once you’ve captured the final shot, be sure to take detail shots of all the extraordinary design elements of your design.

At-home photography tips:
- Angle the camera straight down. Tri-pods are always helpful but we often get up on a step ladder and hold the camera by hand.
- Use natural light whenever possible. We often shoot outside so that we have the best possible light. Anything that requires artificial lighting, we leave to a professional.
- To be safe, take your final shot with a couple of different exposures. You can always adjust them afterward in Photoshop and it’s always good to have options.