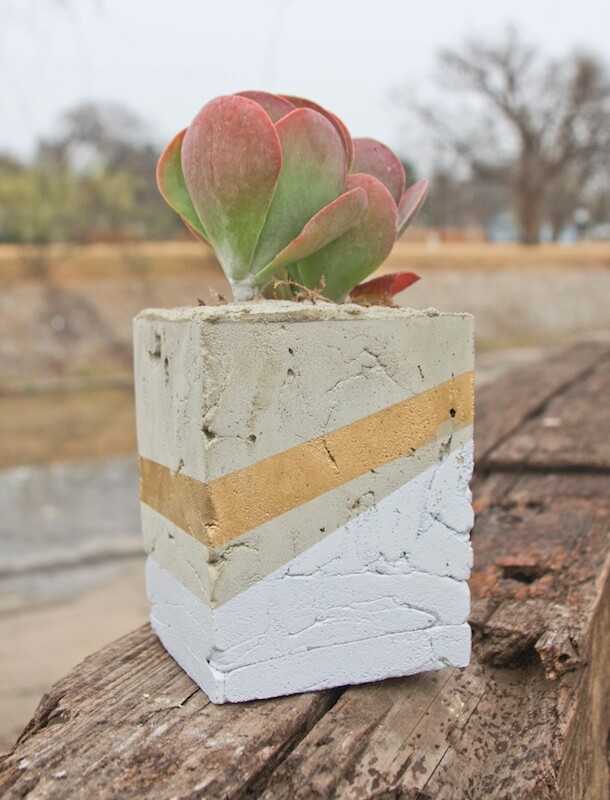

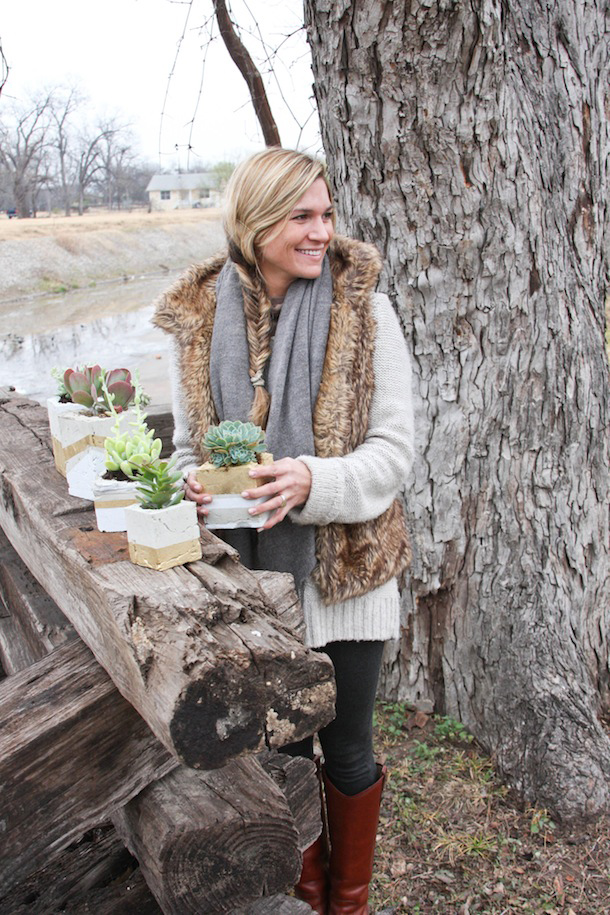
Claire here, and I hope everyone had a wonderful holiday! Today’s project is perfect for tackling in the New Year, and can add just the pop of color that your home may need for a little pick-me-up. Last time I had so much fun experimenting with cement and loved the result so much, that I decided to continue working with the material to see what other handmade creations it’d inspire. I love succulents and thought the idea of cement planters would be a fun way to spice up my typical potted plants — and what better way to pass the winter days than with a fun and easy afternoon of DIY-ing? Follow the instructions to make your own!


![]()
- spray paint (any colors you want!)
- bucket
- stick for stirring
- measuring cup
- plastic gloves
- large spoon/plastic cup
- Rapid Set Cement
- larger container for mold (I wanted square and found plastic containers at Hobby Lobby but you could also use milk cartons, plastic buckets, etc.)
- smaller container for inside of mold to form where plant goes
- blue painters tape
- PAM spray
- succulents
- broken pieces of a terra cotta pot
![]()
- Spray PAM on inside of outer container, and on outside of inner container.
- Follow instructions on the Rapid Cement to mix using bucket, stir stick, and measuring cup.
- Pour into container about 3/4 of the way full, shake out air bubbles (unless you like the rough look) and slowly ease the inner container into the still soft cement.
- Set the inner container center, smooth the top if you desire, and let sit for a few minutes.
- **note, I’ve achieved the best results by slowly turning the middle container in the cement and removing when the cement is still soft, otherwise the suction and hardened cement makes the removal difficult.
- Once middle container is removed let cement sit in the mold till dry.
- Once the concrete is set (I recommend waiting longer than the instructions say), carefully slide the cement form out of the mold.
- Using blue painters tape, tape off a pattern on your base. Spray and allow to dry.
- Place some broken bits of terra cotta pot in the bottom of the planter, this helps with drainage so the roots don’t rot.
- Plant and enjoy your inexpensive custom cement planter!

*photos by Claire Zinnecker for CamilleStyles.com