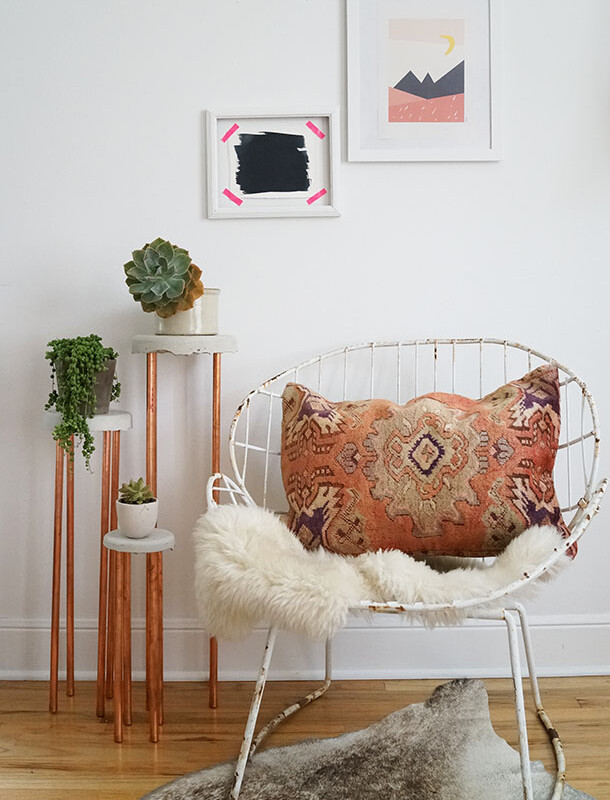

Happy Thursday! Claire here with the perfect summer kick-off DIY. I don’t know about you all, but I am a plant lover. I have them scattered on my porch, decorating my shelves and still can’t help but keep buying more! What is better than displaying them on a plant stand you made yourself? Better yet, it is made with two of my favorite materials — copper and cement! Get all the details on how I made these simple (and completely customizable) stands below.

![]()
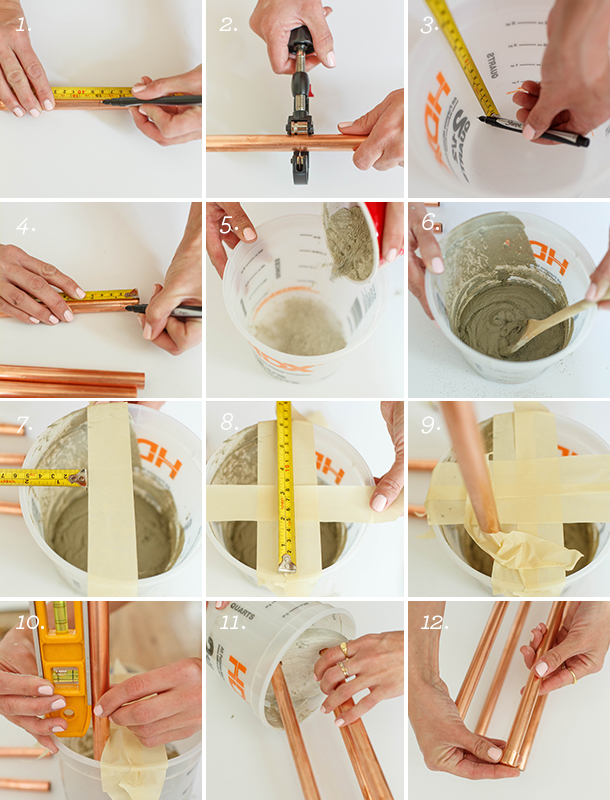
- 3 buckets (2.5 qt., 5 qt., 10 qt.)
- 1/2″ copper pipe (10ft, 8ft, 8ft are the lengths I purchased)
- 16 – 1/2″ copper tube cap
- Husky quick release 1-1/8in tube cutter
- quickcrete
- wooden spoon (or paint stir stick)
- sharpie
- tape
- level
- cup
- glue
- tape measure
 process photos by nicole mlakar
![]()
- Measure and mark desired length of copper pipe legs.
- Use pipe cutter to cut pipe at mark. I cut 4 at 30″, 4 at 24″, 4 at 15″.
- Measure thickness of cement top from bottom of bucket and mark with sharpie. Size of bucket corresponds to length of legs — smallest bucket with shortest legs, etc.
- Measure and mark 1 inch from the end of each copper pipe. This indicates how deep to set the pipe legs into the cement.
- Pour cement (all dry powder) into the bucket, stopping at Sharpie mark.
- Add water slowly while mixing until reaching a smooth, even consistency (an Elmer’s Glue-type consistency).
- Lay two pieces of wide tape along the top of the bucket.
- Repeat, making a tight tic-tac-toe grid as pictured.
- Place a leg in each triangular corner, securing with an additional piece of tape.
- Use a level to make sure each leg is straight.
- Set aside to dry for an hour or more. Once dry, gently ease it out of bucket and sand concrete as desired.
- Use copper caps can balance out any unevenness. Apply glue and adjust until all legs are level.