


ed. note: As Thanksgiving approaches, we’ve been spotting tons of “slab pies” around the web and love their rustic look and (most of all) their ability to easily feed a crowd. We called in our go-to expert on all things pastry, chef Callie Speer, to share her most delicious slab pie recipe with a few tips on achieving crust success. Stay tuned for her return to the blog next week, when she’ll give us all the details on creating the cutest pie crust toppings to crown your Thanksgiving creation! (and ps – you can sneak a peek at a few details on her newest venture here, which we’re beyond excited about.) Take it away, Callie –
Making multiple pies around the holidays and getting each of them to look just right can be next to impossible for many of us. This is where slab pies can come in to save the day! They’re perfect for big get togethers because instead of making several small pies, you make one big gorgeous pie in less time. Also, their rectangular shape makes them a breeze to slice and serve. A major component in getting your pie just right is creating the perfect pie crust, which can be daunting… but the key here is to not overthink it. Someone once told me that butter can sense your fear, and as silly as it may sound I think about it all of the time when baking, because it’s totally true. Keep scrolling for my tips on getting your slab pie just right, every time, plus my favorite recipe for the Thanksgiving feast.
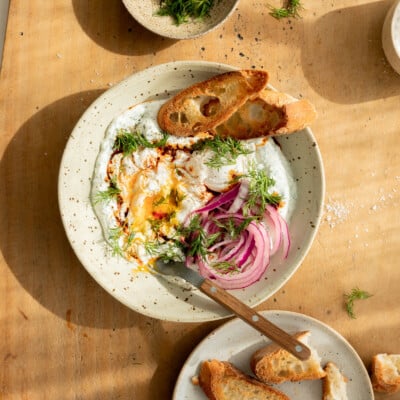
*photo credits: ashleigh amoroso

Tip #1: Follow the recipe to the letter.
I know it sounds silly, but if a recipe says “Don’t overwork the dough,” really be mindful that you don’t do it!

Tip #2: Keep the butter cold.
You want your butter to be really cold: the water will quickly evaporate while baking, and you’ll get that awesome flaky crust everyone loves. Warm butter just melts and seeps into the dough, making it tough and chewy.

Tip #3: Mix minimally & let the dough rest.
It’s important from the beginning to mix minimally. This keeps the dough flaky and tender. Also, make sure to let your dough rest in between making it and rolling it. This helps the gluten relax and allows the dough to hydrate, making it easier to work with.

Tip #4: Don’t forget the finishing touches.
The last couple of steps are what will really take your pie to the next level and give it a nice shine and sparkle. Brush your finished product with egg wash, (I use two eggs, mixed well enough with water to make it easy to paint with) followed by a generous sprinkling of sugar.

Tip #5: Have fun!
You can make a showstopper out of a boring ol’ pie if you aren’t afraid to think outside the box and just have fun with your decorations. After all, it’s just a pie!
Stay tuned next week for more tips from Callie on decorating your pie crust!
Apple, Blackberry, & Thyme Slab Pie
Serves 8 (9x13 pie)
Apple, Blackberry, & Thyme Slab Pie
Categories
Pie Crust
Ingredients
- 5 cups all-purpose flour, plus more for rolling
- 2 teaspoons salt
- 4 tablespoons sugar
- 2 cups (4 sticks) unsalted butter, chilled and cut into cubes
- 2/3 cup cold water
Instructions
- In a food processor, place the flour, salt, and sugar and process until combined. Add the butter and pulse until the mixture resembles coarse pea gravel. Don’t over process! You want those small bits of butter.
- Place the butter mixture in a large bowl, and add water. Fold the dough together just until you form a shaggy ball. Don’t overwork it. Divide into two pieces, wrap tightly in saran wrap, and let rest in the fridge, at least 30 minutes.
- After the dough has chilled, place one disc of the dough on a lightly floured surface. Roll the dough into a 12 inch circle. Keep lifting the dough up and turning it a quarter turn as you roll to keep it from sticking. Roll from the center of the dough outwards. Fold the dough in half to transfer it to a 9 inch pie pan. Brush off any excess flour and trim the edges of the pastry to fit the pie pan. Cover with plastic wrap and place in the refrigerator.
- Take the second disc of dough and roll it into a 12 inch circle. Transfer to a parchment lined baking sheet, cover with plastic wrap, and place in the refrigerator. You’ll use this later for the lattice top, or cutouts.
Apple Filling
Ingredients
- 6 large granny smith apples, peeled, cored & sliced 1/4 inch thick
- 6 large pink lady apples, peeled, cored & sliced 1/4 inch thick
- 4 cups blackberries, halved
- 1/2 cup sugar
- 1/2 cup light brown sugar
- juice and zest of 2 lemons
- 20 sprigs of thyme, leaves picked
- 2 teaspoons ground cinnamon
- 1/2 teaspoon ground nutmeg
- 1 teaspoon salt
- 4 tablespoons unsalted butter
- 6 tablespoons cornstarch
Instructions
- In a large bowl, combine the sliced apples with the sugars, lemon juice, ground cinnamon, nutmeg, and salt. Let sit at room temperature for at least one hour.
- Place the apples and their juices in a strainer that is placed over a large bowl to collect the juice. Let the apples drain for 30 minutes. Place the juices and the 2 tablespoons of unsalted butter in a small pot, and boil until caramelized and syrupy.
- Transfer the drained apples slices to a large bowl and toss them well with the blackberries, thyme, zest, and cornstarch. Pour the syrup over the mix and toss to combine. Place this filling into the chilled pie crust.
- Moisten the edges of the pie shell with a little water and then place the top lattice over the apples. Tuck any excess dough under the bottom crust and then crimp the edges using your fingers or a fork.
- Place the oven rack at the lowest level and place a foil-lined baking sheet on the rack. Set the pie on the pan and bake for about 45 to 55 minutes or until the juices start to bubble through the slits of dough and the apples feel tender when poked with a sharp knife or toothpick. If the pie starts looking too brown before it’s done, cover with foil.
- Remove the pie from the oven and place on a wire rack to cool for before cutting.


I love the idea of this slab pie. The crust directions are for a 9″pie pan. Are the crust ingredient quantities enough for the slab pie instead?