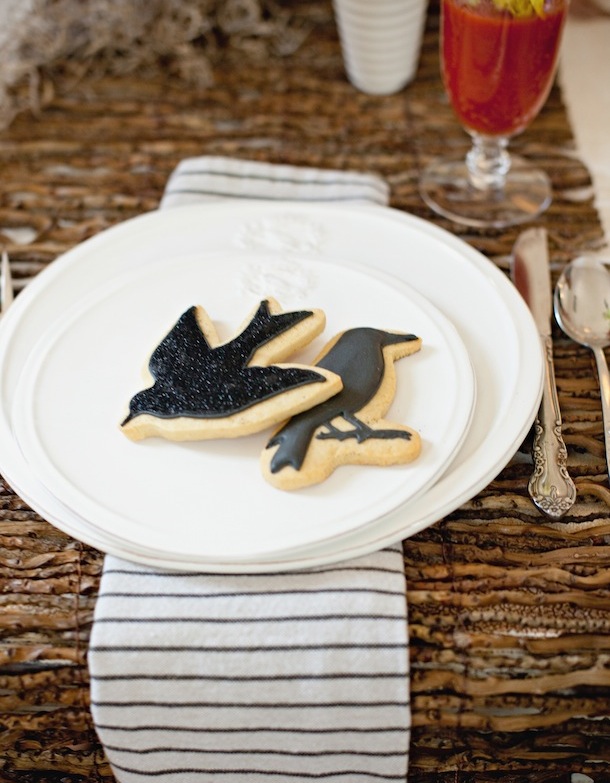
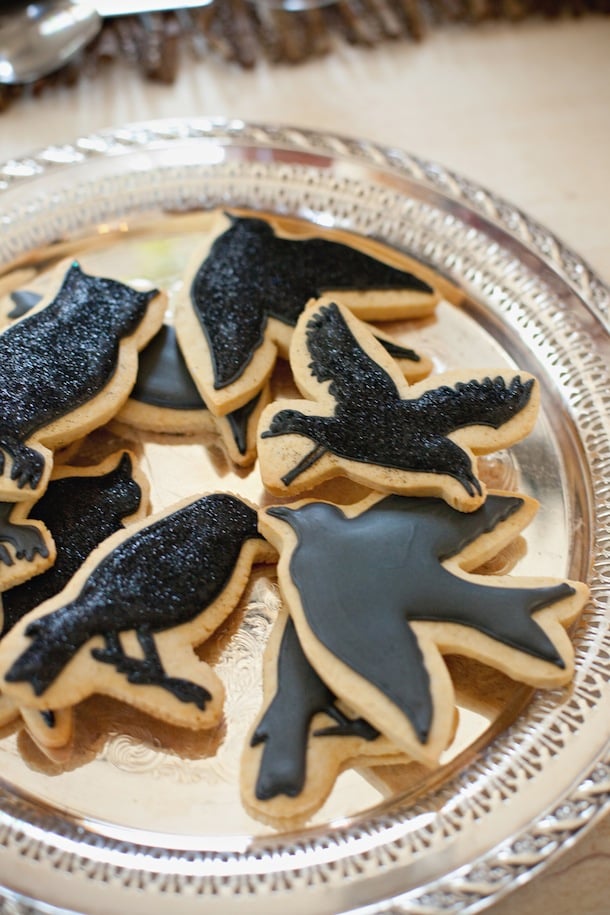
Did y’all catch this morning’s spooky Halloween party inspired by Alfred Hitchcock’s The Birds? Some of my favorite elements on the table were those perfectly creepy cookies depicting black birds in every size and shape… and the gal who created them, Sara of Sara Belle’s Bakery, stopped by to share how we can recreate them for Halloween fêtes this season (with gorgeous step-by-step photos by She-n-He Photography.) Sara not only has the amazing ability to turn every cookie she decorates into a little work of art – she also happens to be one of the sweetest people you’ll ever meet, and I’m so thrilled that she’s taken her passion for baking and turned it into a growing business. Take it away, Sara!
As a cookie decorator, I look forward to every holiday because each one is a new opportunity for creativity. Halloween is definitely one of my favorites due to the fact that simplicity can often create the most impact. When Camille asked me to create some spooky yet sophisticated cookies for her Birds-themed party, the wheels in my head started turning and I decided to start with the clean silhouette of a black bird, then add a WOW factor with edible glitter. This is one of my favorite tools for adding dimension and interest to iced cookies while maintaining simple lines and a limited color palette. Hope you enjoy the step-by-step process for making your own Little Black Bird cookies!
Step one
Your sugar cookie recipe will make or break your iced cookie adventure! It’s important to use a recipe that will maintain the cookie’s shape. It’s a nightmare when you take the time to roll out and cut dough only to have your cookies bake out into unrecognizable blobs! Click here for a great recipe that uses a little less sugar than some others I’ve tried and results in cookies that hold their shape.
If I could share just one tip today, it would be to put your rolled out sugar cookie dough on a cookie sheet in the freezer for at least 2 hours before you begin cutting your cookies into shapes! Trust me: it will make all the difference in the world. There are tons of great places to buy cookie cutters, especially around the holidays – check out your local craft store for a wide selection. I also love the amazing copper selection from ecrandal – they’ll last a lifetime.
Step two
Royal icing is used for these sugar cookies, and my recipe is straightforward and foolproof. With a hand or stand mixer, combine 1 lb confectioner’s sugar with 1 1/2 tablespoons meringue powder (I use Wilton’s brand) on low speed. Increase the speed to medium, and add 1/2 cup water. Increase speed to medium-high, and mix for 2 minutes. Icing will thicken.
Step three
Transfer icing to an airtight container – make sure it’s tightly covered so that it doesn’t dry out and clog your piping tips. Set out a few small bowls to be used for mixing icing with food coloring. For this project, I used two bowls – one for mixing a thicker icing to create the outline on the cookies, and the other for mixing a thinner consistency that allows for the icing to “flood” the cookie and create a smooth finished product. This thinness is created by mixing just a few drops of water into the icing.
Step four
After you’ve mixed the color into your icing and created the thicker and thinner versions, it’s time to put the icing into piping bags. For this project, I used a #2 tip for the outline and a #3 tip for the flooding. (Wilton also makes disposable icing bags that are extremely handy for projects like this.)
Step five
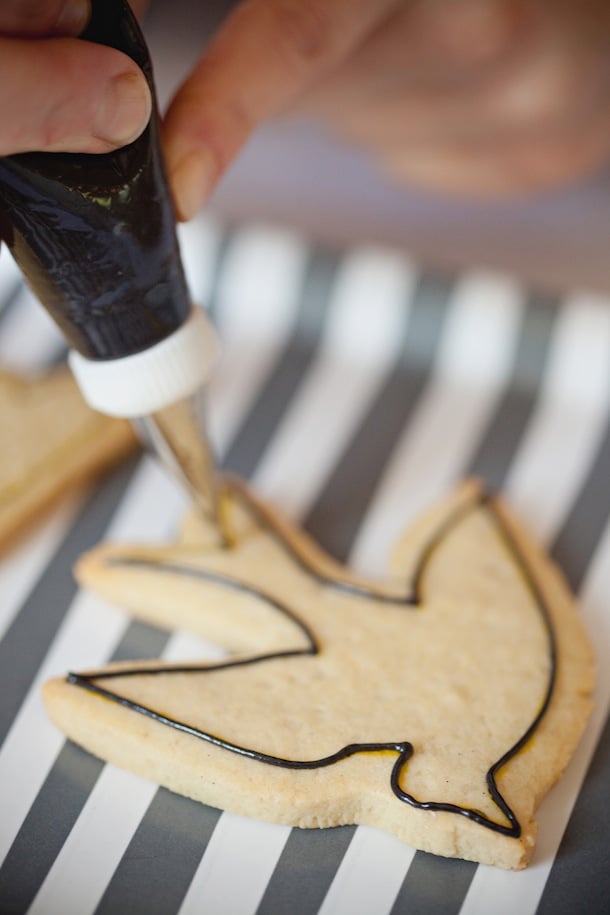
Food coloring markers are going to become your new best friend. What a brilliant invention, my friends! You can use these to make an outline to follow as you ice your cookies, and I guarantee it will make all the difference in the world.
Step six
Now the real fun begins… start piping your border on the outline you made for yourself with the food coloring marker. Allow to dry for 30 – 45 minutes to create a solid barrier before you apply the “flooding” icing to the center, giving a very clean appearance.
Step seven
Using the border as your guide, create an outline within the border and repeat until you’ve flooded the entire cookie.
Step eight
At this point, your icing may not seem completely smooth. Don’t panic: sometimes it just needs a bit of extra help. Hold the cookie firmly, and give it a good shake back and forth – I even sometimes tap it on my flattened palm, allowing the icing to smooth out. But try to remember: these are somewhat fragile cookies, and they will break if you tap them too hard. I share that from more personal experience that I care to recall! If you’re going to add glitter, now’s the time. Just sprinkle some edible glitter on top and allow to dry.
Step nine
Let the wait begin! It’s imperative that you allow your cookies to dry for at least 6 – 8 hours.
Step ten
Enjoy the fruits of your labor!
*photos by She-n-He Photography…and don’t forget to hop over to Sara Belle’s Bakery to check out more of her beautiful designs!












Black icing, I love it!
These are fabulous. I know just the person who will enjoy these! Love the “Birds” theme. A little more original than scarecrows and witches too!
Wow, those are gorgeous!
These are so sophisticated!
I am totally in awe of Sara’s ability to make decorated cookies so precise and chic. When I asked her to do something with birds, I never imagined they’d end up being SO modern and fresh!
Those cookies are so adorable and a very sophisticated Halloween treat. Thanks for your step by step instructions too. I have a Halloween party coming up and I think these would be perfect.
these are AMAZING I love them. so chic! Did you feel like the black food coloring affected the taste at all? Sometimes when I go super dark I feel like it does, but I’ve used the wilton brand gel.
Ravens! my favorite! now who can tell the difference when looking at a cookie??? Crow? Raven?
how long can you store your cookies for
Hey, beautiful work! What edible glitter did you use for the job and do you apply on a wet or dry icing? Thank you for your time!