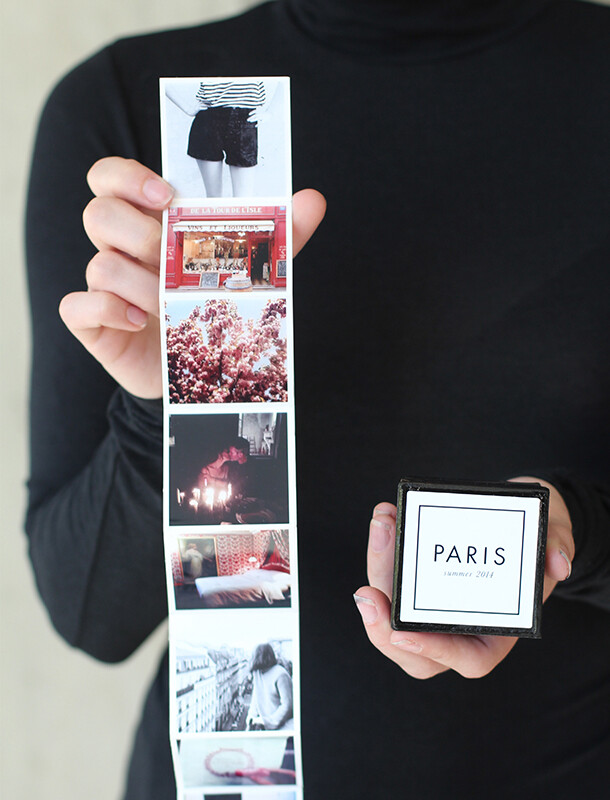
I have fond memories of visiting my next door neighbor’s house as a child — they spent the first two years of their marriage traveling the world together before settling down in our small town. I loved pouring over the artsy albums commemorating their trips that they kept on the living room coffee table. In today’s digital era, it’s all too easy to leave our travel albums floating somewhere in cyberspace. Now, with a little help from Canon USA (and their nifty SELPHY CP910 wireless photo printer), you can bring your latest trip to life with your very own compact photo album. With a cute accordion-style display tucked inside a decorative box, this little DIY looks great on a coffee table and is a fun way to commemorate a special trip.

 We created our “faux” trip to Paris using wonderful images found on Pinterest and the instagram accounts of @sophieartphoto, @farfelueparis, and @mimithor.


![]()
- metal ruler
- exacto blade or box cutter
- pencil
- Canon SELPHY CP910 Wireless Compact Photo Printer
- Canon Square Labels (2.1 x 3.4 in for SELPHY)
- Lightweight poster board
- small paper mache craft box
![]()
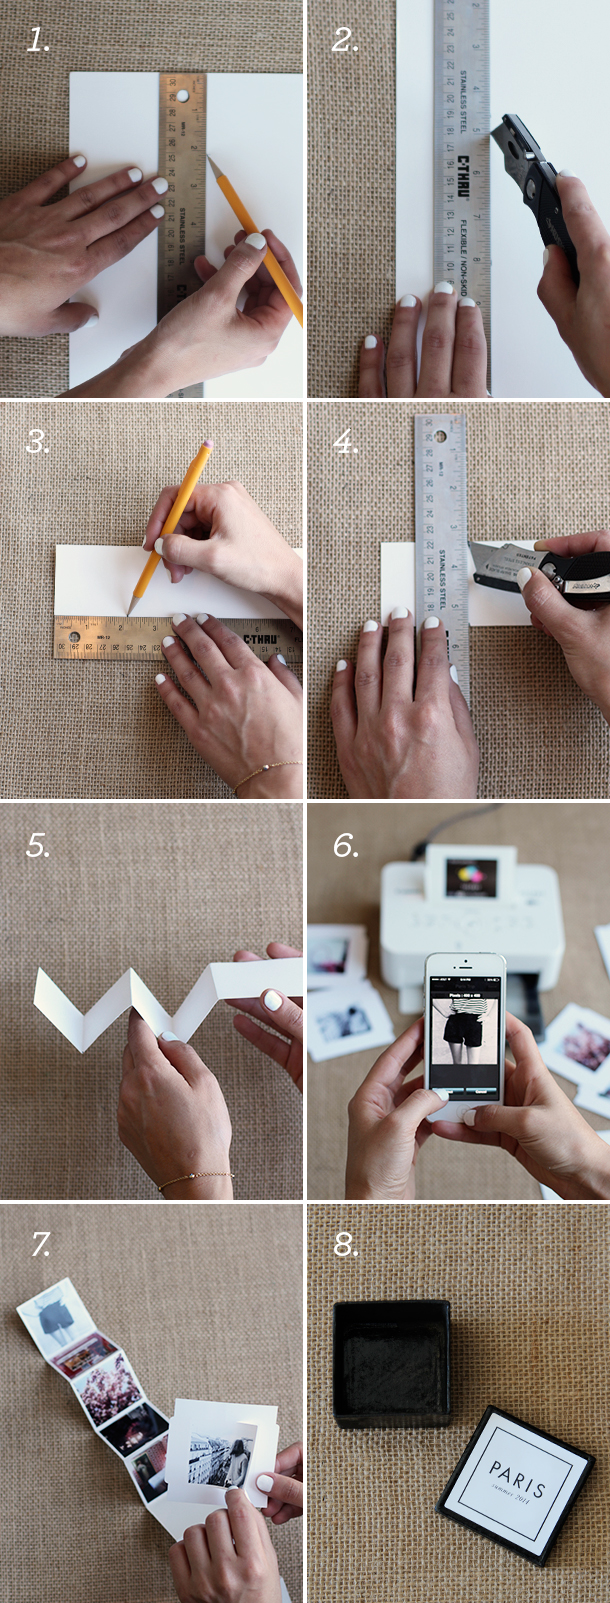
- Along the short edge of poster board or paper, mark vertical points with pencil 2.125″ from edge.
- Use blade to cut a long strip of paper that is 2.125″ wide.
- Create hash marks with pencil every 2.125″ along each side of the paper strip.
- Turn the blade upside and score paper straight across at the 2.125″ intervals (these will be your photo panels, create as many panels as you need for your number of photos — we used ten. Cut off any excess paper off the end of your strip.)
- Using the scoring guides, carefully fold the strip of paper into an accordion shape.
- Use your smart phone to connect to and print from the SELPHY printer. We used 2.1 x 3.4 square labels from Canon. (Since the labels are square, they’re perfect for printing instagram pictures! Make sure you select “bordered” from the printer options.)
- Carefully peel the labels from the sheet and place onto the accordion paper.
- Decorate your box to house the photos! We spray painted ours black and created a graphic label for the top. We made the graphic in Photoshop and saved it as a jpeg — then, we used the SELPHY to print that label, too!
This post was created in collaboration with Canon USA.