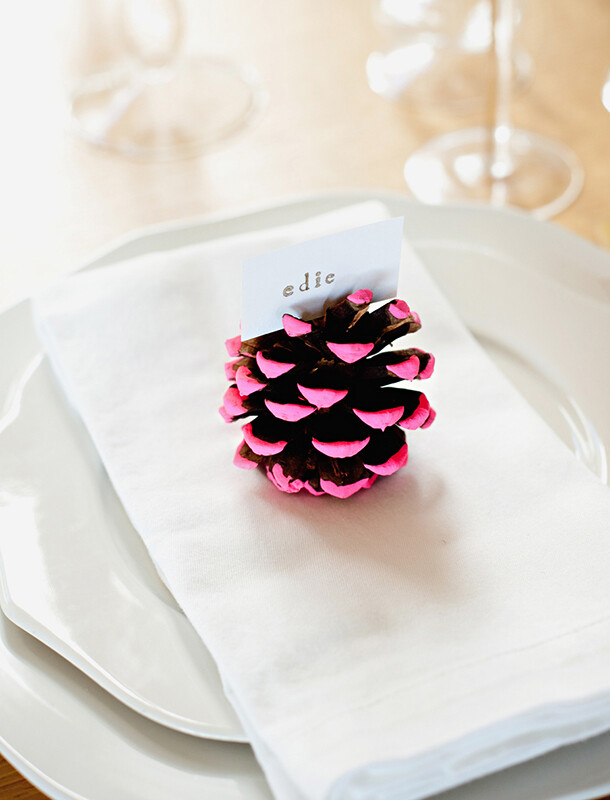
 Happy Friday! Jenn here, with a fun and easy DIY placecard project. Our post earlier this week on modern hostess styles received such a great response that we started thinking about other fun ways to modernize a Thanksgiving table. I had been planning a gold pine cone placecard holder when Camille had the idea to experiment with adding a touch of neon. Set against simple white china and gold flatware, our neon-dipped pine cone is a thoroughly modern take on fall decor! Read below for instructions on how to create your own.
*images by She-N-He Photography


![]()
- pine cone
- paint brush
- acrylic paint
- paper plate

![]()
Using the paper plate to protect your table or counter, dab the tip of each prong of the pine cone with paint. For best results, make sure that you’re creating very thick applications of paint. Let dry overnight. Take a paper placecard (Chanel created ours using letter stamps and gold ink) and wedge in between prongs at the top of the cone. You should not need any adhesive for the placecard to stay in place.