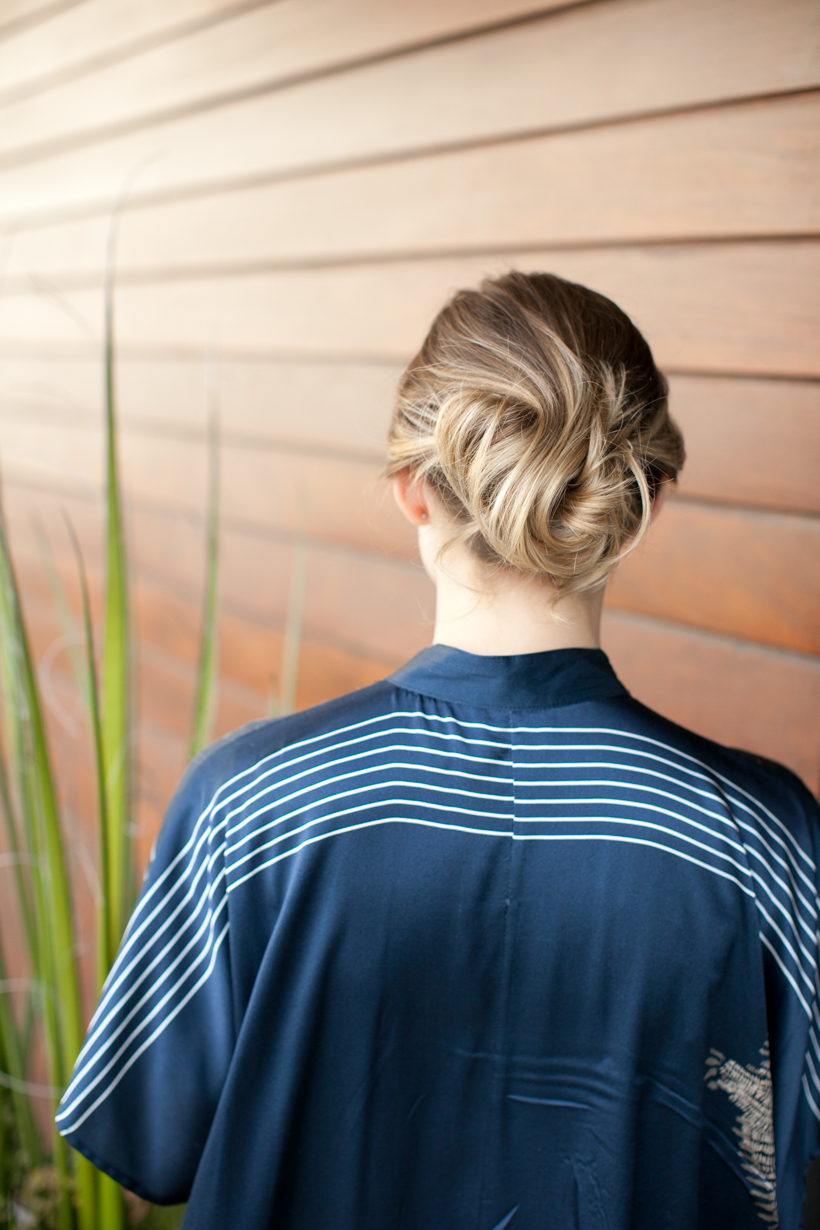
 When stylist Lauren Phillips of Sabia Salon introduced us to this secret updo technique we simply couldn’t wait to share it with you here on the blog. We’ll admit we were skeptical at first (will the string even hold?) but we’re full-blown converts now that we know it’s actually more secure than using bobby pins. “This technique is wonderful,” she says, “because you can dance, run around town, or even sleep with the sew-it-up and never worry about bobby pins coming out.” She uses the sewing technique often on clients who need to put their hair up quickly for formal events. To demonstrate the look on model Jessica Thompson, Lauren used the Sewing Kit from Kevin Murphy. And even if you don’t have access to the Kevin Murphy kit, don’t be afraid to hit your local craft store for similar supplies. “This style is great for the crafty and creative,” says Lauren. “I’ve even used gold and silver string and added little flowers!” The finished look is a tousled updo that works as well for both casual and formal moments. Read below to discover this amazing technique that you can learn to do on yourself with practice.
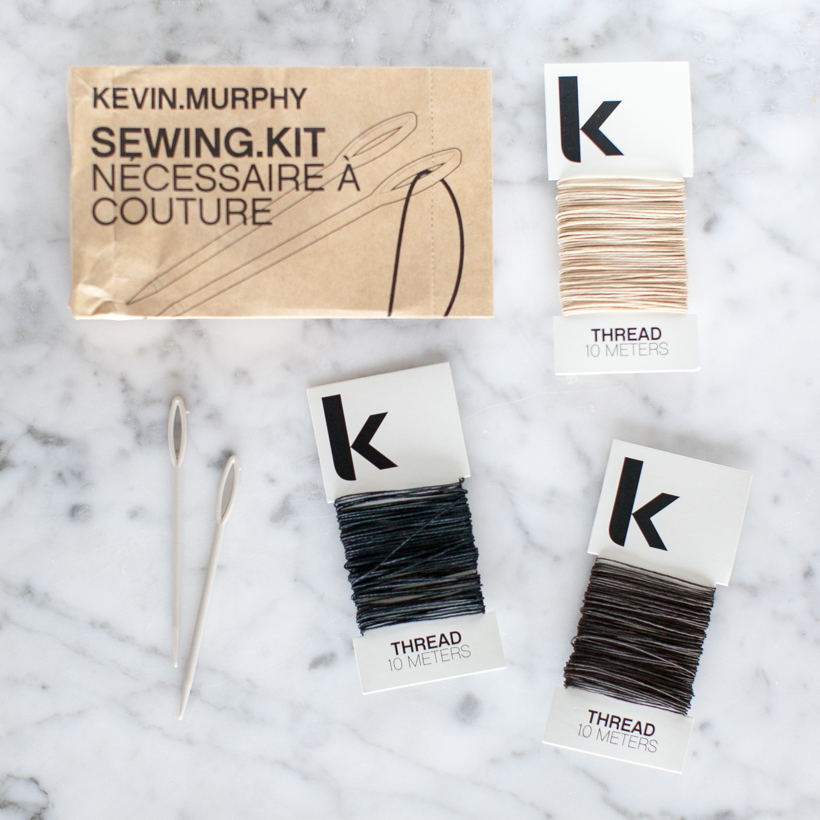 SUPPLIES:
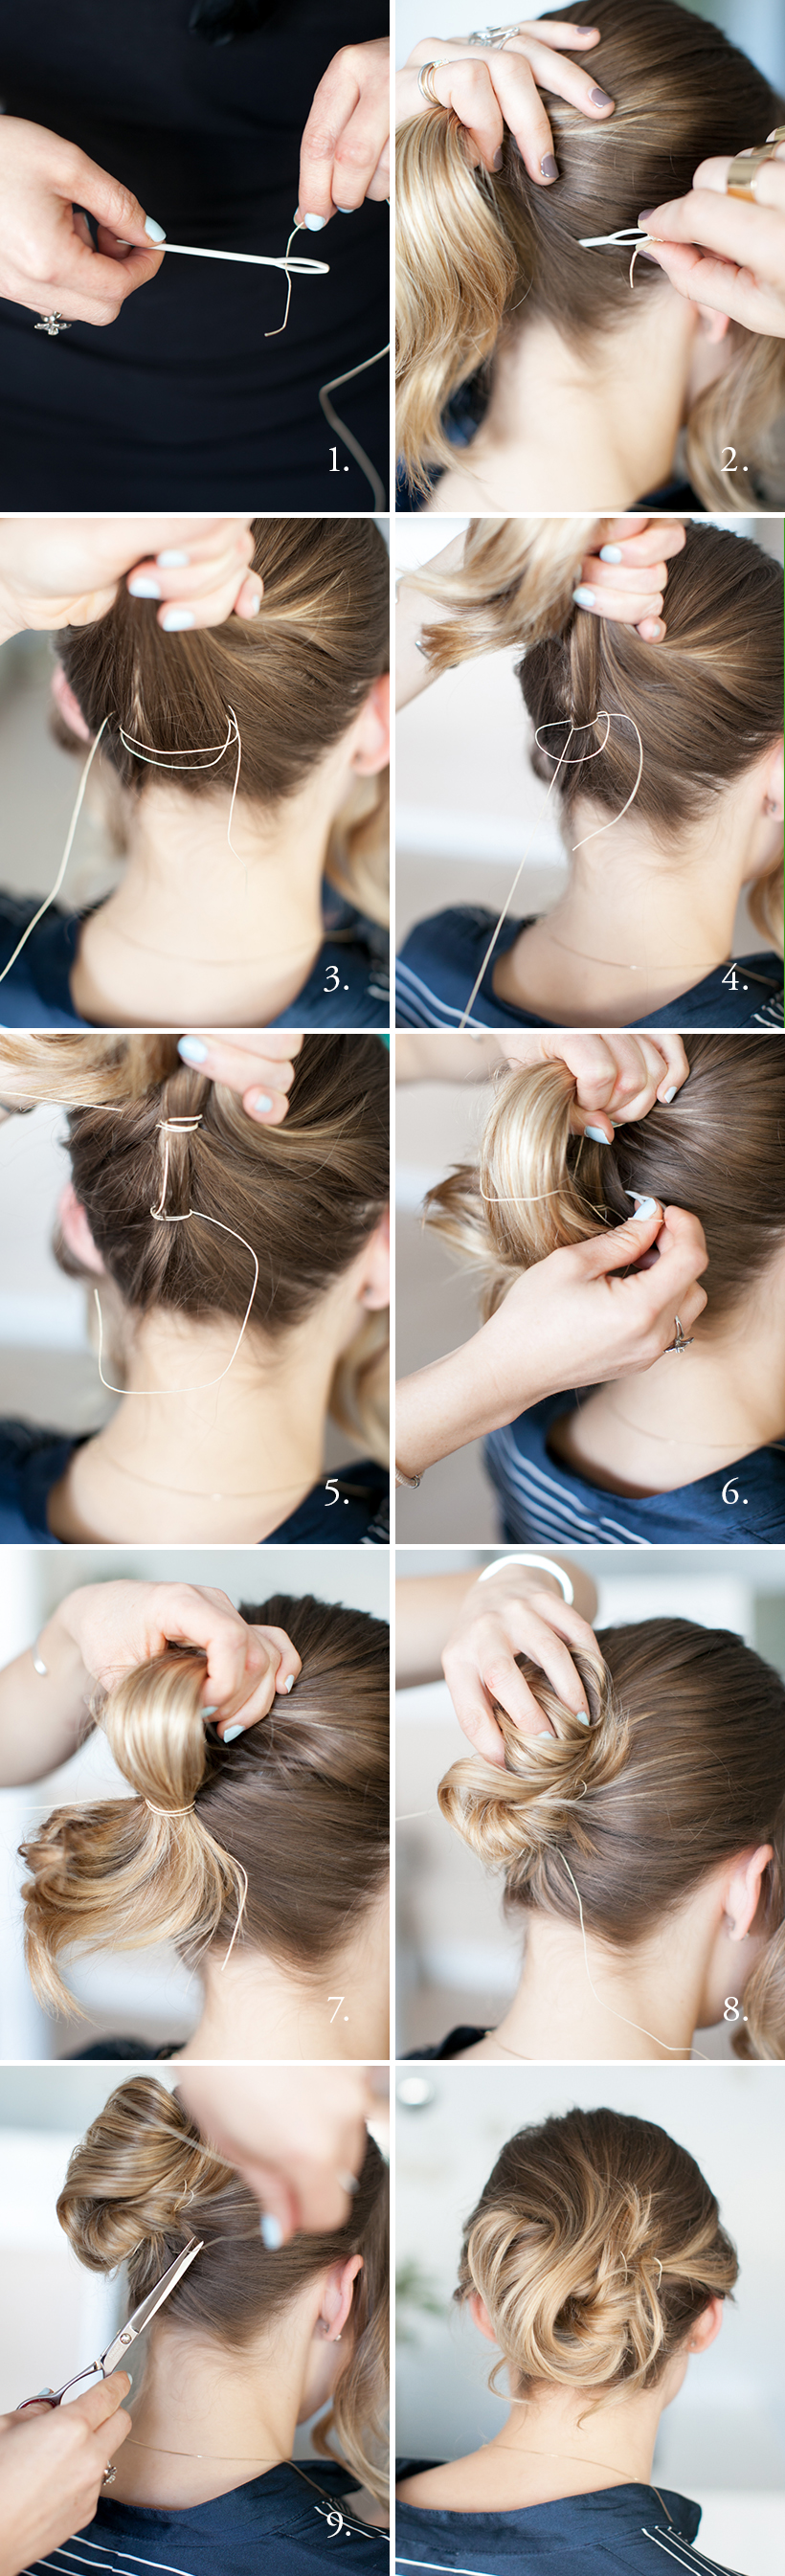
STEPS:
- If your hair is clean, add texture by using a curling iron to give some bend or mousse and a quick shot with the dryer to give it some workability. If it’s already slightly dirty, great! Thread your string through a large plastic needle. We used a wax coated thread that comes in the Kevin Murphy Sewing Kit.
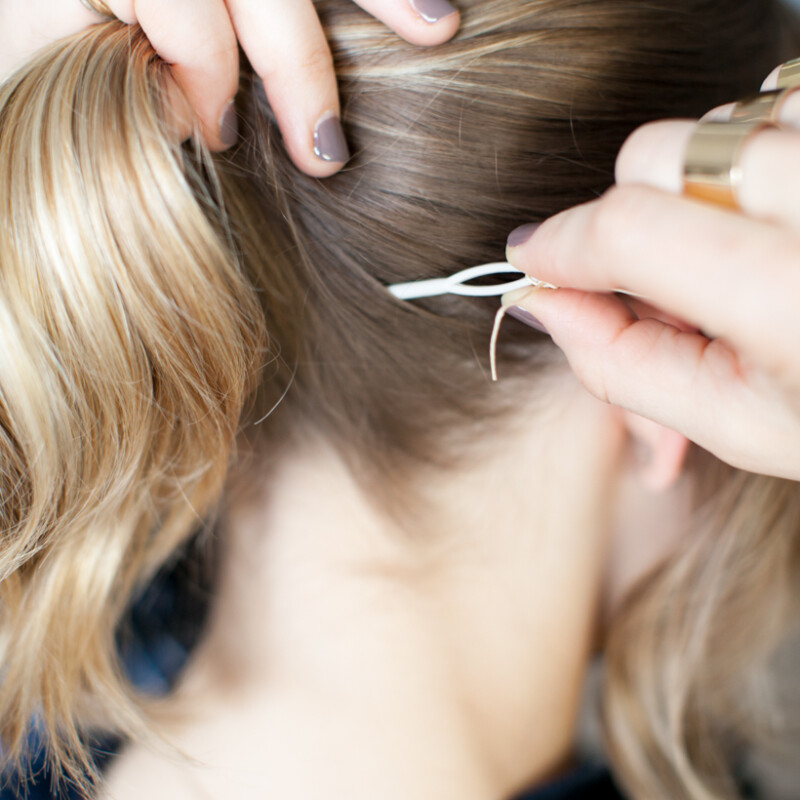
- Gather the hair into a mid ponytail and hold with your non dominant hand, then push the needle and thread through the hair laterally below the base of the pony.
- Repeat the last step twice more, looping the string through the base and pulling it through.
- Pull the string taught after the third loop.
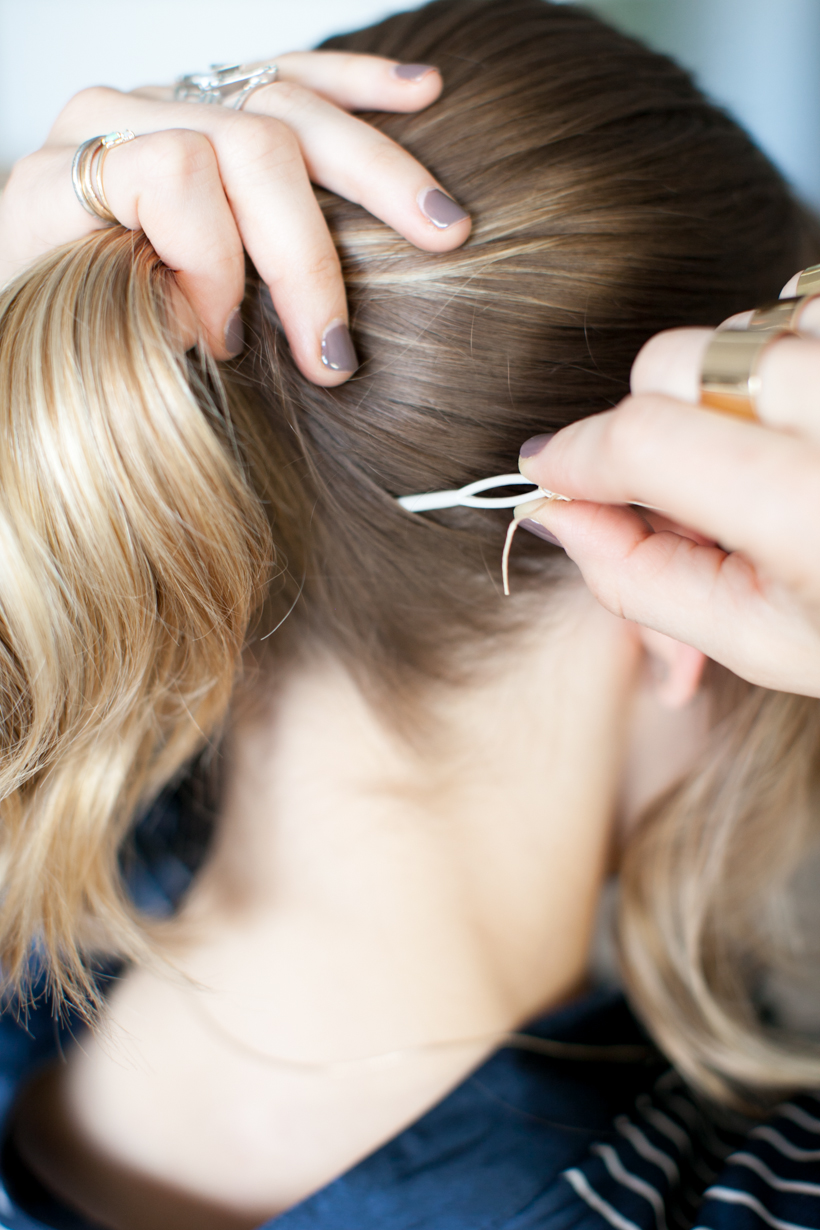
- Create a second “stitch” by lifting the pony up and repeating the looping technique (three loops) a few inches above. Pulling the string taught on the final loop in the middle of the pony base.
- Continue to grip the pony tail at it’s base and let the “tail” hang naturally. Take the needle and stitch the tail tightly against the secured hair.
- Now the pony should be secure.
- Twist the hair slightly and continue stitching at random to tack the hair into place.
- Cut the string leaving a tail small enough to tuck and hide. There’s no need to “knot” your thread — the style should hold on it’s own. Soften the style by pulling a few pieces out around the hairline and use your hands to adjust where necessary. Finish the look with light hairspray.
LAUREN’S PRO TIP FOR REMOVAL: Have a friend carefully snip the thread at different points for easy removal. Once the string has been cut, lightly pull it out in sections to release the hair.