

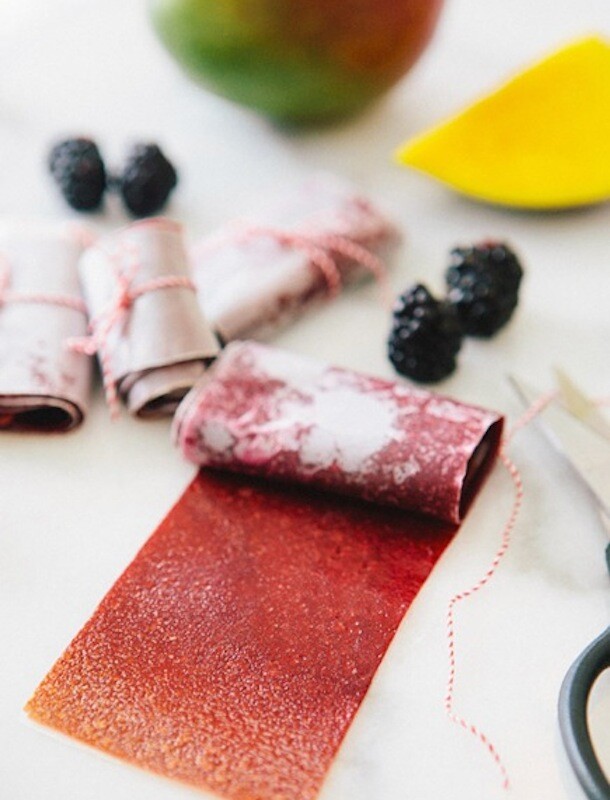
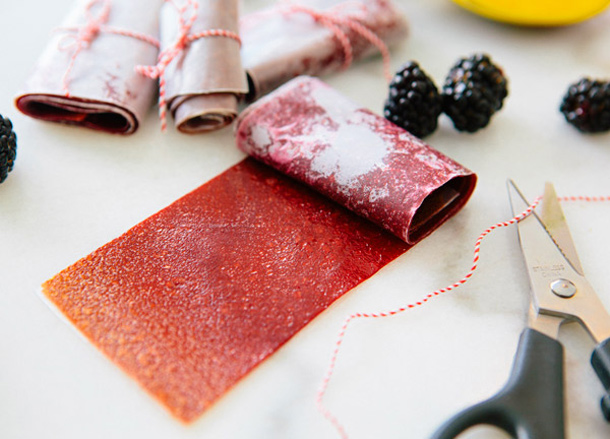
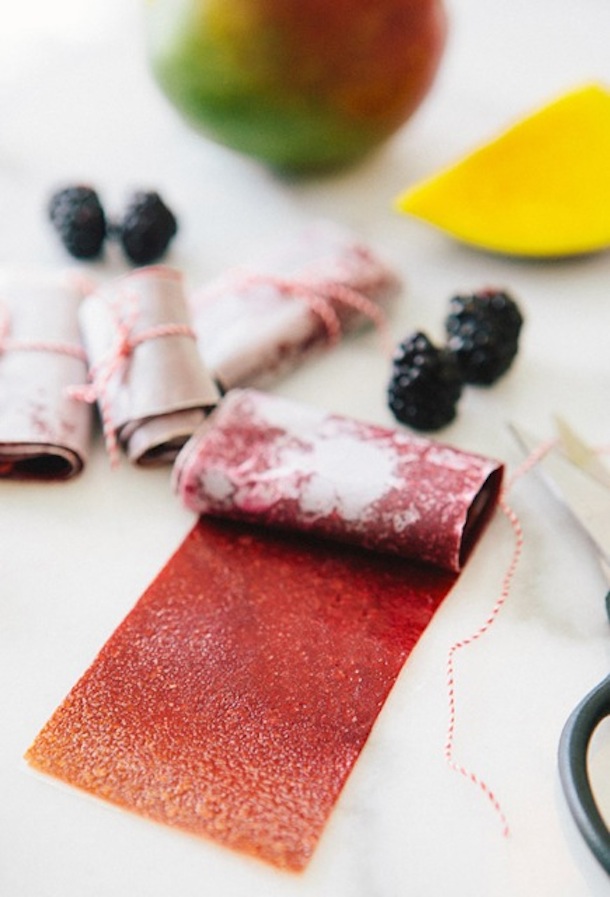
I had a childhood obsession with fruit leather…it was my favorite snack ever! And when I say fruit leather I mean fruit roll ups, the content of which I don’t even like to think about. So recently, I made my own mango and blackberry goodness. They taste even better than the fruit leather of my childhood, and I’m a little bit obsessed. I do have to warn you though — they’re not difficult to make by any means but they do have to cook for 4-6 hours at a low heat. So this is a recipe to make on a day when you know you’ll be home for a bit. There’s something so satisfying about unpeeling homemade fruit leather and tasting the fruits of your labor!
As with all of the recipes I share here, this snack is designed to be a healthy treat! The mango has antioxidants that protect the body against cancer of the colon, breast and prostate. It’s also an amazing source of Vitamin C, Vitamin A and fiber. And blackberries, as all berries, are also an incredible source of antioxidants and vitamins. They’re also low in calories, virtually fat free and high in fiber. The perfect snack!
Ingredients:
- 2 ripe mangos
- 2 cups blackberries
Instructions:
- Preheat oven to 200 degrees F.
- Peel and cut mangos into cubes.
- Combine mangos and thoroughly rinsed blackberries in a high powered blender. Blend until pureed.
- Squeeze mixture through a cheesecloth or nut milk bag (preferred) to remove seeds. This step is optional, but I found them to be SO much better without the seeds, and it was well worth the extra effort.
- Line an 11 x 16 inch baking sheet with wax paper.
- Use a spatula to evenly spread puree on baking sheet, giving it a gentle shake to help smooth mixture out.
- Place in oven for 4-6 hours or until the top is no longer sticky and fruit can easily be peeled from pan.
- Place a piece of wax paper over the top, and firmly press into fruit leather. Cut leather into strips, roll up and tie with baker’s twine!


Looks amazing! How long do you think they would last and how would you recommend storing them?
This is an awesome snack for kids AND grown ups!
xo Lily
http://whilemyboyfriendsaway.blogspot.com/
These look so good! Thanks for the recipe!
-Ashley
http://www.ashleykiraand.blogspot.com
I cannot wait to make these for Ash!
I’m also curious how long these might last (if I can avoid eating them all immediately)..
Such a beautiful color. I like the idea of the wax paper instead of plastic wrap.