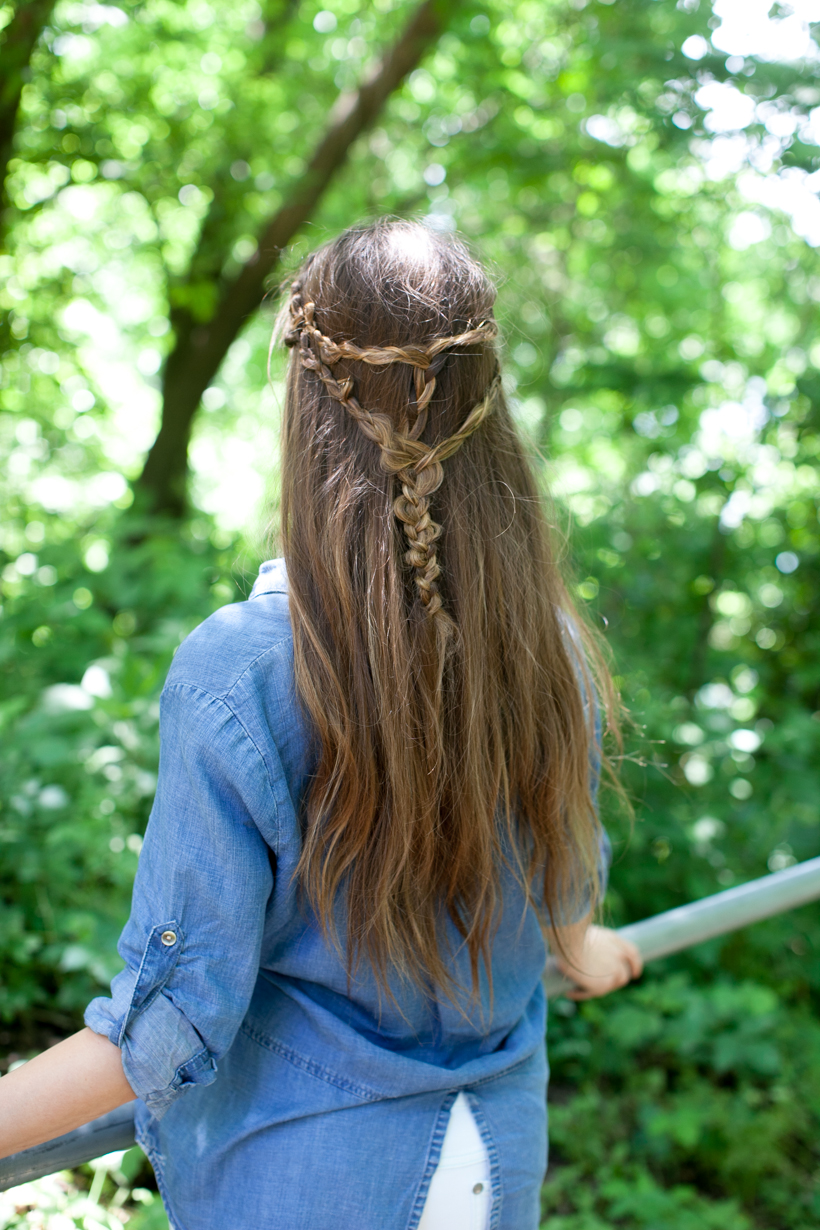
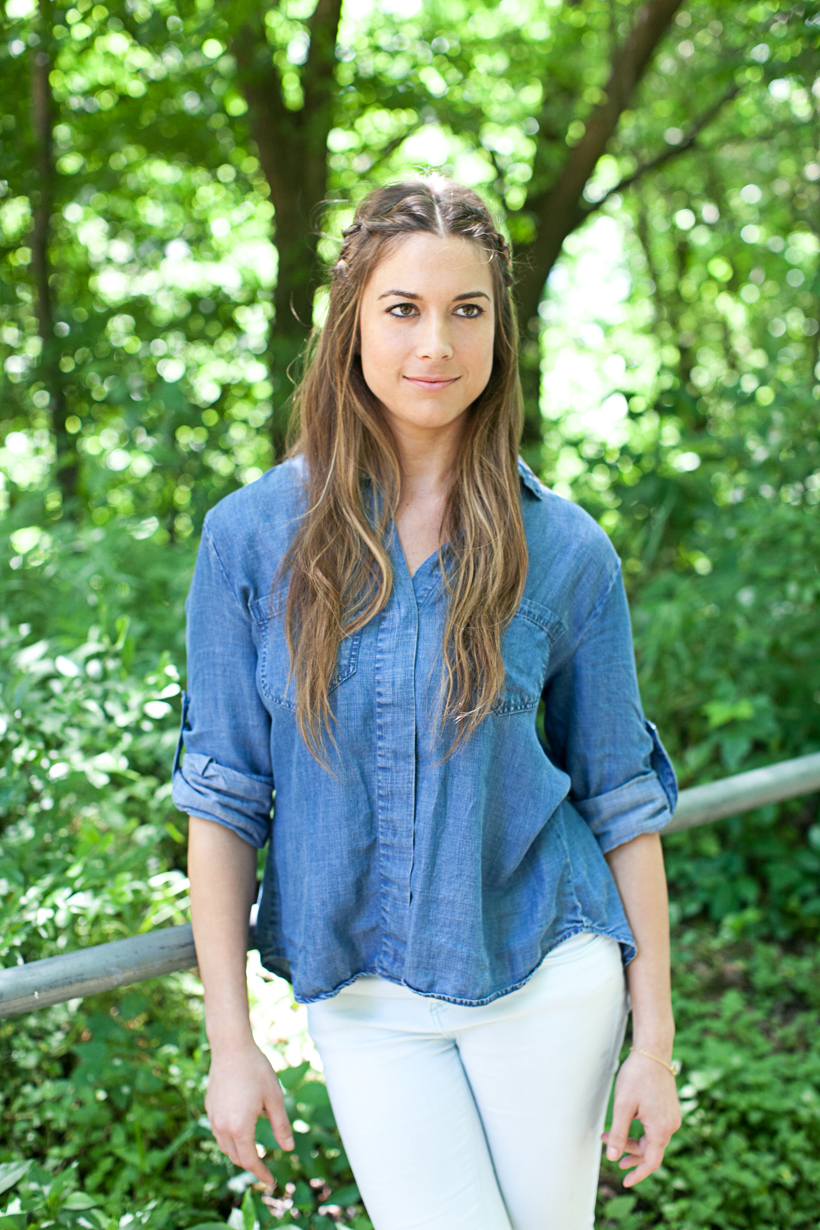
 With an office full of individualistic women, our tv tastes don’t always align (Chanel loves VEEP, Camille never misses Nashville, and I remain firmly opposed to The Bachelor). But lately every Monday morning we can’t wait to discuss the one show we all watch and love — HBO’s Game of Thrones. We’re gearing up for the season finale this Sunday with a Daenerys inspired hair tutorial, and we’ll freely admit that this braid looks every bit as complicated as the plot lines of our favorite fantasy show. Senior Stylist Erica Rae of ROAR Salon developed this technique in response to GOT’s popularity: “I always get requests for braids and it never fails — clients constantly reference Khaleesi and her trademark Dutch braids,” she explains. “The costume styling on the series is incredible, and Emilia Clarke’s fierce braids have made a big impact in the fashion scene.” And in case you’re not a card carrying George R. R. Martin fan, rest assured that this look works for real modern day life as well. Erica recommends pairing these braids with a long flowy dress for a bohemian vibe or even using this look to dress up a simple t-shirt and jeans day. Read on to discover Erica’s technique for Daenerys-style Dutch braids:
DIRECTIONS:
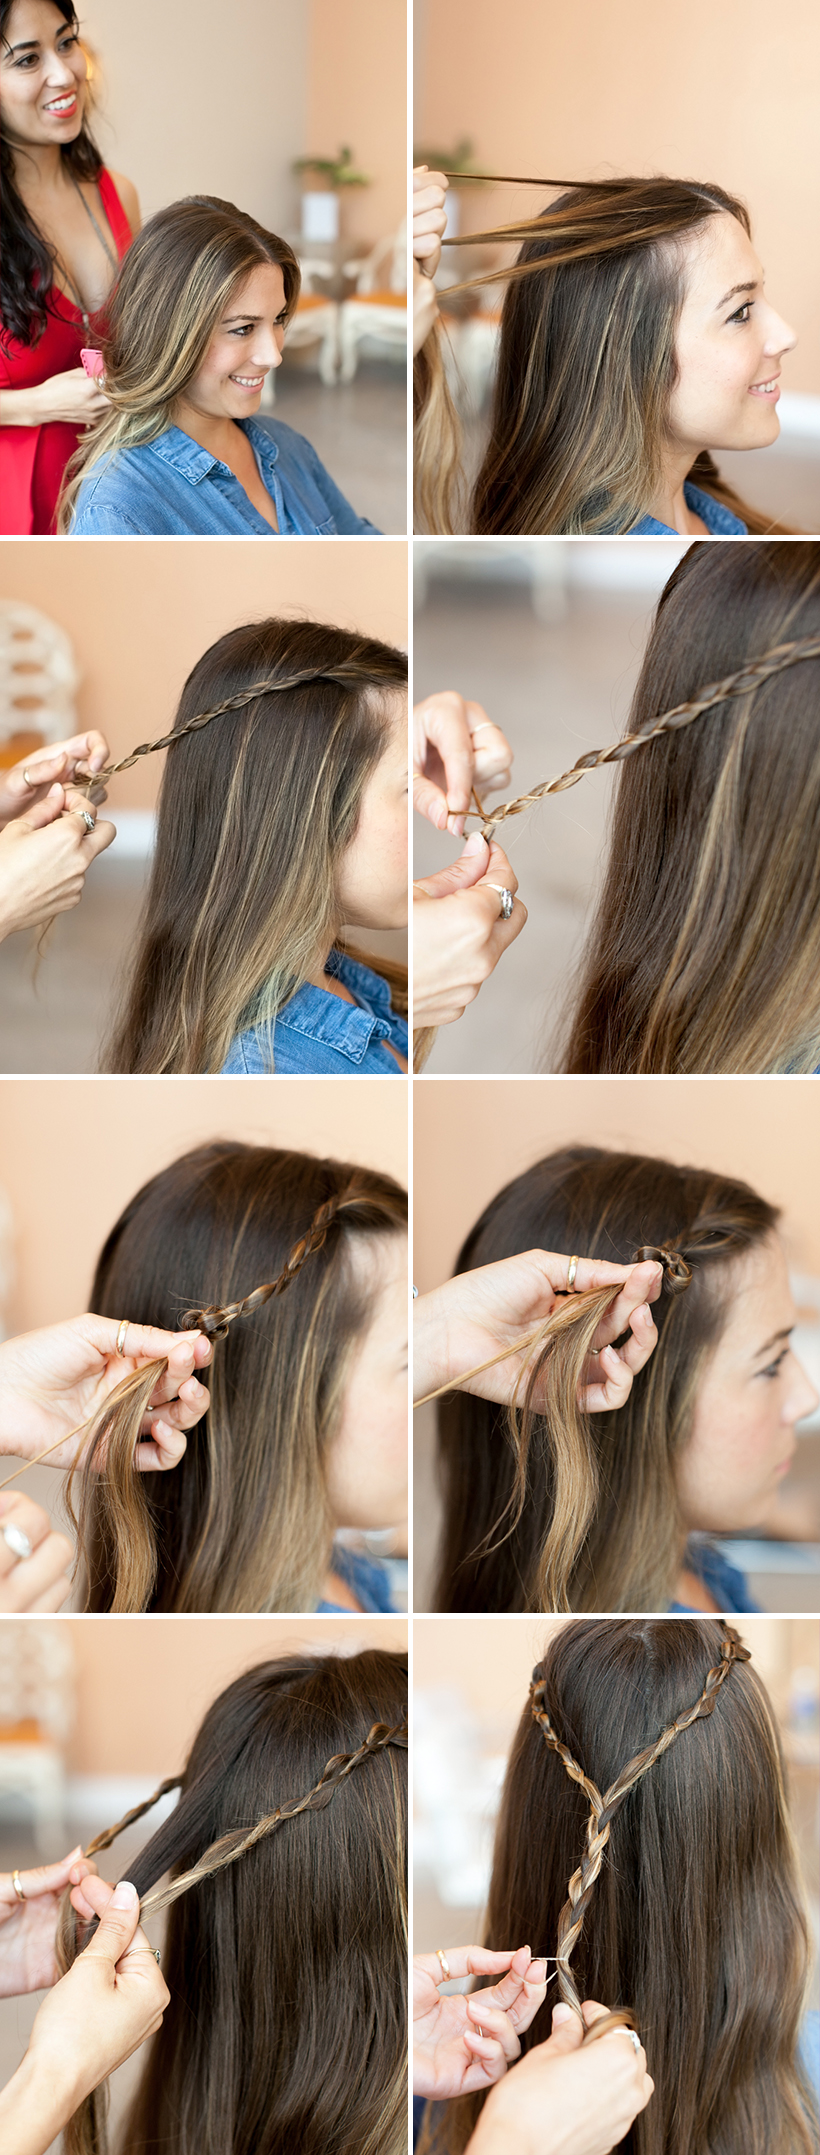
- Prep hair with texture spray, blow dry, add lose wave with curling iron.
- Part the hair down the middle and start your first three-stand braid at the top of right section. Make each of the three strands of the braid different sizes. This is an important step!
- Begin a normal braid with these three strands, continuing braiding until you reach the center of the back of your head.
- Once you reach the end of the braid, create texture to the braid by grabbing a thin section of the end of the braid. While lightly holding the small section of the braid, push the rest of the braid in an upward motion, then stretch the braid out again. This technique gives the braid a disheveled look that makes the braid different than a normal three stand braid.
- Once you’ve finished this step, secure it with an elastic band while you repeat steps 2, 3 and 4 on the opposite side.
- Remove the elastic bands from before then grab a section from the back of the head and combine both ends of each braid to create a new three-strand braid.
- Braid down three to four inches and secure with a small elastic band.
- Repeat steps 3 through 7, this time start your braids just above the ear. Remember to make each subsection different sizes. This is what makes the three-strand braid look so different.
- Once you’ve combined the two new braids and have braided the hair another three to four inches, repeat the push/pull technique as you did in step 4. You can see how if done properly this technique can give the braid such a unique look.
- Once you’ve reached the bottom of the braid, take a comb and tease the hair in an upward manner to secure the braid. This looks much better than using an elastic band.
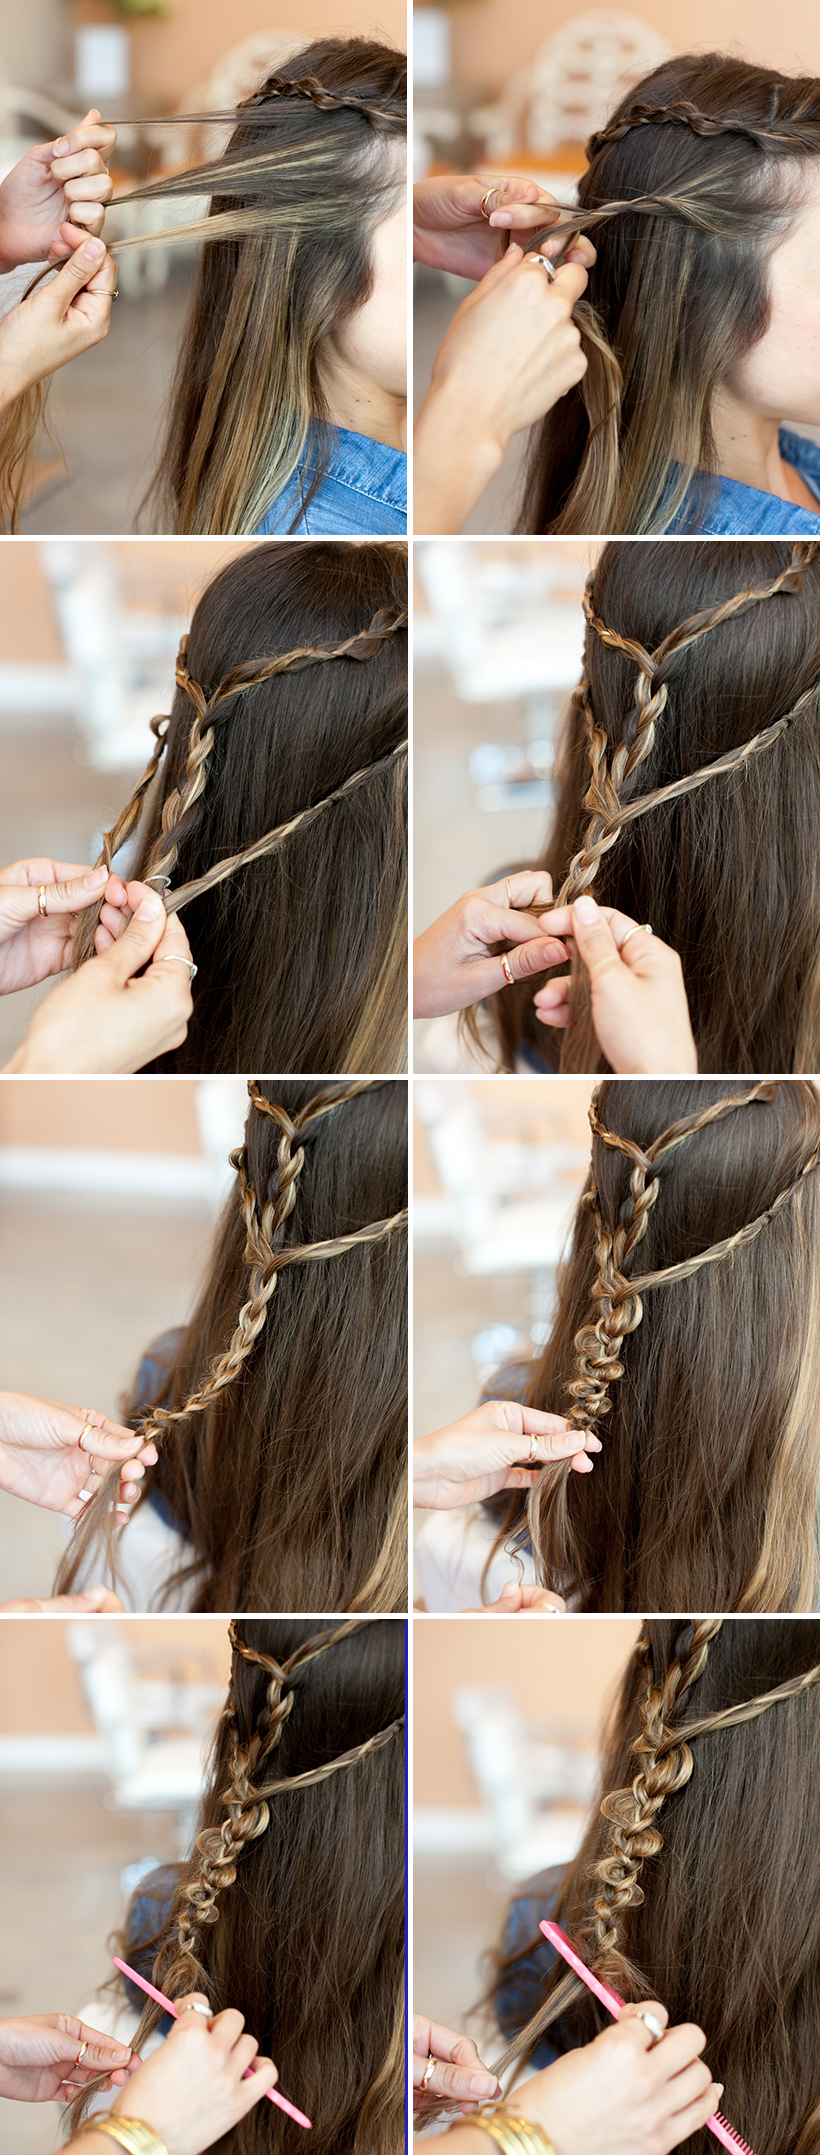
ERICA’S PRO TIP: For an even more dramatic “costume” effect, try adding a third tier of braids into this look!