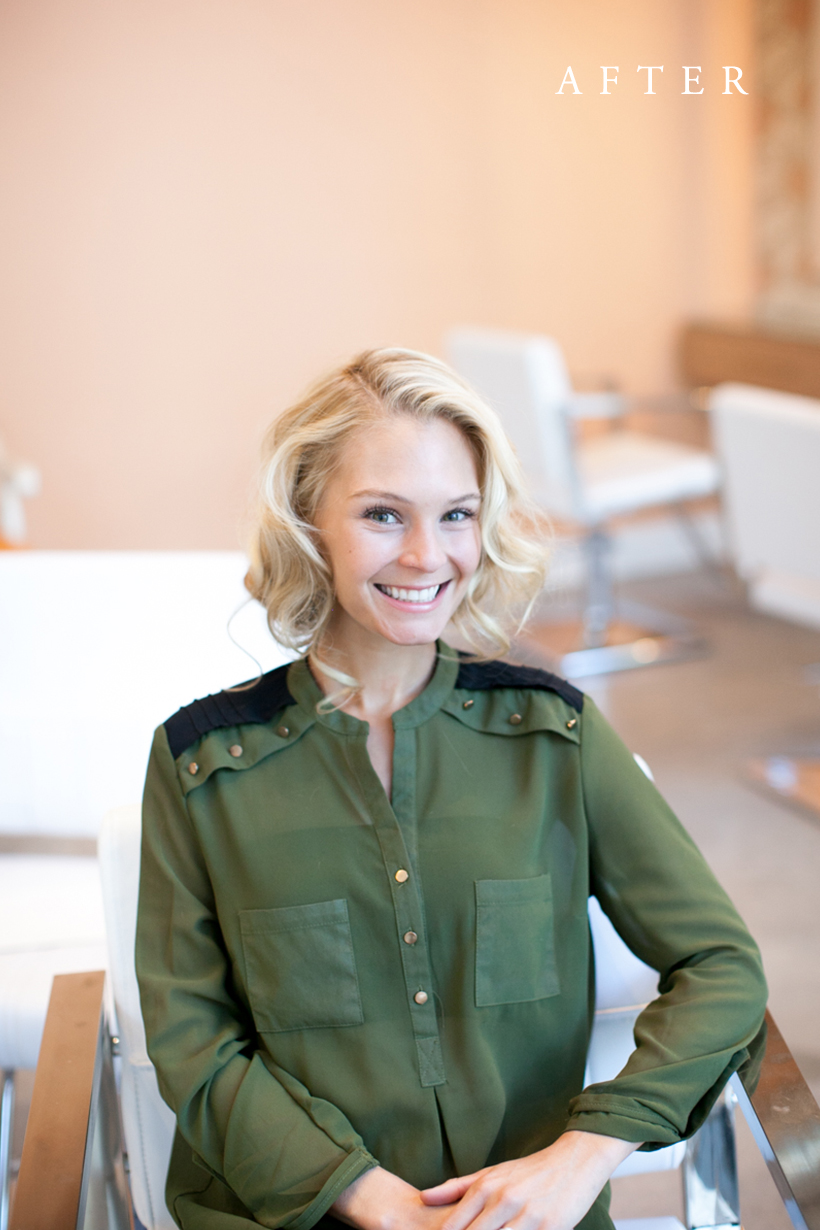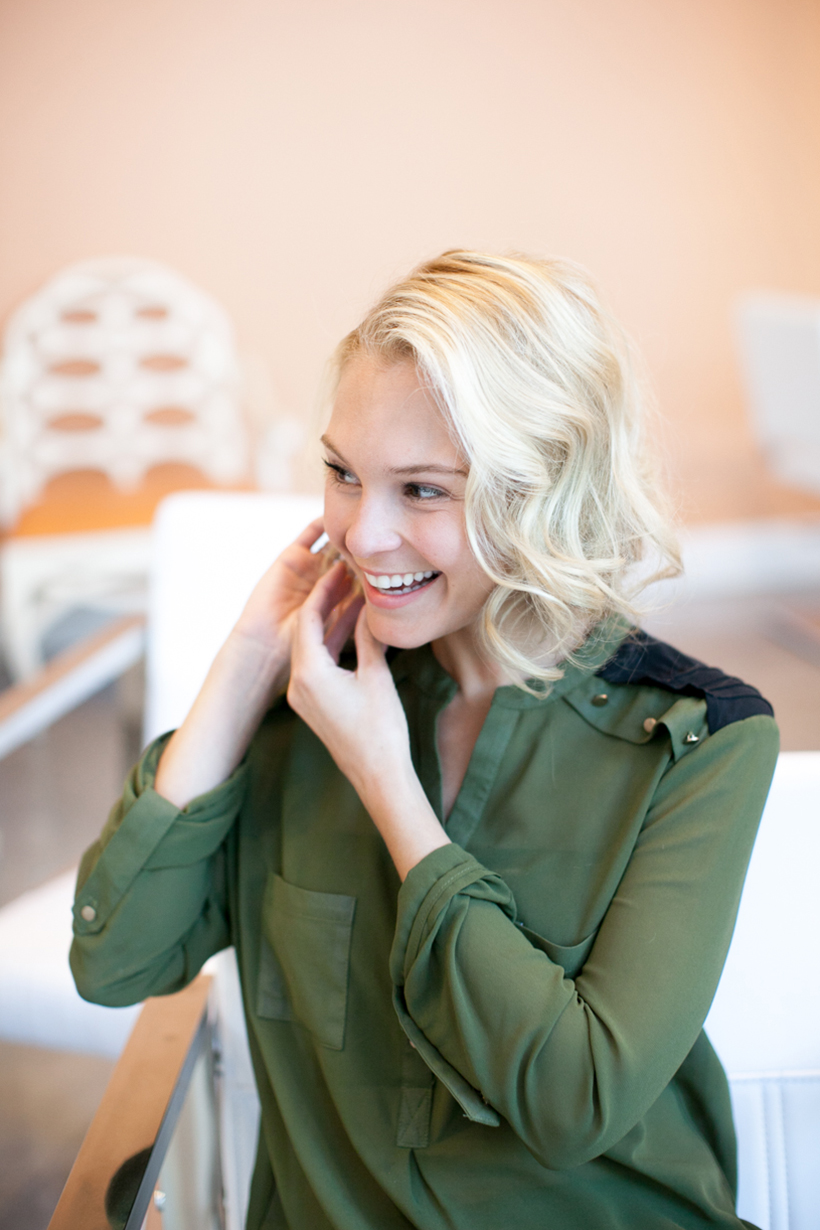
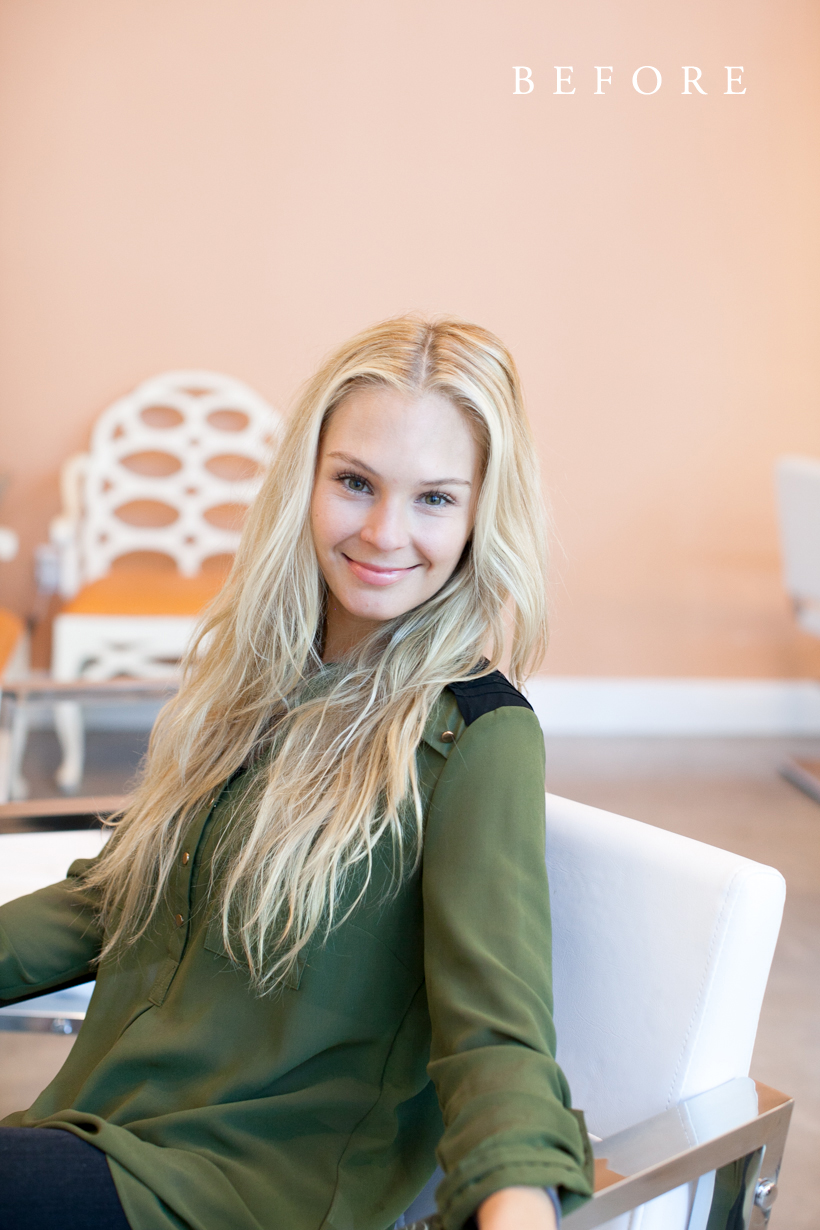
Is it just us, or does it seem like everyone is going shorter with their hair right now? From Lauren Conrad to Natalie Portman, we’re seeing the “lob” look fresh and modern on so many different faces. If you’re itching to try out this look yourself but freeze up every time you see a pair of scissors, we’ve got your perfect commitment-phobe solution. We met up with Erica Rae, senior stylist at ROAR Salon, to learn her technique for creating a faux lob. “I’ve tried talking myself into cutting my hair off for years now,” she confesses. “And the thoughts are usually brought on by seeing a celebrity go from long to short.” While some people use extensions to reverse a cut they don’t want to keep, most of us will be living with the decision for a while. Erica developed this technique to allow long-haired clients to try out a shorter look before making the big commitment. Musician Kendall Beard volunteered her long blonde locks to try going short for a day, and she loved the results. “All it takes is a little elbow grease and a little sass. Try it out and see what it’s like to have short hair for a day,” Erica says. No scissors required.
SUPPLIES:
- blow dryer
- 1″ curling iron
- bobby pins (large and small)
- pin-curl pins
- texturizing spray
- finishing spray
- small elastic rubber bands

DIRECTIONS:
- Start by prepping your hair with a texturizing product. Spray a Porter by Kerastase is one of my favorites. It’s light weight and works for all hair types.
- Quickly dry your hair with a blow dryer until your hair is completely dry.
- Section hair into two sections, top and bottom. To do this you’ll create a “horizontal” part from the top of one ear to the other.
- Secure the top section with a hair clip and start with the bottom section.
- Take the bottom section and braid the hair in a regular three strand braid. Secure the braid with a small elastic rubber band.
- Wrap the braid and create a bun just above the nape of the neck. Pin the bun using bobby pins to create a “pin-cushion.”
- Curl your the remaining top section of hair using a 1” curling iron. Create barrel curls with your fingers and temporarily pin the curls in place with pin curl pins. Allow the curls to cool down and set.
- Release the curls and tease each section at the base of the curl to create more volume and fullness.
- Grab the entire back section by the ends. Roll the section under and up towards the “pin-cushion.” Grab two large bobby pins and secure the section by pinning each side into the braided “pin-cushion.”
- Do the same for each side. Grab. Roll. Pin. Once you have the hair pinned at the desired length, pull and/or tuck the hair. You may have to use some additional bobby pins, especially if you have layers. This look doesn’t have to be perfect. The messier the better! Once you’ve made your final touches you can then follow up with a medium to strong finishing spray. I love Laque Dentelle by Kerastase.