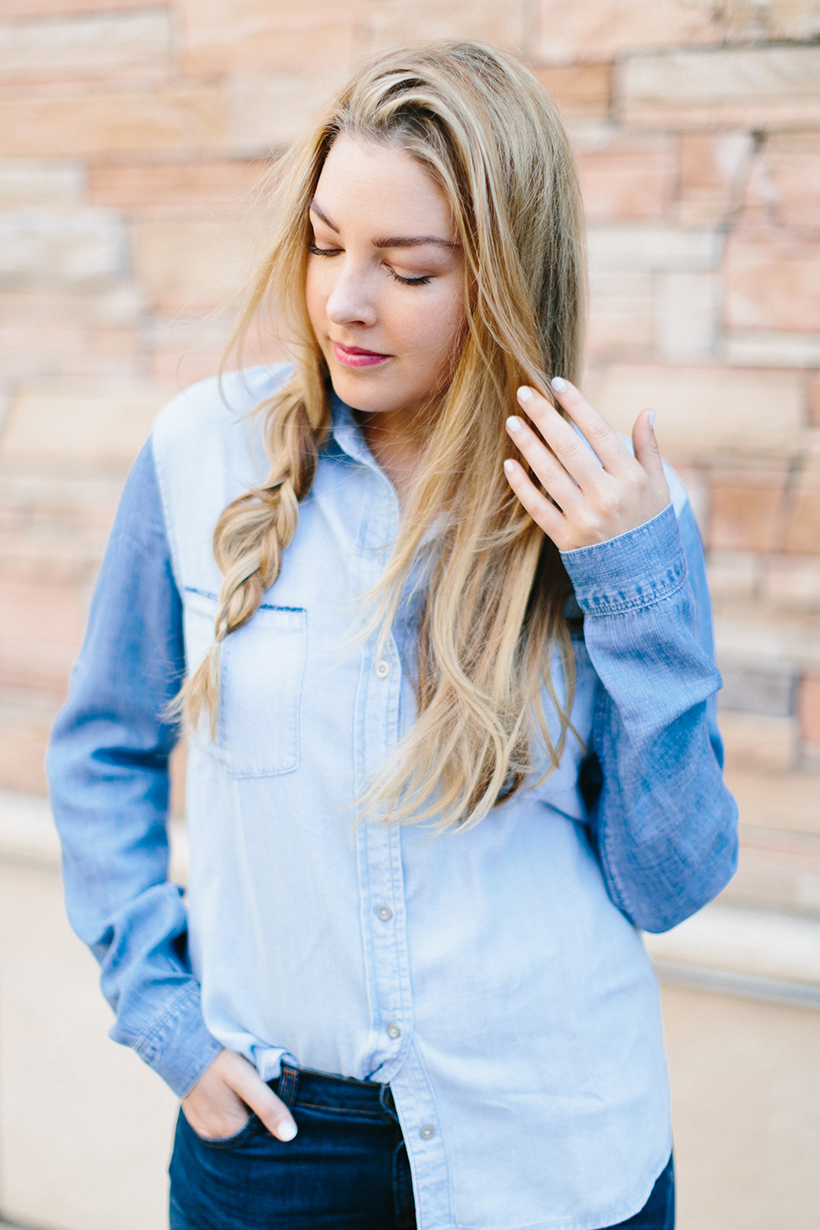
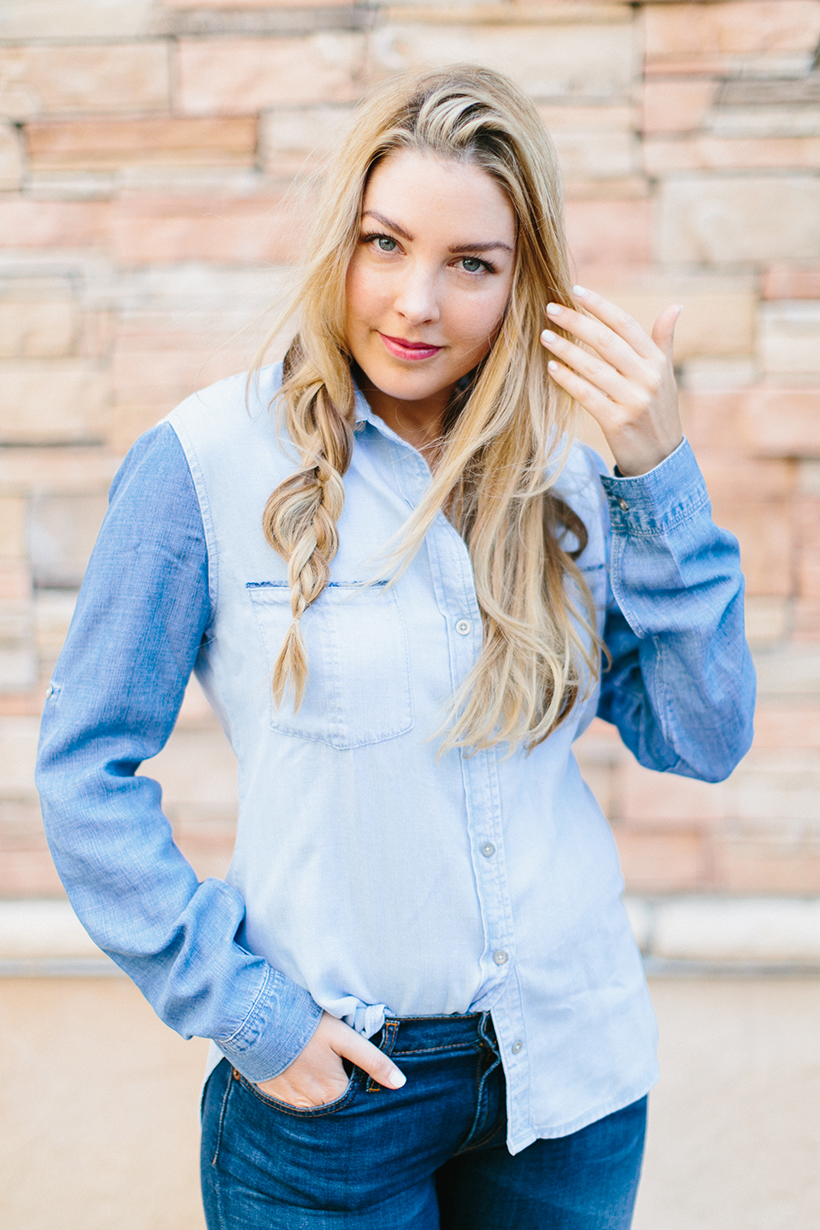
 “I love to scout looks from catalogs and one of my go-to sources is always Free People,” says Senior Stylist Erica Rae of Roar Salon. That’s where she spotted a fun side-bride look she wanted to recreate with model Rebecca Gaddis in this week’s beauty tutorial. The certified beach babe (and owner of the online swim boutique Ambhasaa) was the perfect choice to model this bohemian look. “Her hair is always so effortless and her makeup is minimal,” says Erica Rae. “And her personality is very laid back and chill, too. I didn’t want to take away from that.” It’s an edgy asymmetrical look, and it’s meant to stand out. “It’s different and that’s the point,” explains Erica. “Don’t be afraid of being different!” she encourages. With her long blonde locks and chill attitude, we think Rebecca is totally pulling this off. Read below for Erica’s steps to recreate this fun boho look:
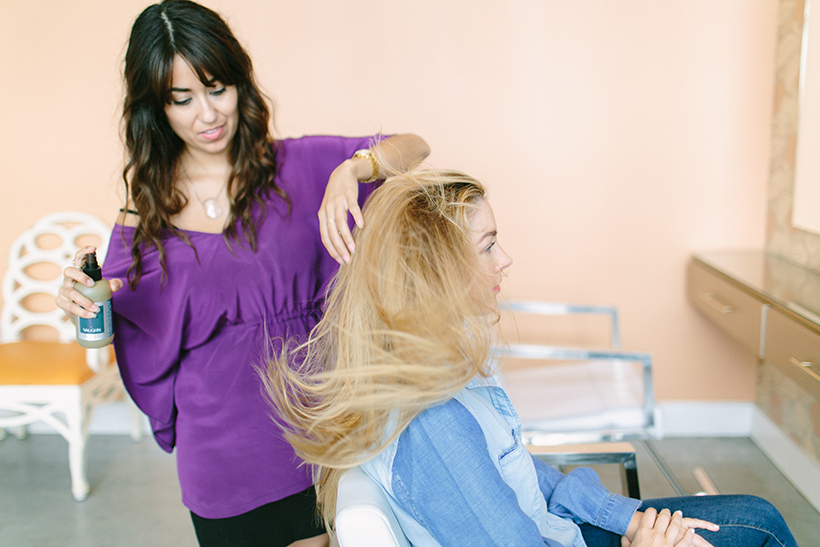
Erica started by spritzing Rebecca’s hair with texture spray and then quickly touching it up with a blow dryer. 
DIRECTIONS:
- Start by sectioning your hair into four sections. I recommend using some kind of texturizing product to add a little bit of grit to your hair. Prep your hair before sectioning your hair into clips.
- Once you have sectioned you can then add more texture and body by taking small subsections and curling you hair with either a curling iron or rollers. *If your hair has natural waves then just rock your natural texture. You could always enhance your natural curls with a product that creates a piece-y look or only curl a few strands using a curling iron or wand.
- If you are needing to add texture with curls then continue step 2 all over. I would suggest using pin curl pins to pin your curled sections, you can also use bobby pins to secure the curls.
- Once finished you can unpin your curls and then part your hair on either side. A side part is more flattering than a middle part for this look.
- Section your hair into three sections to begin your braid. Pick the section with the least amount of hair.
- Begin your three strand braid and braid your hair. Leave at least an inch or two out at the bottom of your braid. Secure your braid with a small elastic band. If you want you can always add an accessory around the band. I love to use leather straps!
- Once you have secured your braid start pulling apart the braid to give it a messier look. It’s okay if some pieces poke out of your braid. That makes the braid appear more “effortless.”
- Continue loosening sections of the braid until the desired look is achieved.
ERICA’S PRO TIP: Note that this look really only works with longer hair. If you have short hair you could always consider getting clip in extensions for fun. I would advise getting clip in extensions cut by your hairstylist to make them appear more natural as they blend with your haircut, and if needed your stylist could also touch up the color to match your hair perfectly.
photographed by kristen kilpatrick