
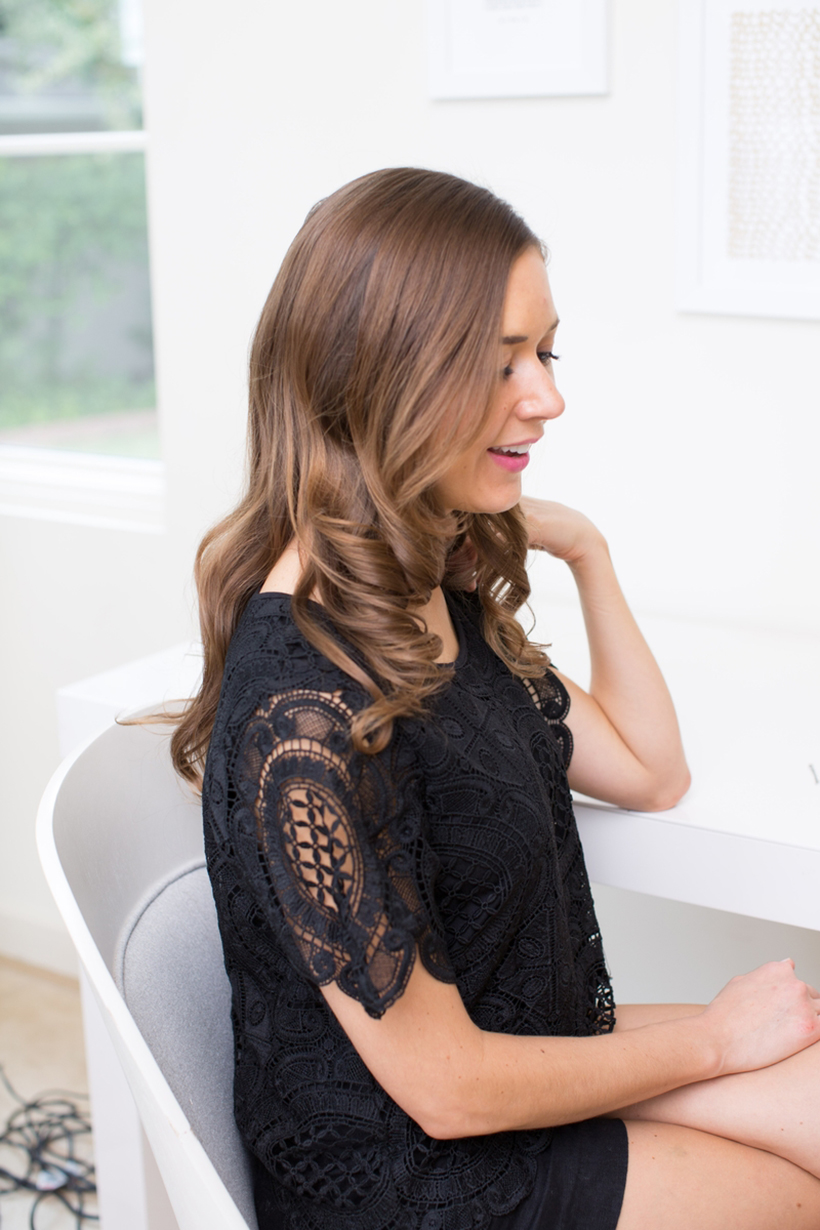
Y’all *might* have noticed that I tend to wear my hair in the same beachy waves every day, and I’m kinda not sorry about it. But they say that a new hairstyle can put a whole new spring in your step, so I’m trying to mix things up a bit more lately. Our resident hair guru Erica Rae says, “There are a few timeless styles that just look great on just about everyone, and Hollywood-style waves are one of them. It’s classic enough for a bride to wear with a beaded gown, yet still works to dress up an edgy going-out ensemble as well.” Erica worked her magic on me, and one of the hidden benefits to this style is that the “set” curl lasted for days! Keep reading for the step-by-step instructions to creating your own Hollywood waves, plus some ridiculous in-process shots of me getting styled. You have my full permission to laugh. And I’d love to hear in the comments if y’all give this style a spin!
SUPPLIES:
DIRECTIONS:
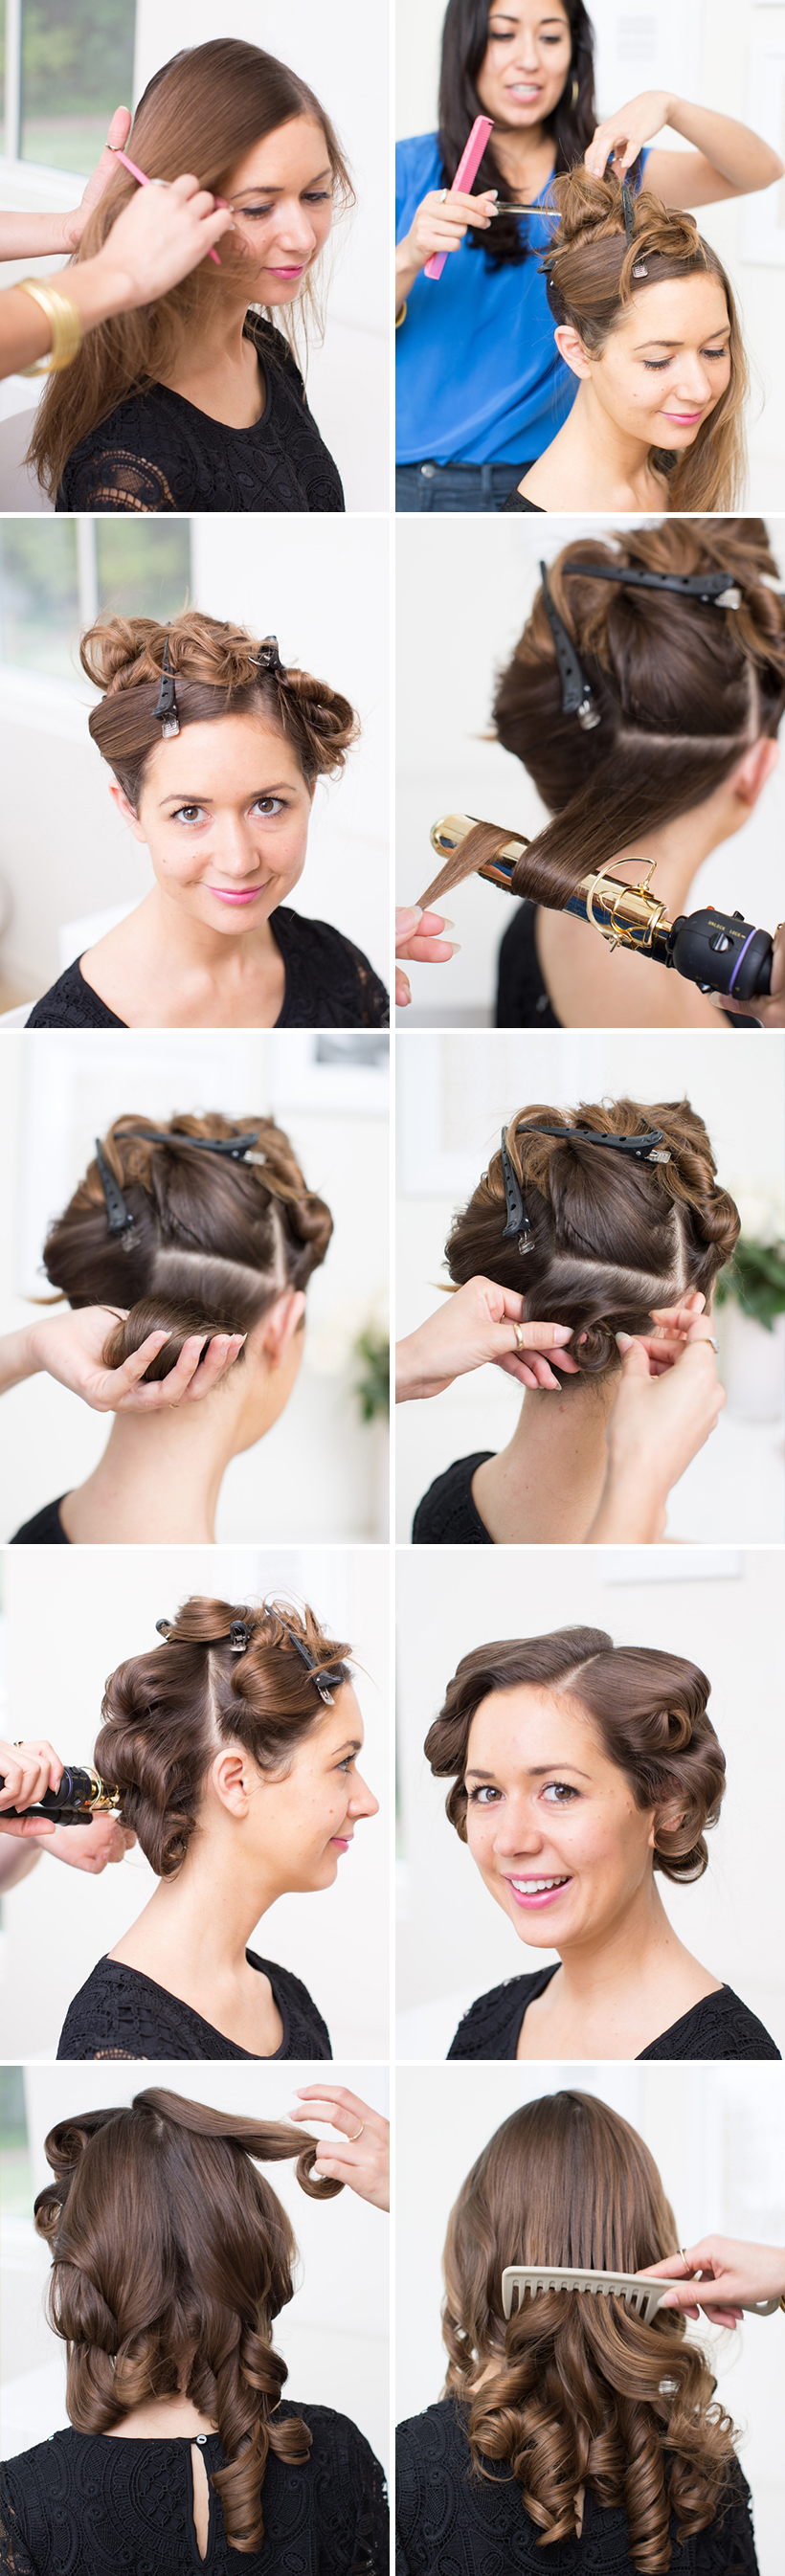
- Start with a deep part on either side of the face.
- Section your hair into four equal sections.
- Clip away each of the four sections using anything that will tie your hair away.
- Take two or three “subsections” from the first section that you clipped away. You want to curl the first “subsection” with a 1″ curling iron. As you wrap your hair around the curling iron, you’ll want to be sure to pull the “tail end”of the section to the left side.
- Hold the curled section in your palm and allow the curl to cool down just a bit.
- Now pin the curl to the scalp using either pin curl pins or even just a simple bobby pin.
- Once you have curled your first “subsection” and have pinned it in place, take another “subsection” just above it and start curling. THIS time you want to make sure that the ‘tail end” of the section feeds off to the opposite side.
- Continue taking these subsections within your sections, curl them, and remember to alternate the way you pull the tail ends. One note: remember to keep all of your subsections aligned with each other. The subsections from each section should be side by side with the opposite section and those opposite sections should have the same curl pattern, meaning that both subsections should have the exact same “tail end.” Sounds intense, but it’s not that complicated. The reason for this is to create the “S” pattern that makes these Hollywood Curls look and fall the way they do (they almost always make an “S” pattern.)
- Once you have curled all of the hair and the curls have COMPLETELY cooled down, you can then unpin all of the sections.
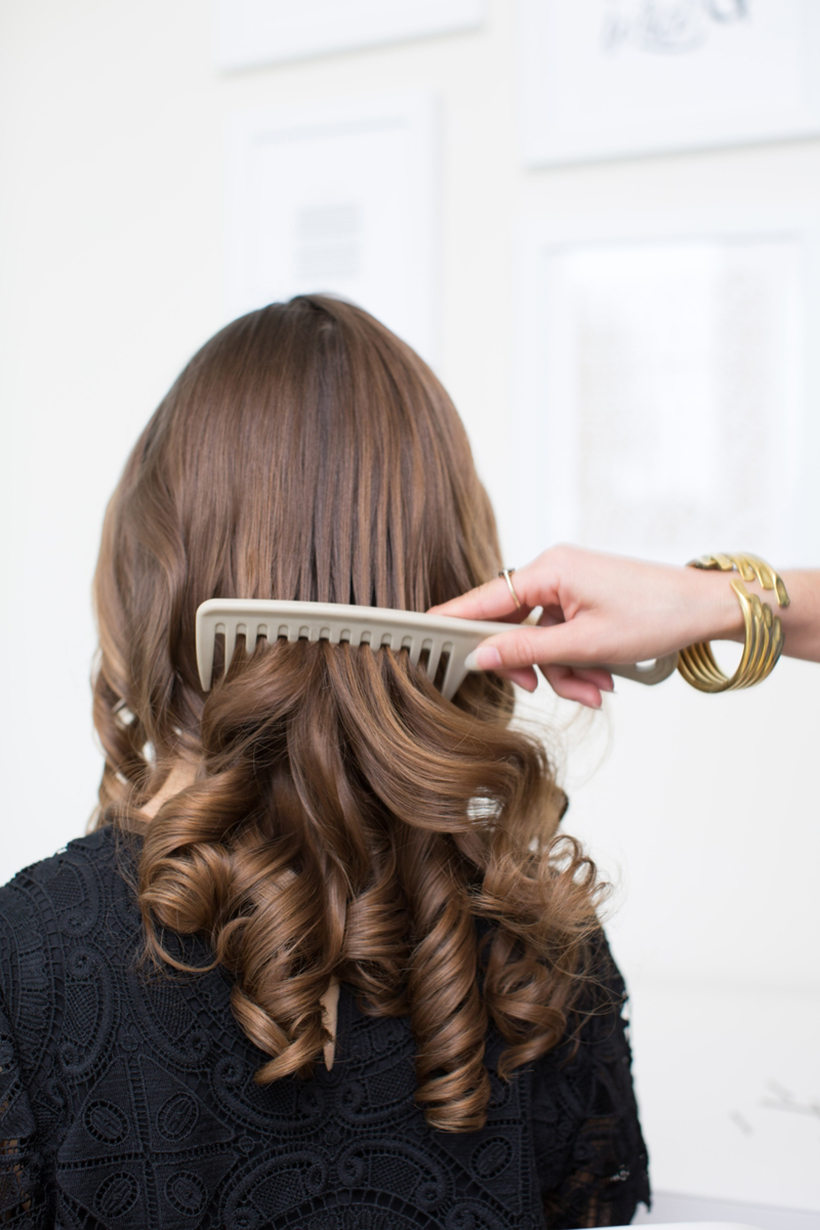
- Use a wide tooth comb and start combing the curls out. Watch how the curls just fall in place! You can determine how much curl you want to keep or comb out. The more you comb through the curls the looser the curls will become.
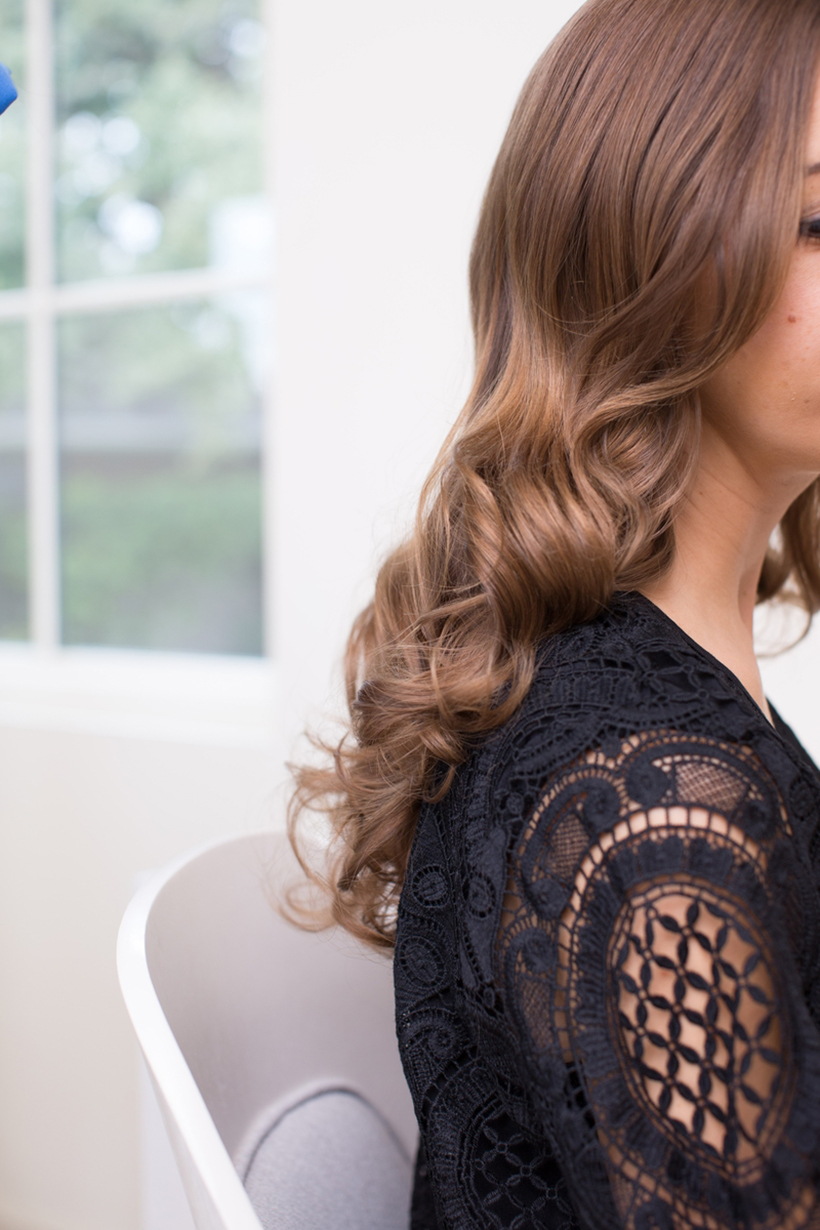
Once you have determined how you want your curls to fall, you can then spray your look down with your favorite hairspray. I would recommend an aerosol spray. I love this look the way it’s styled in these photos but you can also pin one side and give it a totally different feel.
photographed by jessica attie

