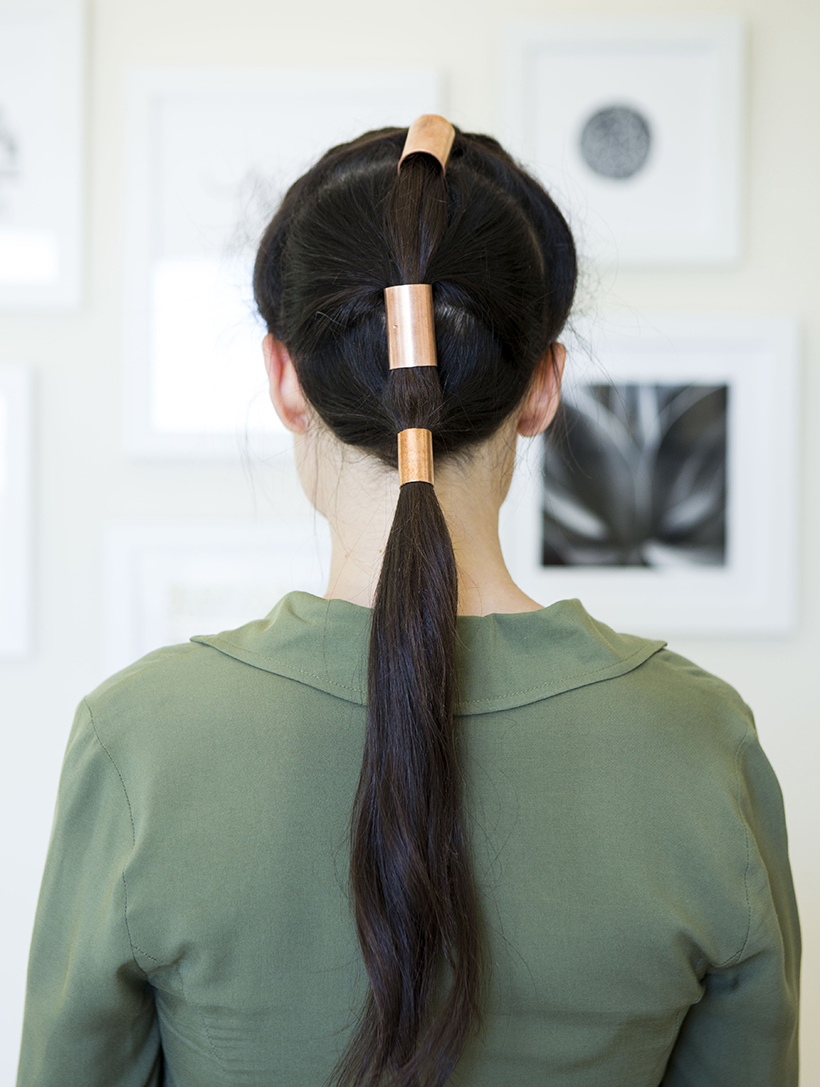
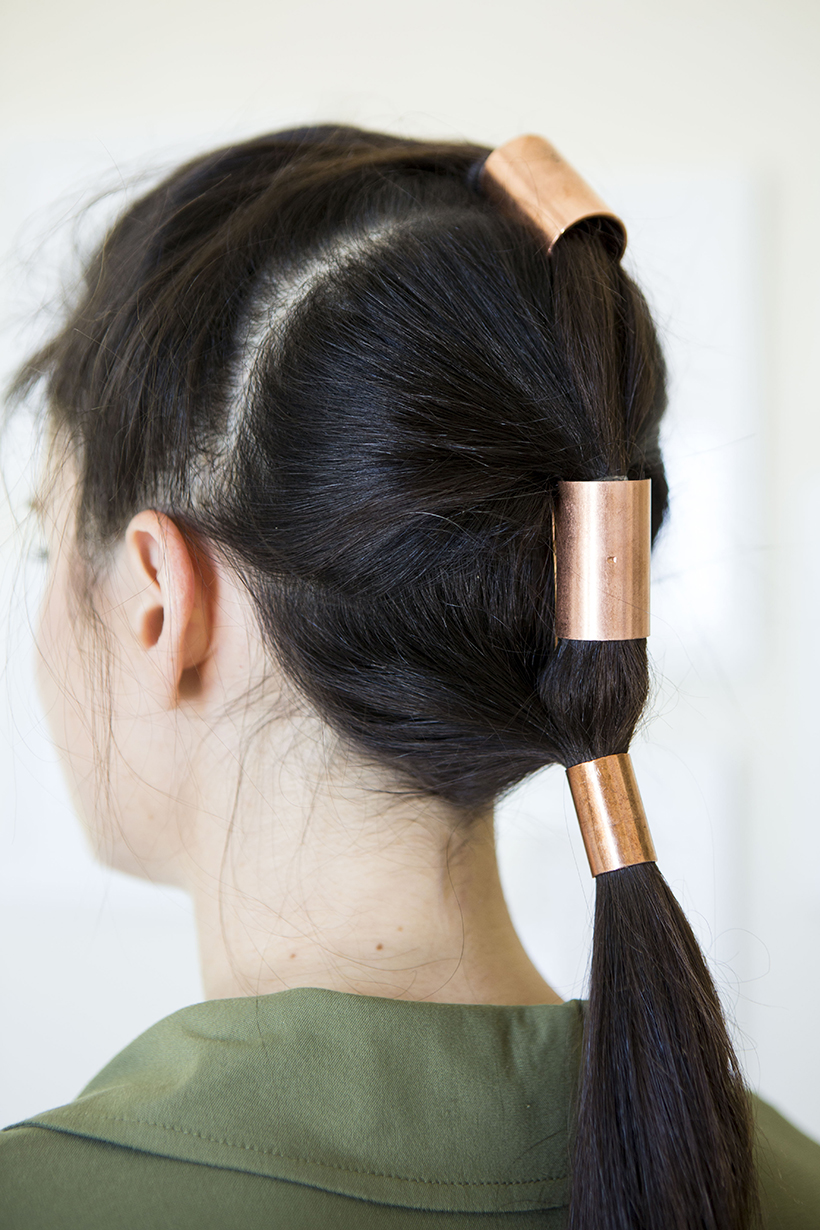
Turns out stylist Erica Rae is just as ingenious when it comes to accessories as she is with hair. When we asked her to come up with something using copper we had no idea that she would end up making her own hair accessories. Inspired by a class she took with celebrity stylist Orlando Pita, Erica isn’t afraid to look to unexpected places for great styling materials. “I’ll never forget some of the things he was pulling out of his kit,” she remembers. “Orlando shared some great tips like the fact that he sometimes goes to hardware stores to find different things to integrate into high end editorial looks. And that’s exactly where I found these copper pieces! They’re called “fittings” and they’re in the plumbing aisle at Home Depot.” Who knew? Fashion blogger Michelle Zuzek of Style Beacon modeled the look for us, and we seriously can’t believe these accessories only cost a total of $6. Read on for Erica’s tips on how to achieve this look for yourself:

SUPPLIES:
- bobby pins
- copper fittings
- clear elastic hair ties
DIRECTIONS:
-
Start by parting the hair from ear to ear over the head and use the front section to create a sleek pony tail.
-
Twist the pony tail and slide it through the first copper fitting. If using different sizes, use the larger size first.
-
Slide the fitting all the way to the base of the pony tail.
-
Secure the fitting in place with a bobby pin that matches the color of your hair.
-
With the remaining hair, create a part across the back of the head from ear to ear. Gather this middle section of hair and combine it with the pony tail from your previous section. Secure the new pony tail with a clear elastic band.
-
Slide the second pony tail through the next fitting.
-
Pin and secure the fitting at the base of the pony tail.
-
Section off your last section at the base of your hairline. Combine the pony tail from your previous section and secure with a clear elastic band.
-
Slide the smallest size fitting to the base of the pony tail and secure with a bobby pin.
-
Make sure that the fittings all line up with each other and make any minor adjustments at this point.
Erica’s Pro Tip: If you decide to make this a very sleek look then I would do this look on wet hair and add gel to it. Once you have finished with all the sectioning you can then either let your hair air dry or blow dry the remaining pony tail. I went with a messier version just for the subtle softness but this can definitely be worn either way and will make a statement anywhere you go. This look is so versatile, wear it out or even by the pool, it can dress up any look but also be worn with that sexy black dress on your next night out on the town!

photographed by jessica attie