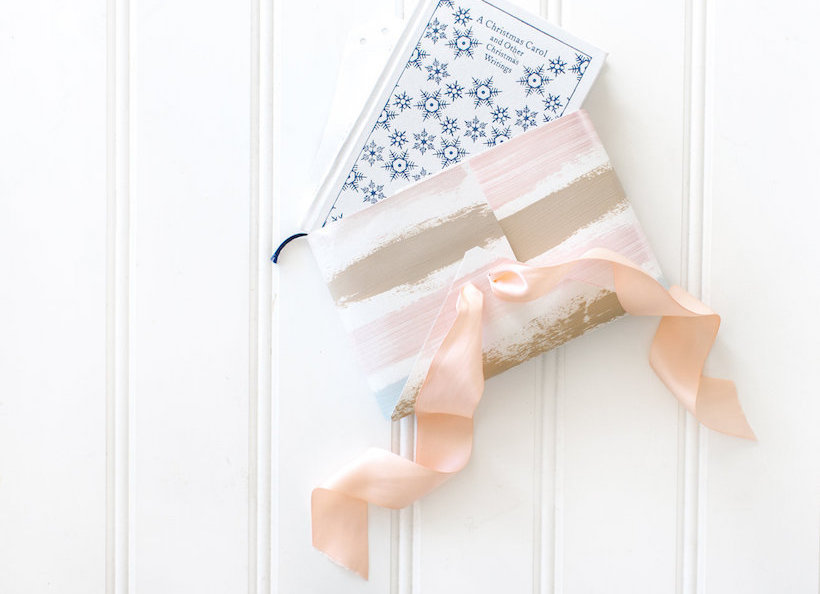
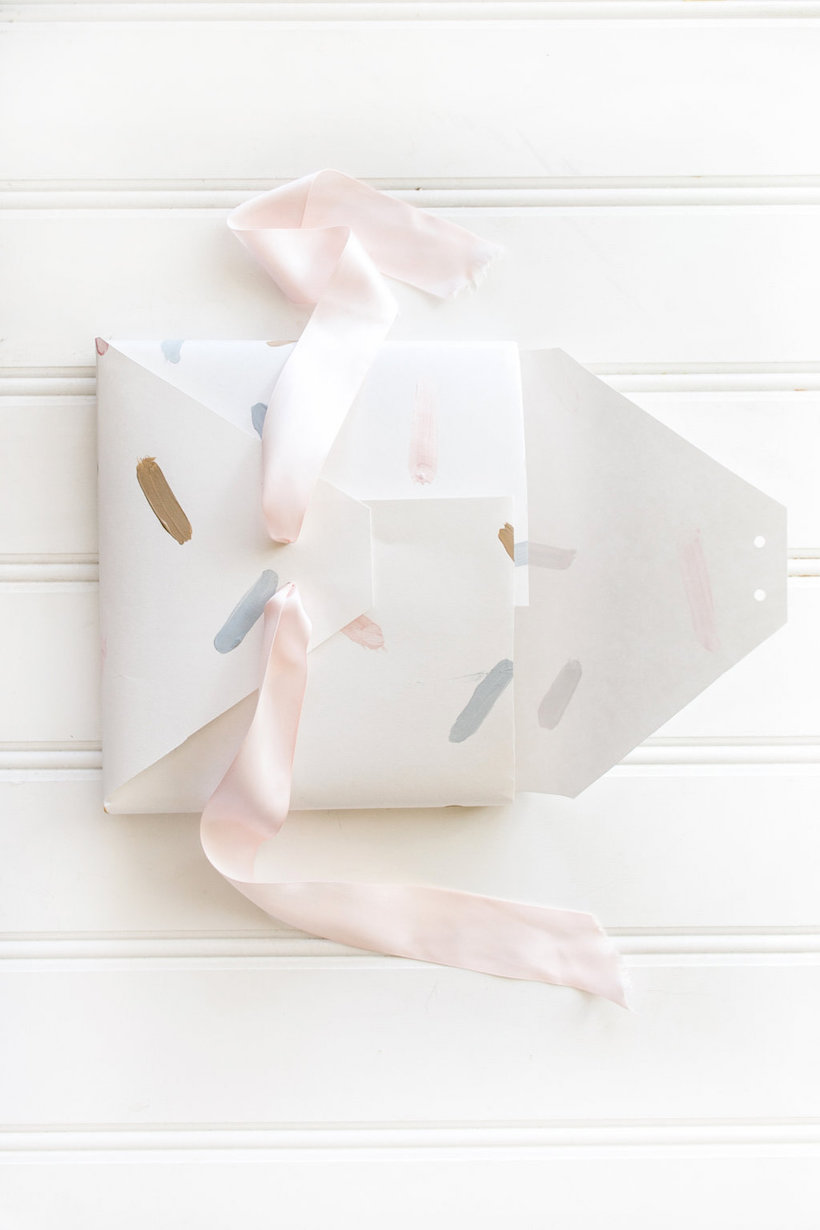
You know you’re doing something right when people want to use your paper gift-wrapping creation as a real life handbag. And who am I to tell them they can’t? While I certainly agree that these envelope-inspired designs are pretty enough to pair with a cocktail dress and sparkly heels, I can’t guarantee they’d hold up to more than two uses… but for holiday gift-wrapping, they’re absolutely perfect. According to my calculations, the DIY process should work for just about any flat-ish rectangular gift, but today, we’re showing you how to create gorgeous, custom packaging for all the coffee table books and cookbooks you’ll be gifting this season.

photography by Kristen Kilpatrick

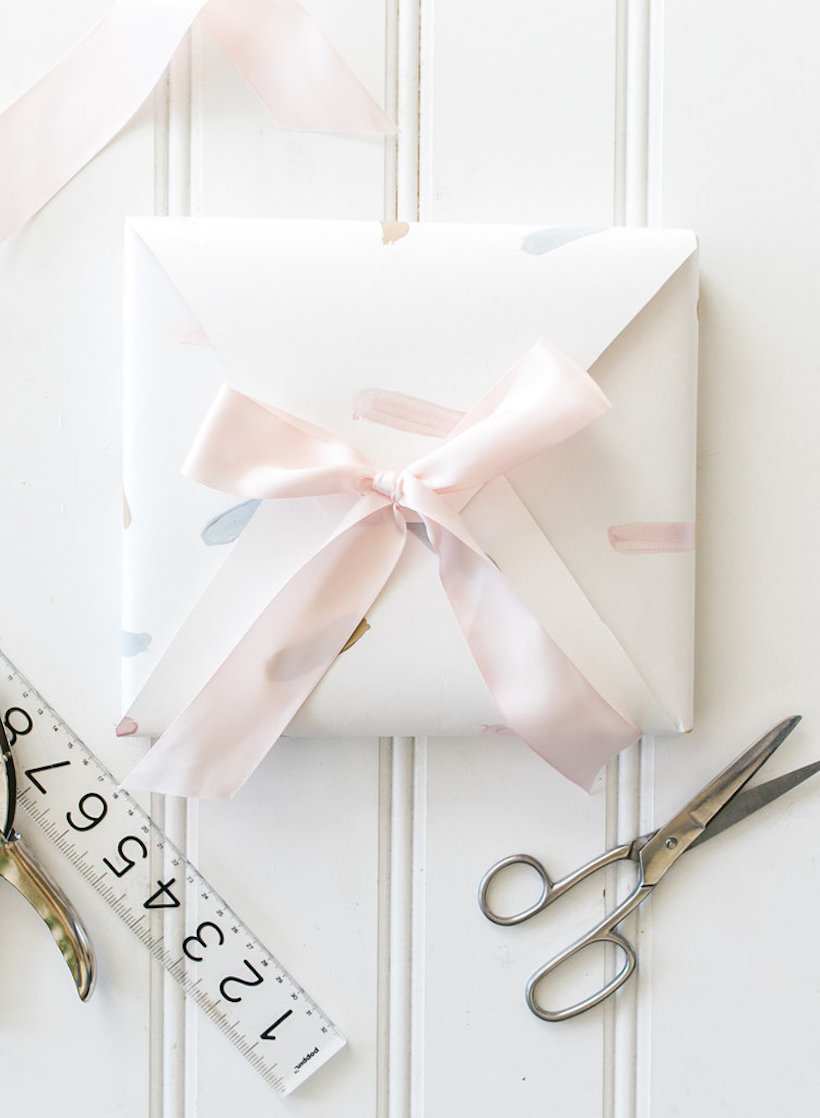
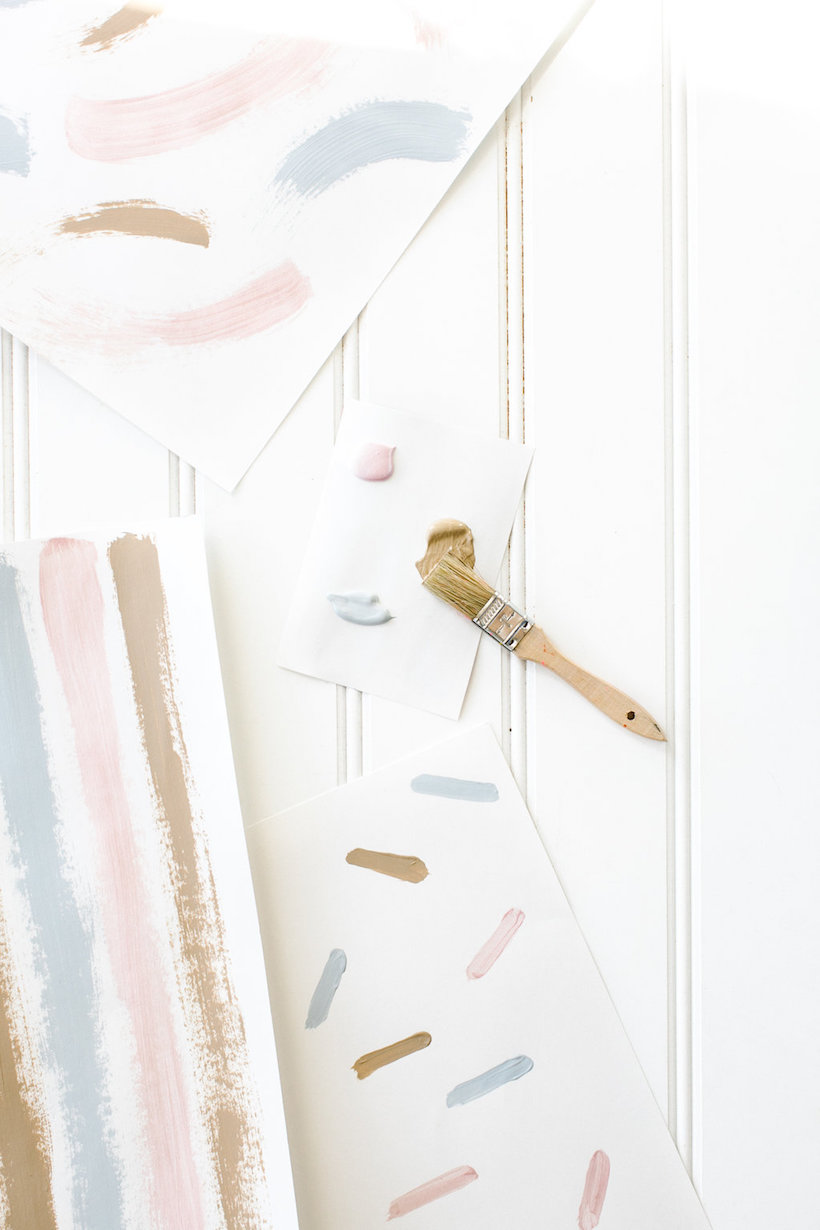
To get started, you’ll want to hand paint plain white poster boards. I chose acrylic paints in a nude, a light gray and a pearlescent pink to create this soft color way, then free handed three different patterns onto my posters.

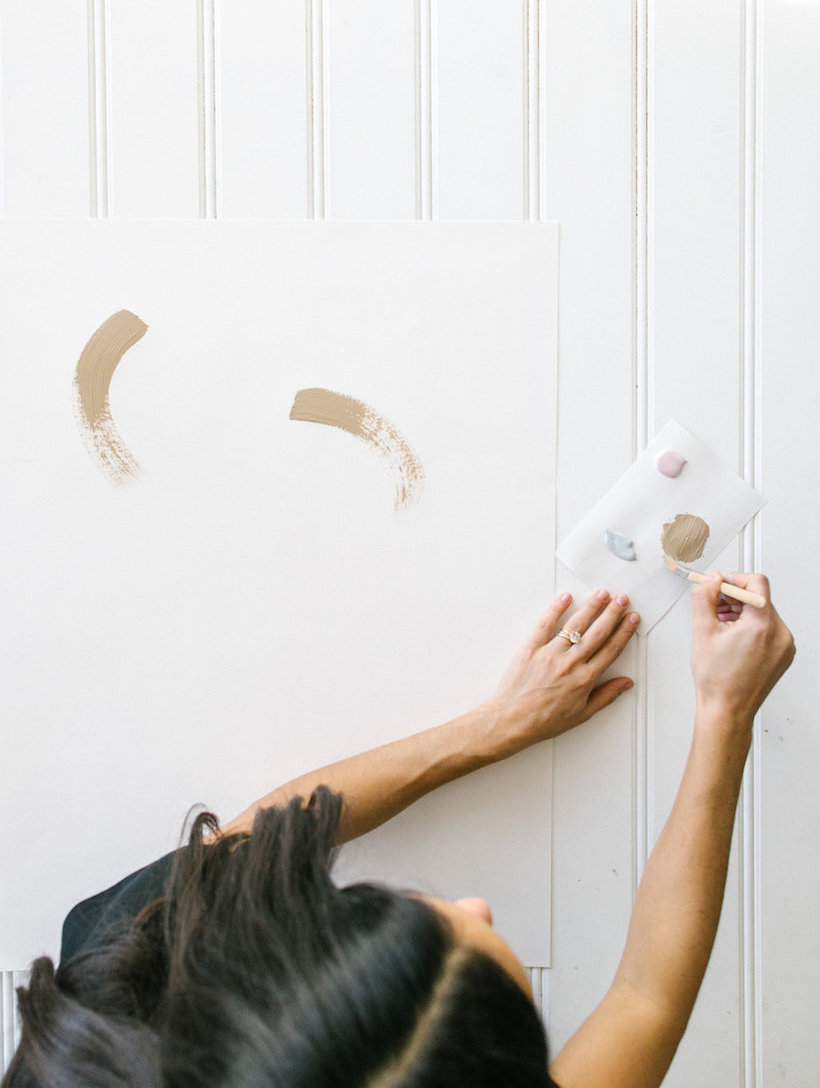
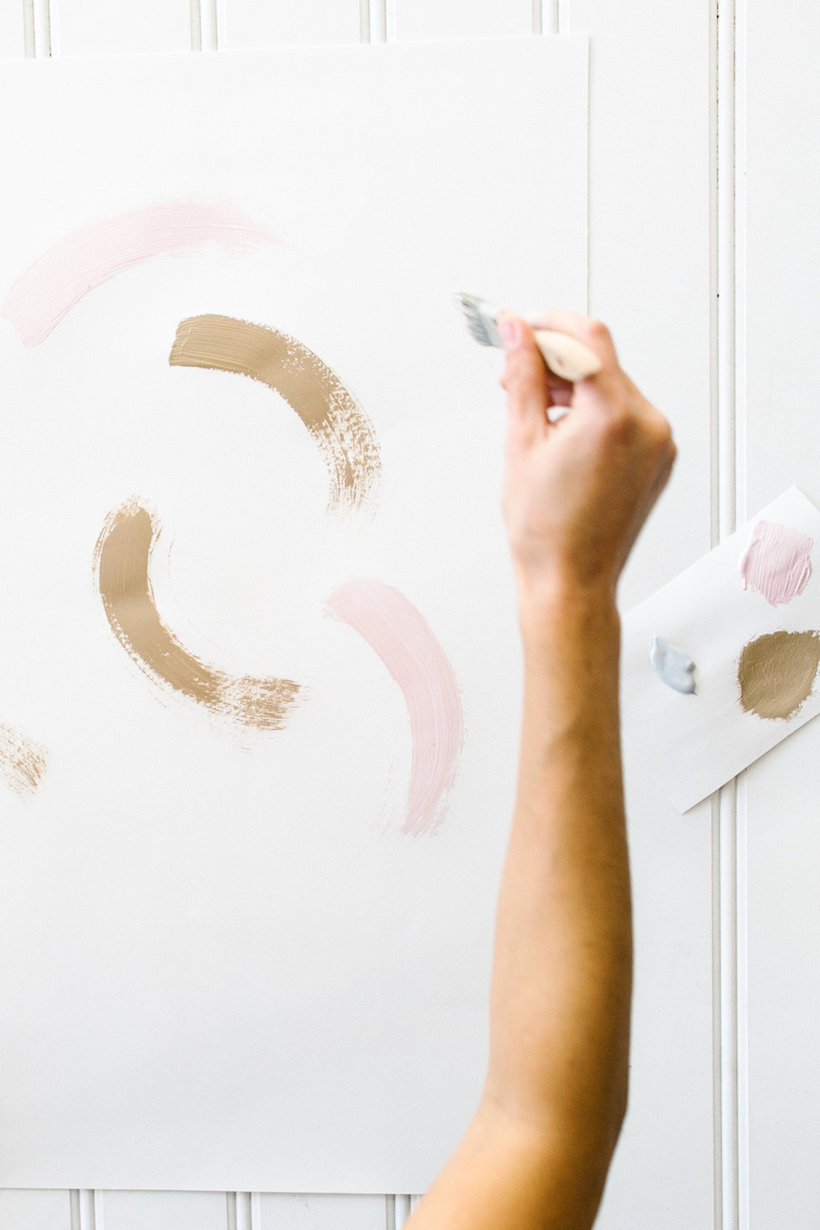
I find that for projects like these, the simplest patterns work best. And leaving the brush strokes imperfect means gift recipients will know this paper was hand painted and not store bought.

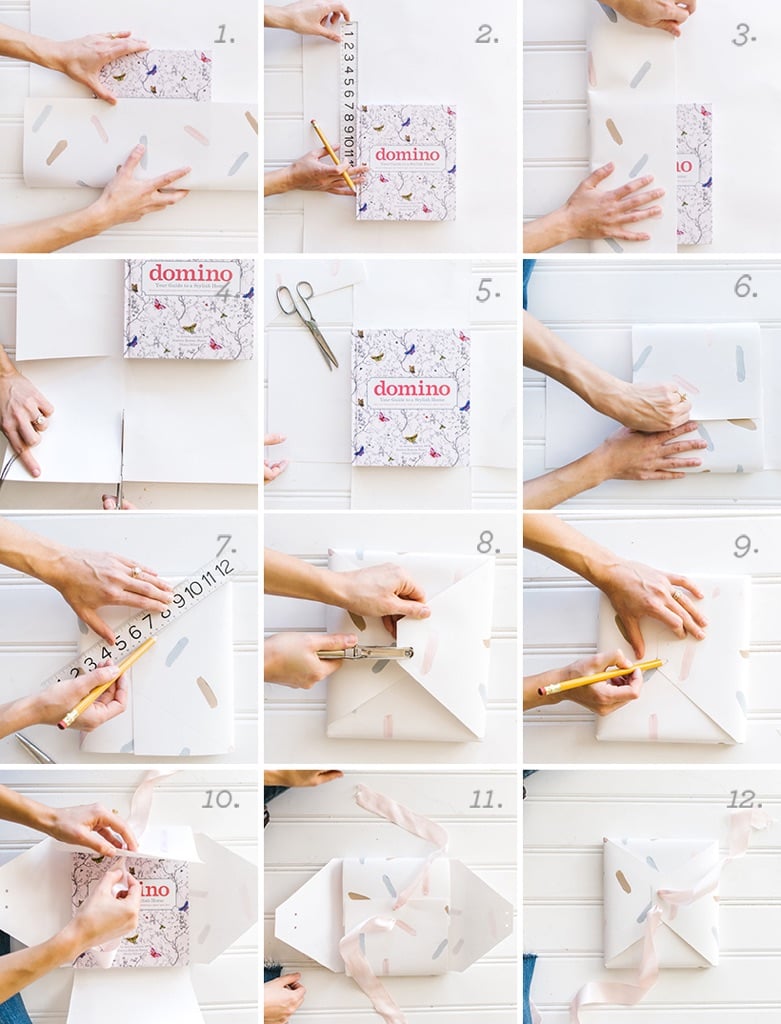
Once your paper is dry, you’re ready to start cutting and folding. Keep reading for the step-by-step instructions!

Poster Board Envelope Book Wraps

supplies


  • 1 hand painted poster board per book
  • scissors
  • ruler
  • pencil
  • hole punch
  • ribbon
instructions


  1. Lay the book flat on the back side of the poster. Fold the edge of the poster until it covers 2/3 of the book front from top-to bottom. Let the folded poster fall back down and do not move the book. Measure the space between the bottom of the book and the edge of the poster.
  2. Measure and mark the same amount of space from the top edge of the book. Cut along the mark. There should now be the same amount of poster from the top and bottom edge of the book.
  3. Fold the left edge of the poster until it covers 2/3 of the book from left-to-right. Repeat the rest of steps 1 and 2. Your book should now be in the center of a rectangle that's perfectly sized to wrap around it.
  4. Cut the corners out of your rectangle as pictured.
  5. The edge of the folding flaps should line up with the edges of the book, as pictured.
  6. Fold in the top and bottom flaps.
  7. Fold in the left and right flaps, then, mark and cut only the left and right flaps to form a triangular envelope shape with a flat point. Make sure that when you cut, these two flaps still overlap when folded.
  8. Use a hole punch to poke two holes into the top flap.
  9. Press the top flap down, and use a pencil to mark through the holes onto the second flap. Punch where holes were marked on the second flap. Repeat onto the third and bottom-most flap until all four flaps have holes punched in them that align.
  10. Cut a long piece of ribbon and thread it through the bottom flap.
  11. Fold the next flap down and thread the ribbon through again, as pictured.
  12. Repeat with the two top flaps, then tie the ribbon into a pretty bow.

Share this Post

Author

Chanel Dror