
When’s the last time you sent someone snail mail just ’cause? My friend Jenny is one of the best at it, checking in with a funny greeting card every few months, and on my birthday just a couple weeks ago, the cards I got in the mail cheered me up way more than the messages written on my Facebook wall (though I’m grateful for those as well!) Just goes to show that nothing really says “thinking about you” quite like a personally penned note.
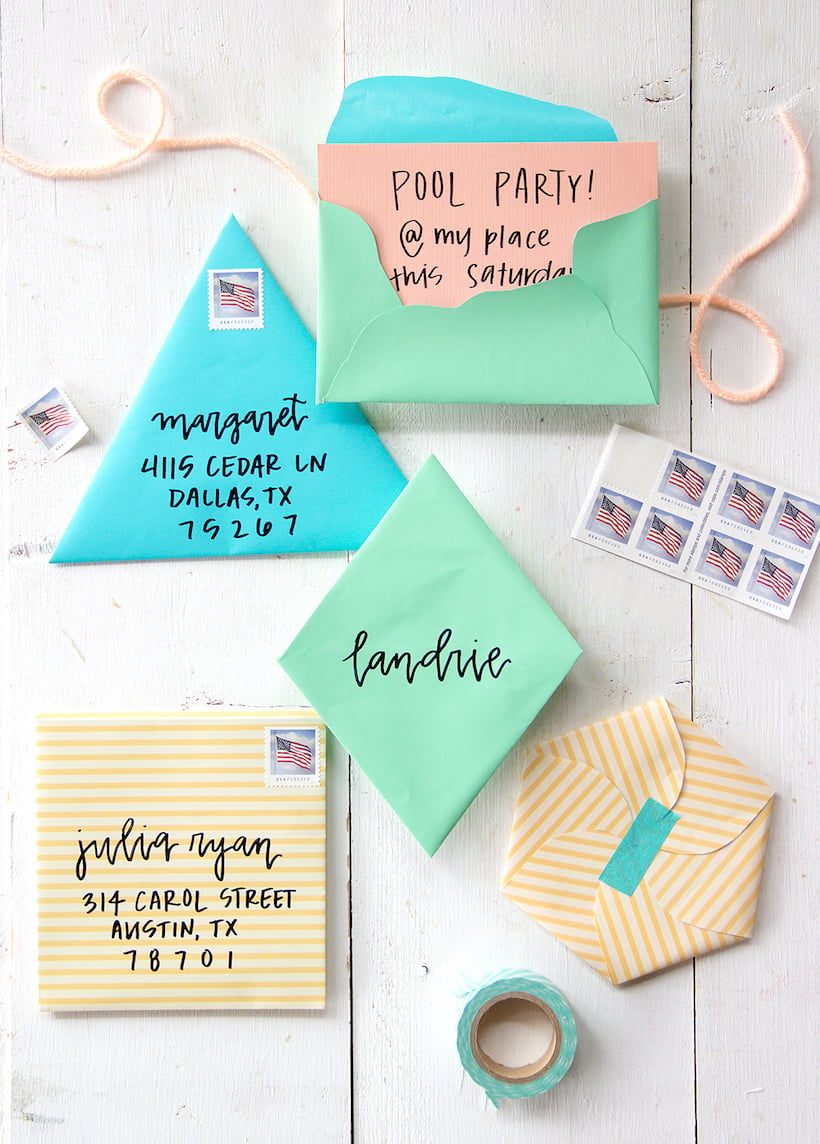
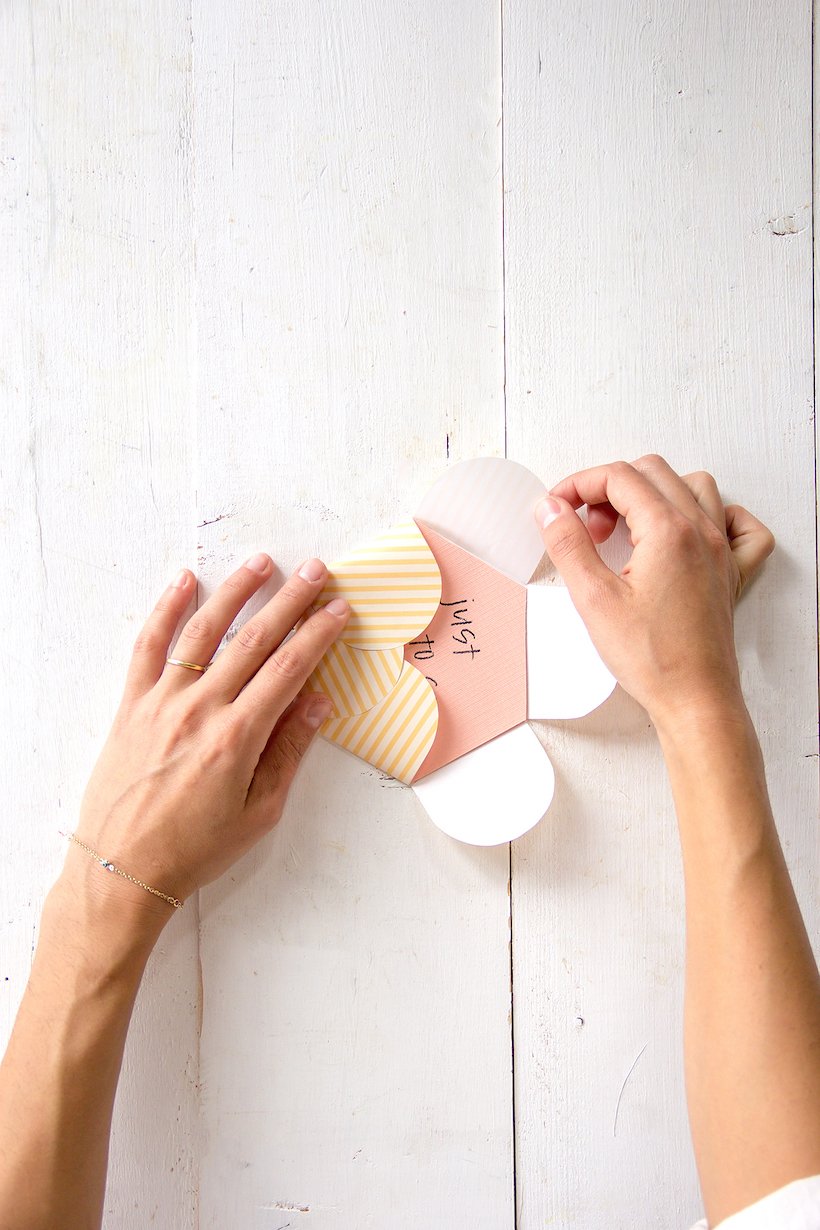
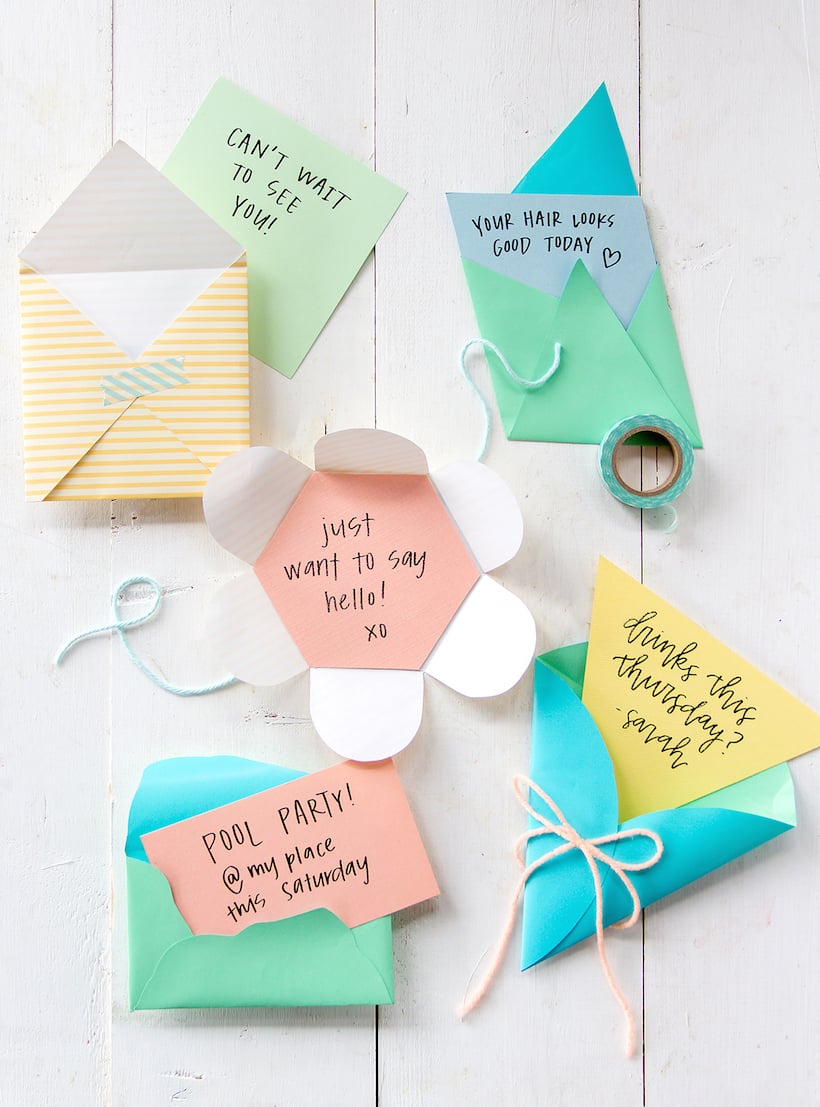
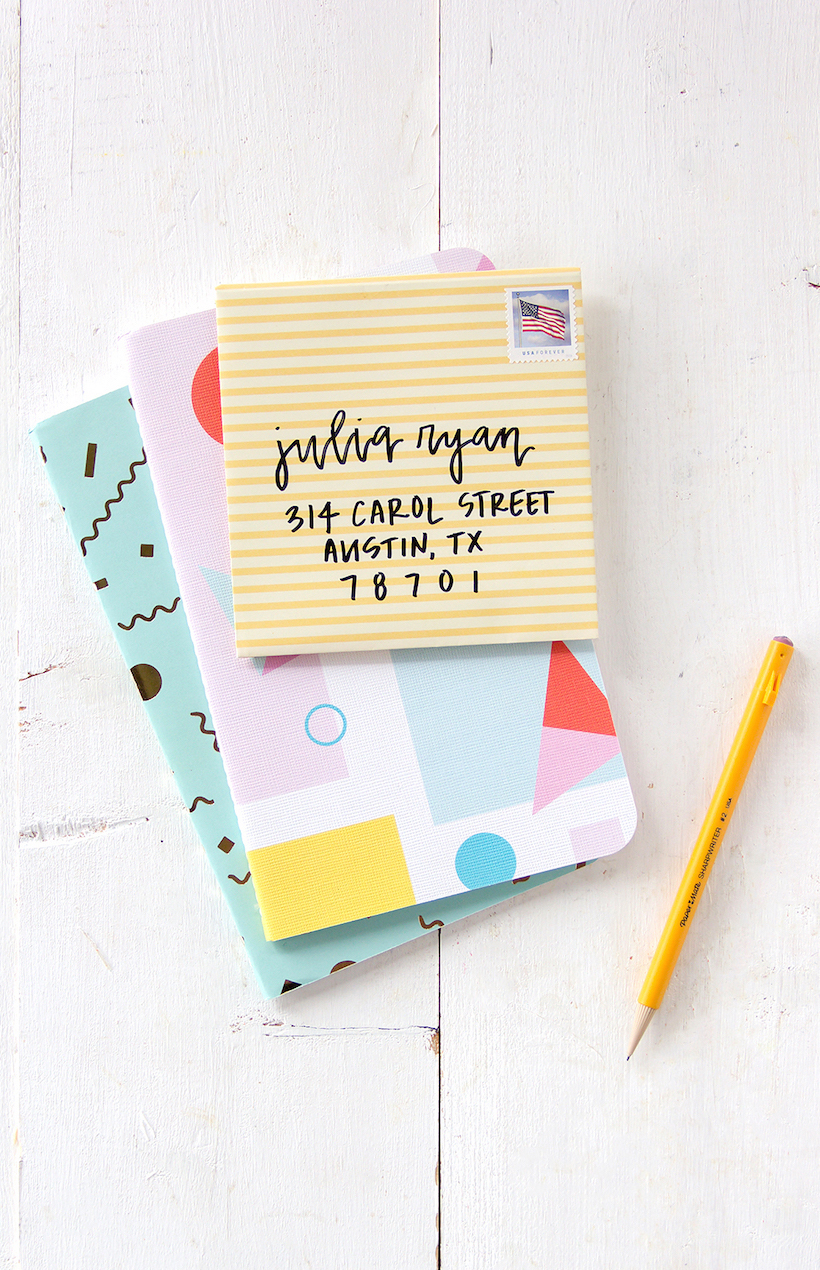
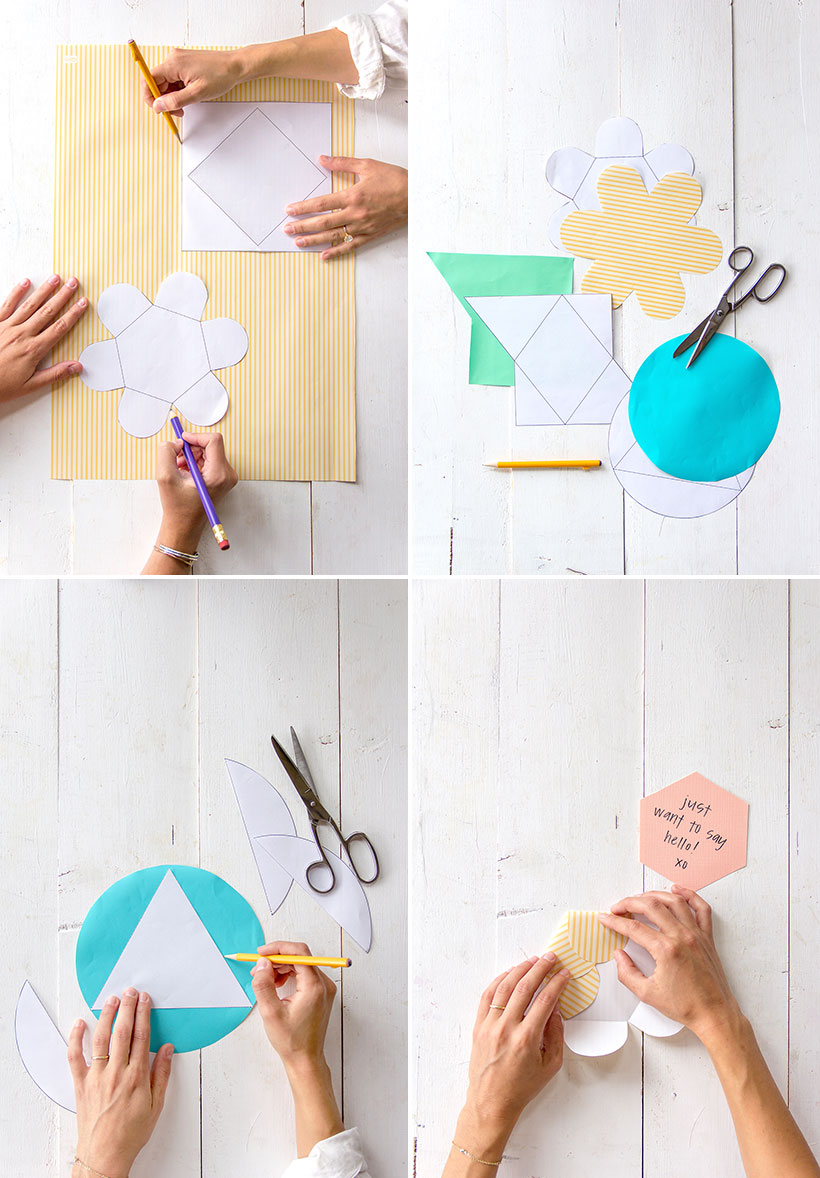
So with that in mind, we set out to create a fun DIY that makes it even more fun to craft a card that’s truly personalized. We turned to our favorite online paper shop, Paper Mart, to source some colorful wrapping paper, then came up with five different ways to fold it into geometric envelopes. So whether your next note is headed to a coworker the next desk over or to a family member in another state, you can bet they’ll be tickled you thought out of the box! Keep reading to learn how to make these little guys…


Love this! It reminds me of when I used to pass notes in school and fold them up so neatly. This is such a fun tutorial!
http://www.livinginsteil.com
Thanks, loving this. I love to write letters so this is great. A lot of them will be going to our military guys..
So sweet! I have 15 nieces and nephews and am always looking for fun, original ways to connect with them. These are perfect. Thank you.
Really cool idea, I love making envelopes myself, mostly out of old maps and book pages:-)
http://www.idimin.berlin/
This is so fun! Love sending real mail!!
You should definitely add a note that the square envelope costs extra postage (more than what is shown in the photos) and the other shapes may need it as well. It depends on whether your local post office thinks they are non-machinable or not, but it sure sucks to have your mail returned!
Love love love this – I write a lot of snail mail, but I normally use the same old envelopes/paper I think I might just jazz up my next bit of post with one of these
– Natalie
http://www.workovereasy.com