

If you were to crawl under the table at my mother’s house and look up, you’d find the space filled with childhood hieroglyphics that my siblings and I left behind. For whatever reason, a boring piece of paper or coloring book wasn’t enough of an attraction for our crayons, colored pencils and markers, and their tips always found their way to the underside of our (not cheap) dining table. Magically, my mom didn’t seem bothered by it. Out of site, out of mind, I suppose… plus, we just loved camping out under that dang table.
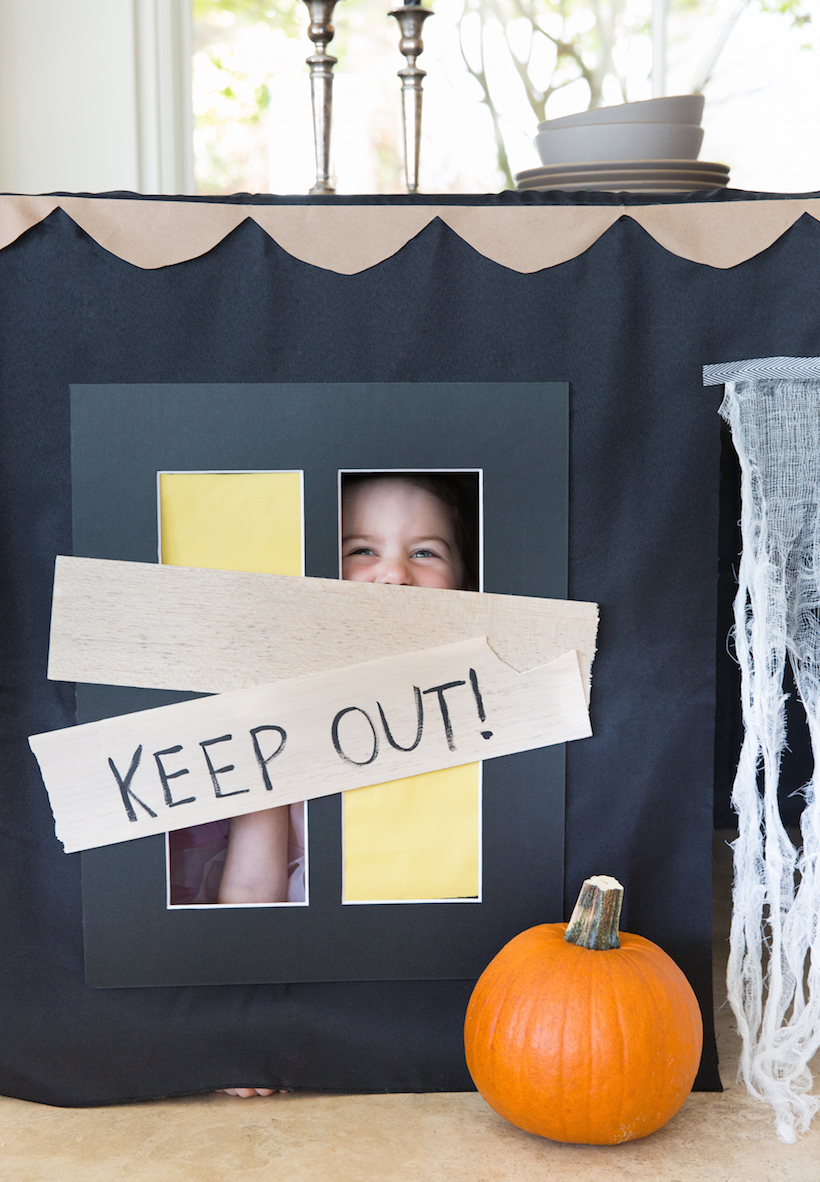
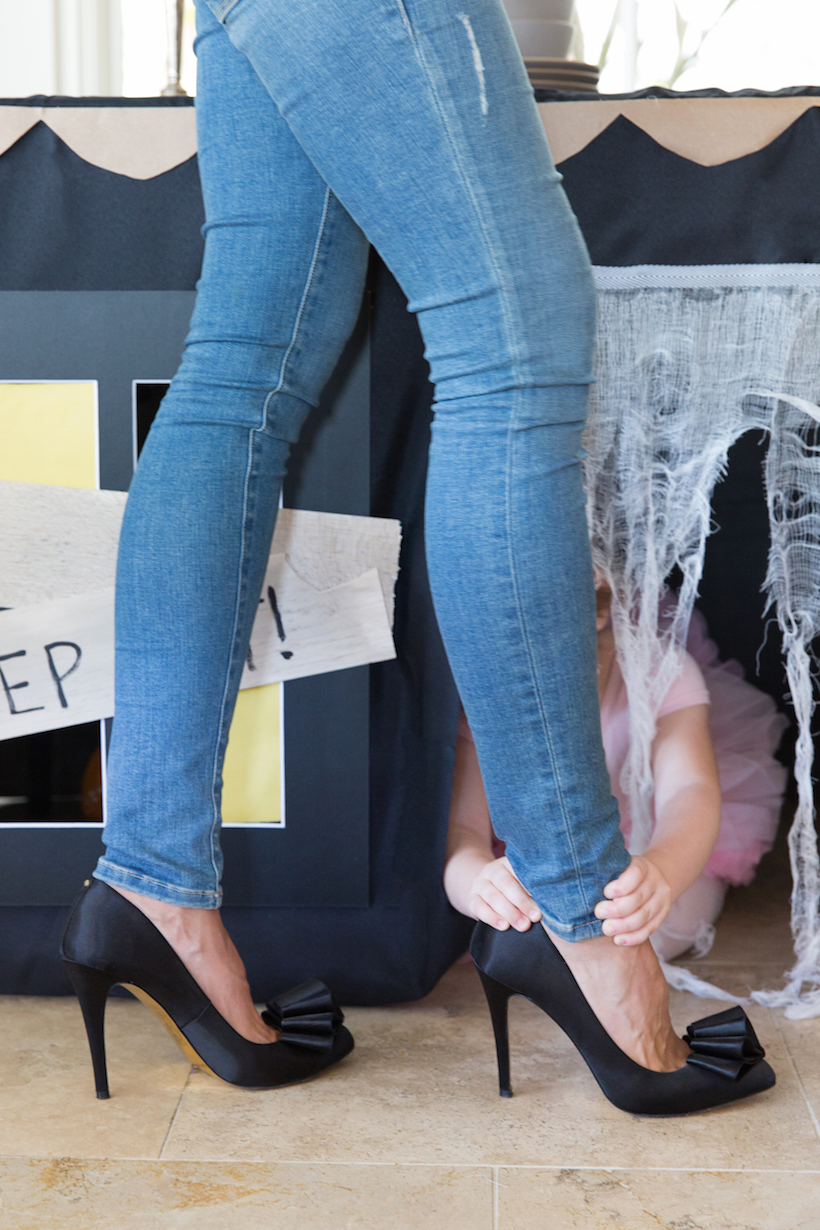
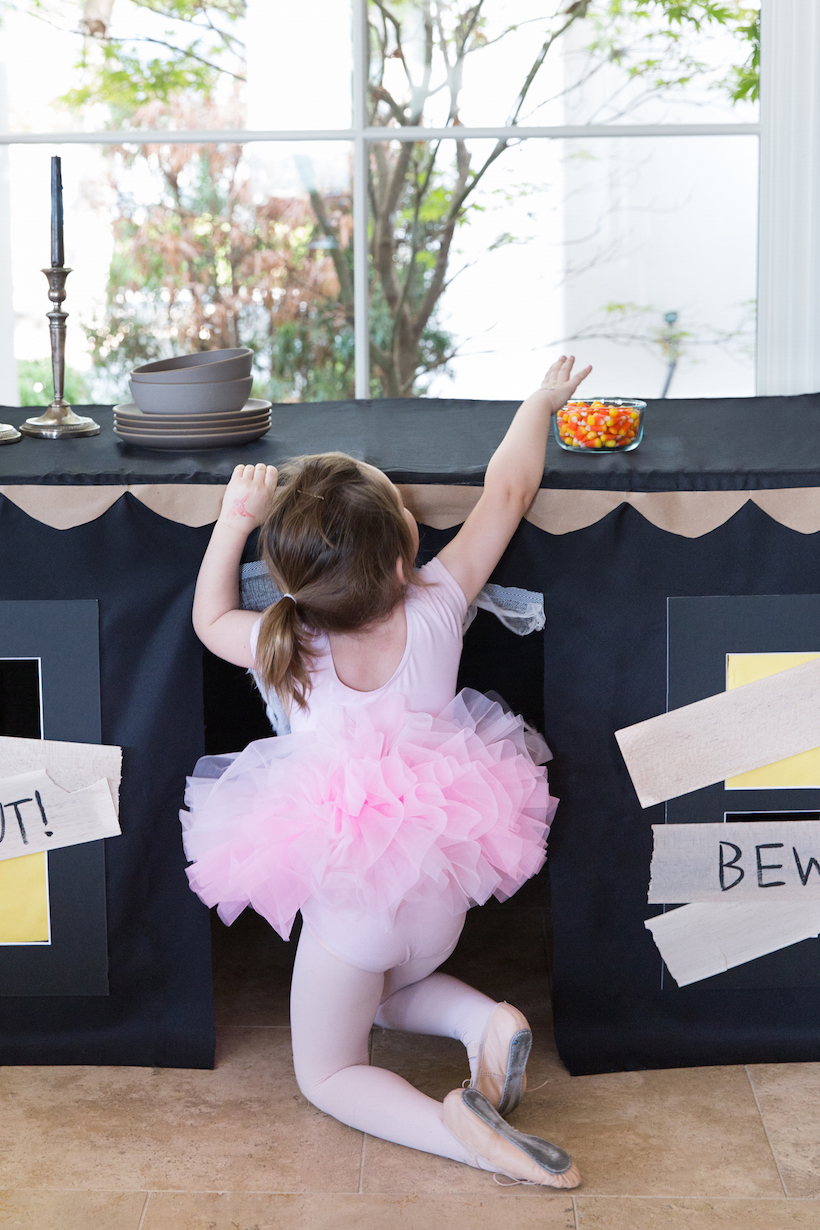
I don’t think our behavior was special or unique — I’m realizing that just about every kid I know under the age of 5 likes to hang out under kitchen tables! It makes for the perfect little hiding place, and just like my dog seeks refuge there in anticipation of dinner scraps, so do little kids, anxious to grab at ankles and surprise dinner guests.
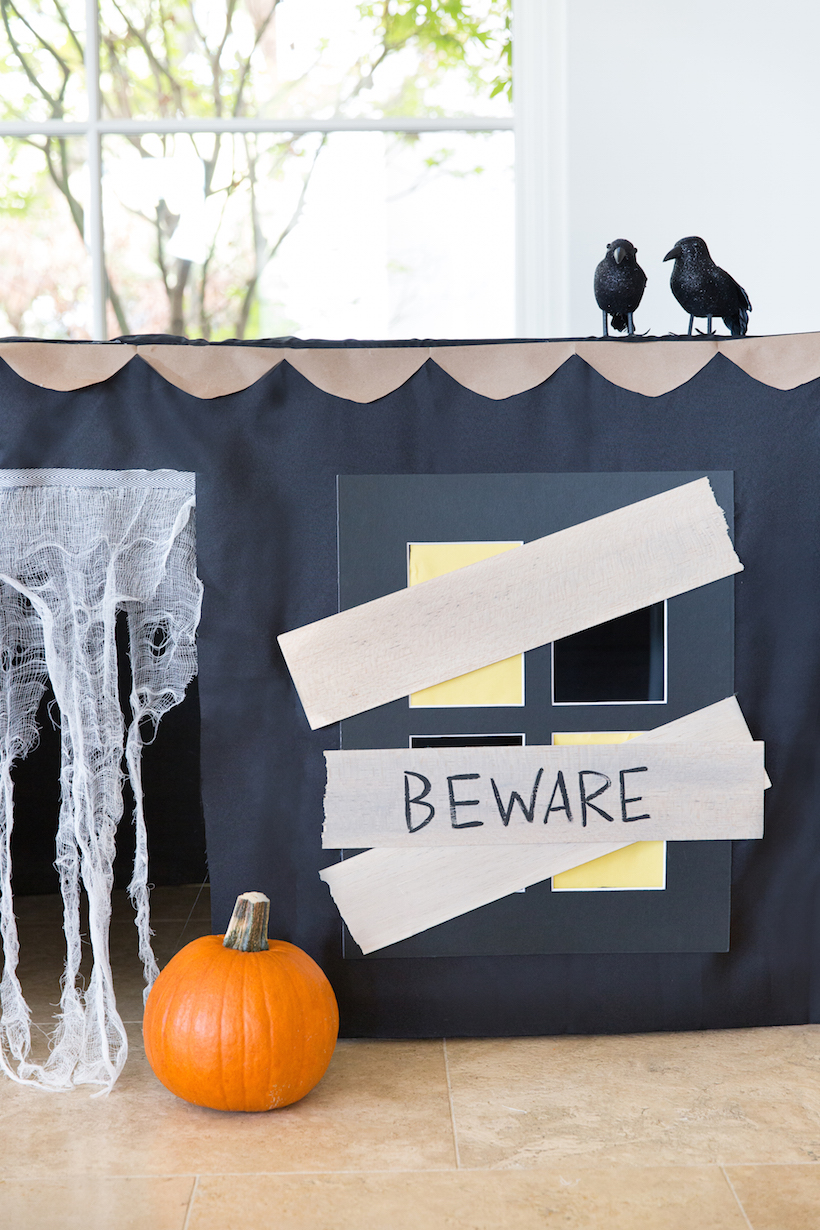
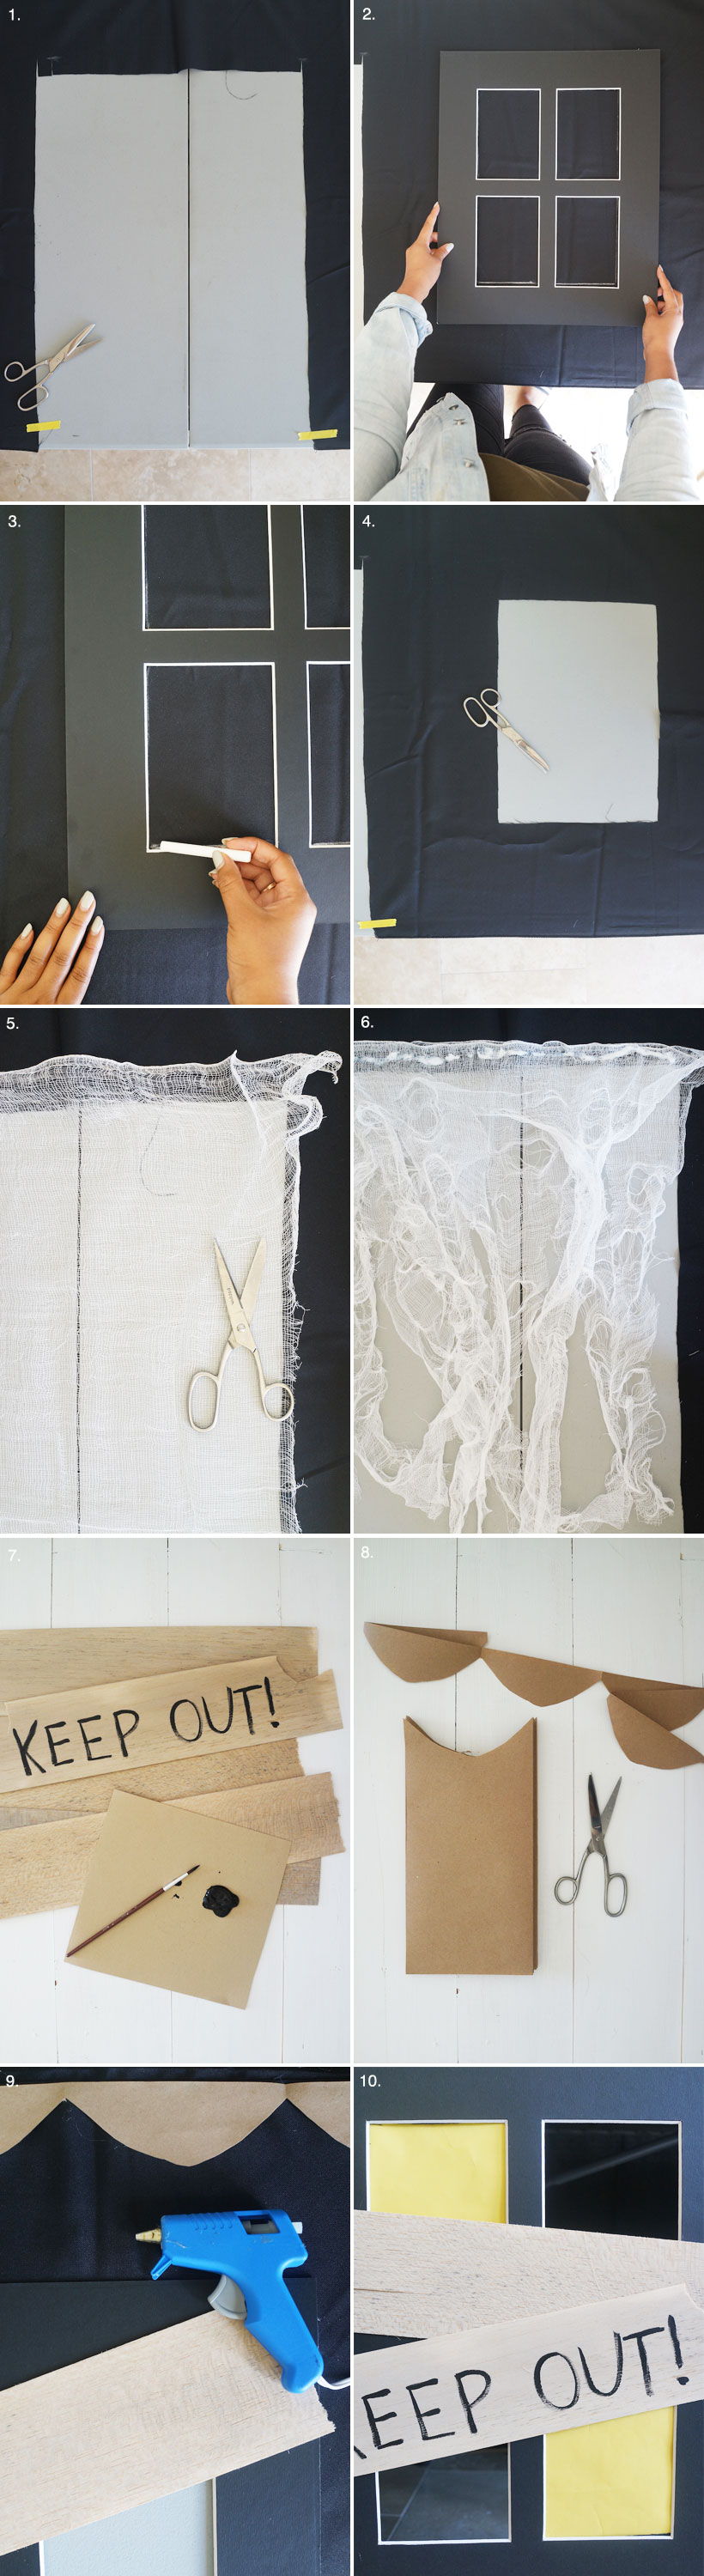
With that in mind and Halloween on the horizon, we created this most fun do-it-yourself tablecloth turned haunted playhouse. Let’s just say, the thing was a smash hit. Keep reading for the easy-to-follow instructions, then kill two birds with one stone when you break this out at this year’s Halloween bash: kids will absolutely love their creepy hideaway, while adults will be pleasantly surprised to find the little ones out of site all party long.


So cute Chanel!
Super cute idea!! Love the foot grabbing and candy corn eating photos 🙂
This is a totally adorable idea!
xoxoBella | http://xoxobella.com
Super cute! Tables make the best frames for forts and now haunted houses! My kids might be quiet longer than 5 minutes if I make them this… 😉
what an adorable idea!! Phoebe wants it to be a permanent installation in our house. 😉
This is a totally adorable idea!