
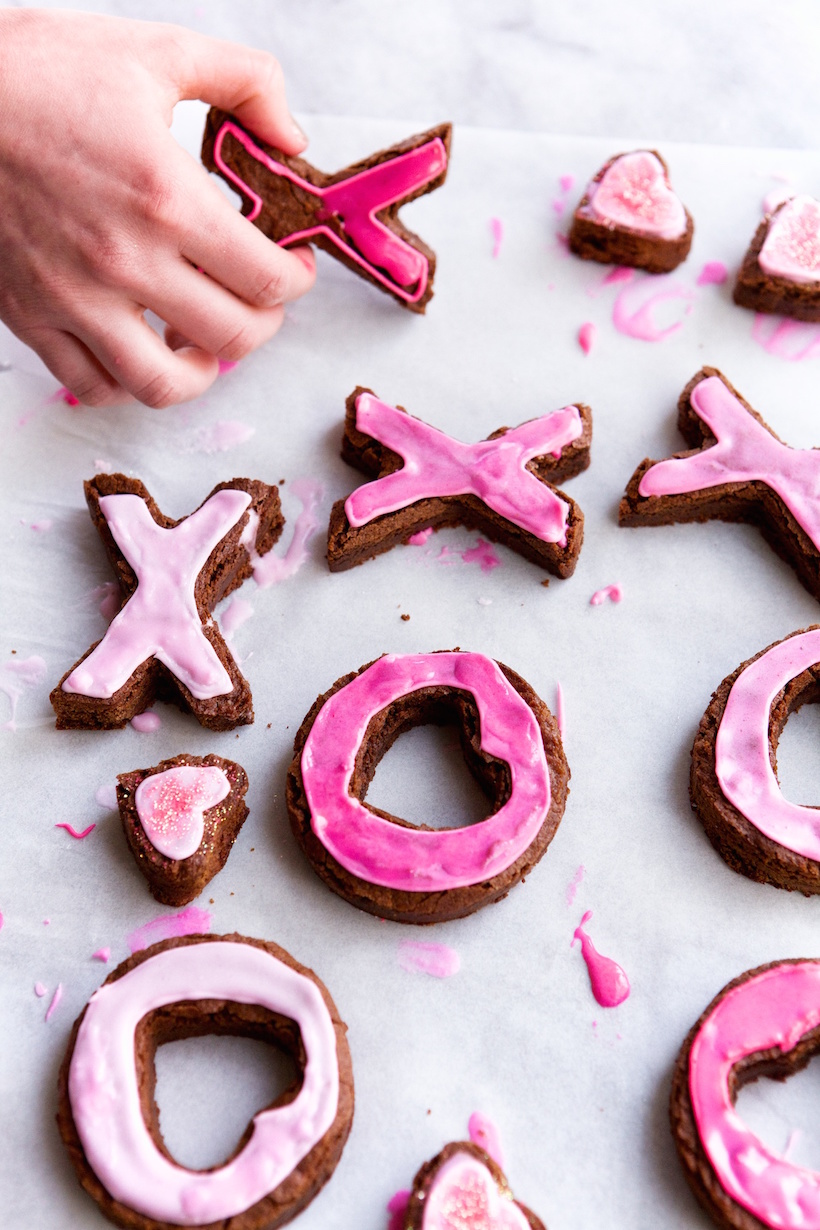
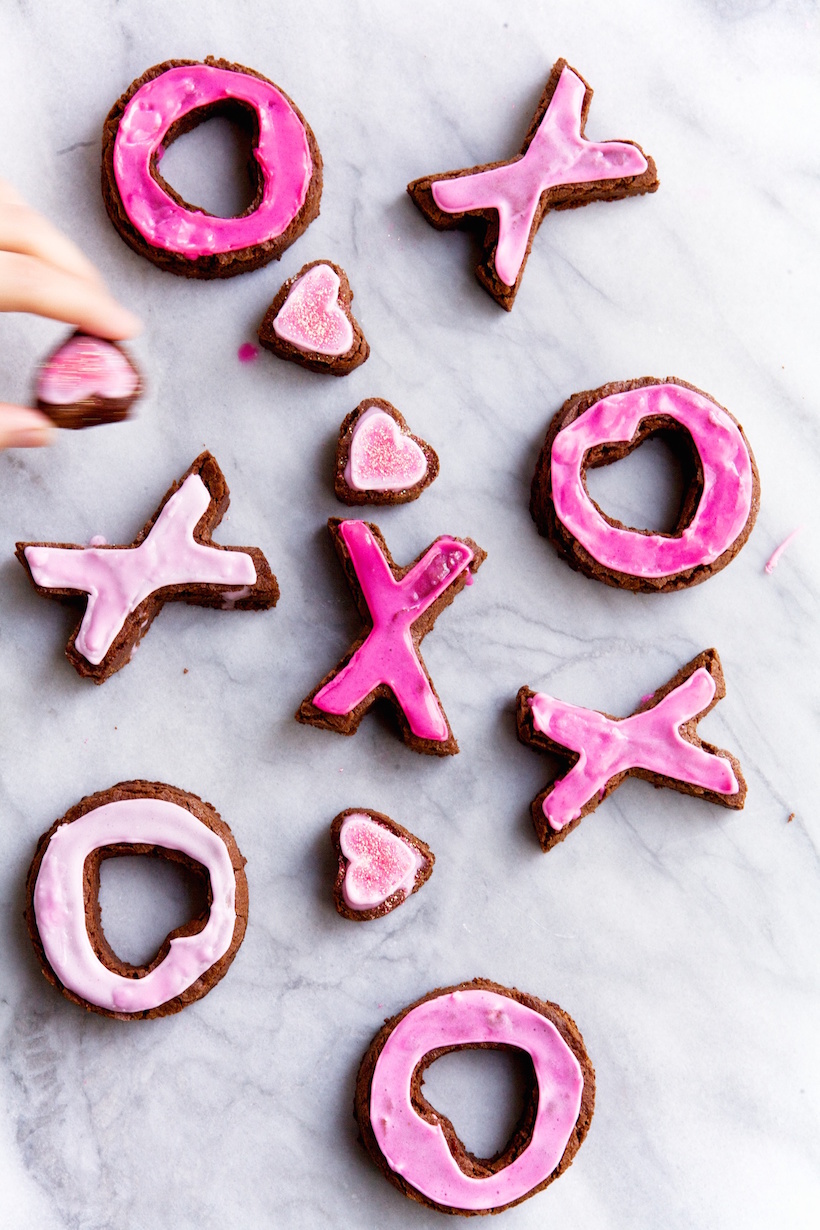
It would be impossible to celebrate love’s favorite holiday without our one true love…chocolate, of course! What better way to say “je t’aime” than these decadent delights adorned with an ombre royal frosting. Now’s the time to up your game by making these extra special — pull out your apron and make a homemade, but still super simple, batch that’s far superior to the boxed mix.
And the art of cutting out brownies that look as perfect as these? Turns out there are a few tricks. We experimented with different techniques to come up with the one that resulted in smooth tops and clean edges. See the recipe card below for our secret solutions. Love is in the air… as is the delicious aroma of these Valentine’s sweets!
*photos by kate lesueur.
XOXO Valentine's Brownies
Serves 8-10
XOXO Valentine's Brownies
Categories
Ingredients
- 4 ounces unsweetened chocolate (I used ghiradelli), broken into several pieces
- 3/4 cups (1 1/2 sticks butter), cut into several pieces
- 2 cups sugar
- 3 eggs
- 1 teaspoons vanilla
- 1/2 teaspoon salt
- 1 cup flour
for the ombre frosting:
- 1 lb powdered sugar, optional 1/2 and 1/4 cup to increase thickness
- 1 1/2 tbs Meringue powder, optional 1 1/2 tbs and 2 1/4 tsp to increase thickness
- 1/2 cup of water
- Pink food coloring or gel
- Pink Luster Dust
Instructions
- Preheat oven to 350 degrees. Line a 13 x 9" baking dish with aluminum foil, leaving an overhang on all sides. Spray with nonstick cooking spray, then set aside.
- In a large microwaveable safe bowl, melt together butter and chocolate on medium heat. Stop every 45 seconds and stir. When butter is melted and chocolate has a few chunks left, remove from microwave and use a whisk to stir together until smooth (this will help keep the chocolate from burning)
- Add sugar to the bowl and whisk together. Then add eggs, vanilla, and salt, and whisk until smooth. Whisk in flour until just combined.
- Pour batter into prepared baking pan, and bake for 35 minutes, or until toothpick inserted in center comes out completely clean. Be sure to monitor the edges while brownies are baking, over-cooked edges make create difficulty when cutting out shapes once brownies have cooled and been placed in freezer.
- Remove from oven and allow the to cool completely. It's important for brownies to completely cool because it helps prevent the brownies from breaking. If the brownies do break, don't worry – break-free brownies are helpful when icing.
- Once cooled, gently use foil to lift brownies out of pan. Then place in the freezer for 30 minutes to slightly harden.
- Spray both sides of cookie cutters with nonstick spray (I used X, O, and small-heart for center of O's) when cutting out brownies. When removing the O's center, it might be easier to do so while O-shaped cookie cutter is placed around the brownie (to prevent damaging the outside shape).
To make the the ombre frosting: (I used a simple royal icing adapted from this post, which includes a great visual tutorial to reference.)
- With a hand or stand mixer, combine 1 lb confectioner’s (powdered) sugar with 1 1/2 tablespoons meringue powder (I used Wilton’s brand) on low speed. Increase the speed to medium, and add water. Increase speed to medium-high, and mix for 2 minutes. Icing will thicken.
- Set out 2 medium sized bowls– one for mixing a thicker icing to create the outline on the brownies, and the other for mixing a thinner consistency that allows for the icing to “flood” the brownies and create a smooth finished product. This thinness is created by mixing just a few drops of water into the icing. You may want to transfer the icing to an air-tight container in order to prevent it from drying!
- Mix about one drop of pink coloring into icing and created the thicker and thinner versions. If you would like to recreate my 'ombre' icing, add coloring into the 2 bowls of icing in stages… a little food coloring goes a long way. If too much coloring is added initially, the final bright pink won’t pop against the other shades!
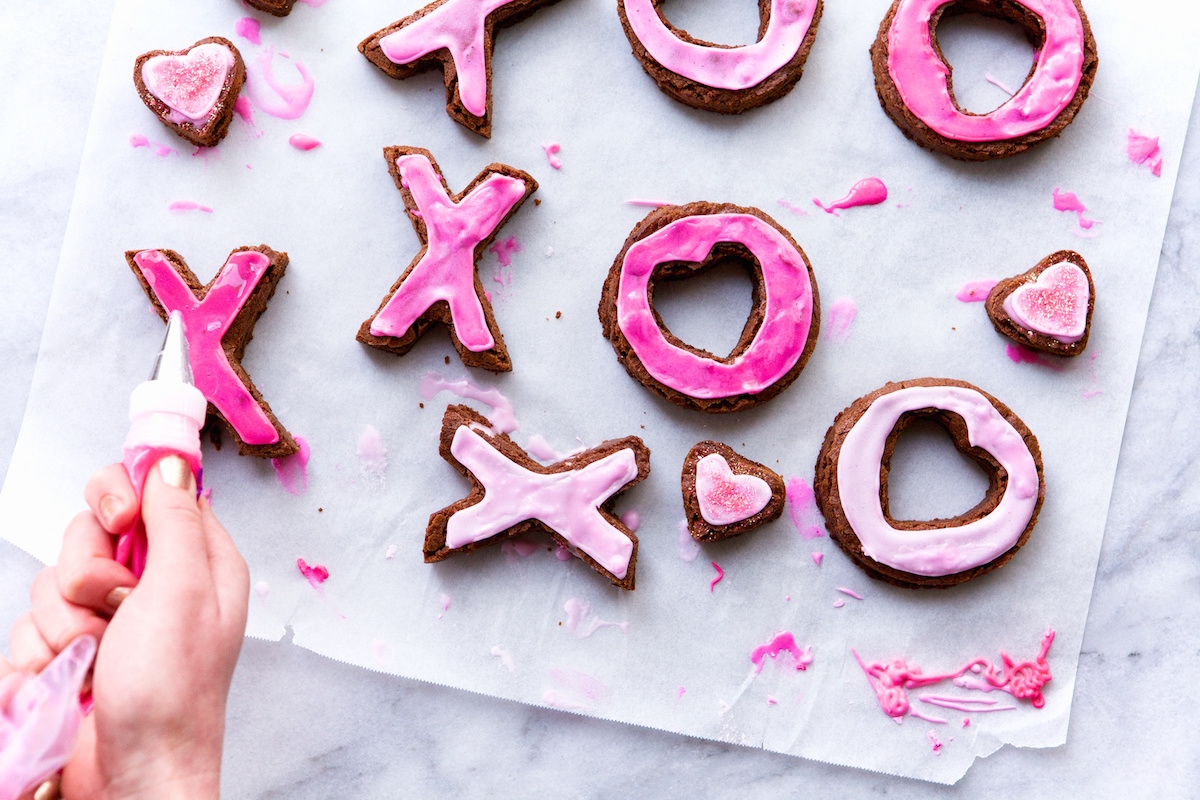
- Put the icing into piping bags. I used a #2 tip for the outline and a #4 tip for the flooding, but a #3 tip would work just as well. (Wilton also makes disposable icing bags that are extremely handy for projects like this)
- Start piping the border on the edges of the first XO brownie… Be sure to take your time if you want to create a clean outline. Allow icing to dry for 30 – 45 minutes...this creates the solid barrier necessary before “flooding” and also helps to prevent the thinner icing from seeping.
- If you’ve decided your best XOXO brownies should be just one shade of pink, proceed to outline the border of each brownie until completed and allow time to dry.
- If you’d like to create my ombre look, add one drop of food coloring to your thicker icing after you have iced 1 X and 1 O. Repeat this step after icing each set of X's and O's. If you've purchased disposable icing bags, remove the Wilton tip from initial piping bag, re-prep a fresh bag, and fill with your succeeding shade of pink. It requires about 8 piping bags total to complete this step for both sets of icing. Allow the outline to dry.
- Though tempting to add color to both icings simultaneously, wait to add color to your thinner icing until after flooding 1 X and 1 O— we want each shade of pink to match its outline! Writing down the number of drops added at each stage helps with remembering when coloring the thinner icing.
- To flood, begin by filling in the area central to the lines of your outline. Use the border as your guide, and create an outline within the border and repeat until the entire brownie is flooded. To complete the ombre icing, add coloring to you thinner icing in increments. Using the same process as coloring the thicker icing— remove the Wilton tip from initial piping bag, re-prep and fill fresh bag, and repeat.
- If you’d like to add some luster, now’s the time. Sprinkle some edible glitter on top of icing and allow to dry. I added glitter to the heart-shaped brownies, but feel free to get creative! Set aside the frosted brownies to dry (the fridge can prevent from the brownies becoming dry) For the icing to set properly, allow the brownies to dry for 4-6 hours. Enjoy!
Tips:
- If you find that your ‘outline' icing is too thin — start by adding an additional 1/4 cup of powdered sugar and 1 1/2 tbs of meringue powder to the thicker icing only, using a hand-held mixer. It should thicken however, if you find that the icing is still too thin then add another 1/4 cup of powered sugar and that should do the trick. If you do need that additional 1/2 cup of powered sugar, it might be best to go ahead and add 1/4 a cup of your powdered sugar and 2 1/4 tsp to your ‘flooding’ icing as it might be too thin and pass through the barrier of the outline.
- If the icing is not completely smooth, there is an easy fix! Gently hold the brownie, and carefully shake back and forth. If the icing remains unsmooth, wait 1 hour until the thinner icing is slightly set and repeat the flooding process.


Beautiful!!
LOVE this! You always showcase the most creative desserts. This just made me want something sweet before breakfast!
http://www.livinginsteil.com
I love how this turned out. I really like the look of Ombre frosting!
This is SO cute! Love it! I want some now!!
The Office Stylist
http://www.theofficestylist.com
These are both adorable and delicious!!
OMG these are so cute! and look delicious!
xxx
http://www.chadesofchic.com