 Can we all agree that one of the hardest parts of being a modern woman (that guys just don’t appreciate at all) is how much hidden time and effort goes in to maintaining long hair? We need our blowouts to last — at least for a couple of days. And while we love a good professional appointment as much as the next gal, sometimes we just don’t have the time or budget to allow it. So we’ve teamed up with stylist Lauren Phillips of Sabia Salon in Austin to teach us how to blow like the pros. Her secret? Divide and conquer. “This is a great way to tackle your hair styling conundrum at the beginning of the week because it will last you a few days and you can skip the blow dry bar appointment! It’s all about using the right product and the divide-and-conquer method takes the difficulty out of this DIY blowout.” Model Ane Urquiola Alberu was kind enough to lend us her long locks to demonstrate the method. Read below to discover Lauren’s amazing technique for an at-home blow out that will start your week off smooth:
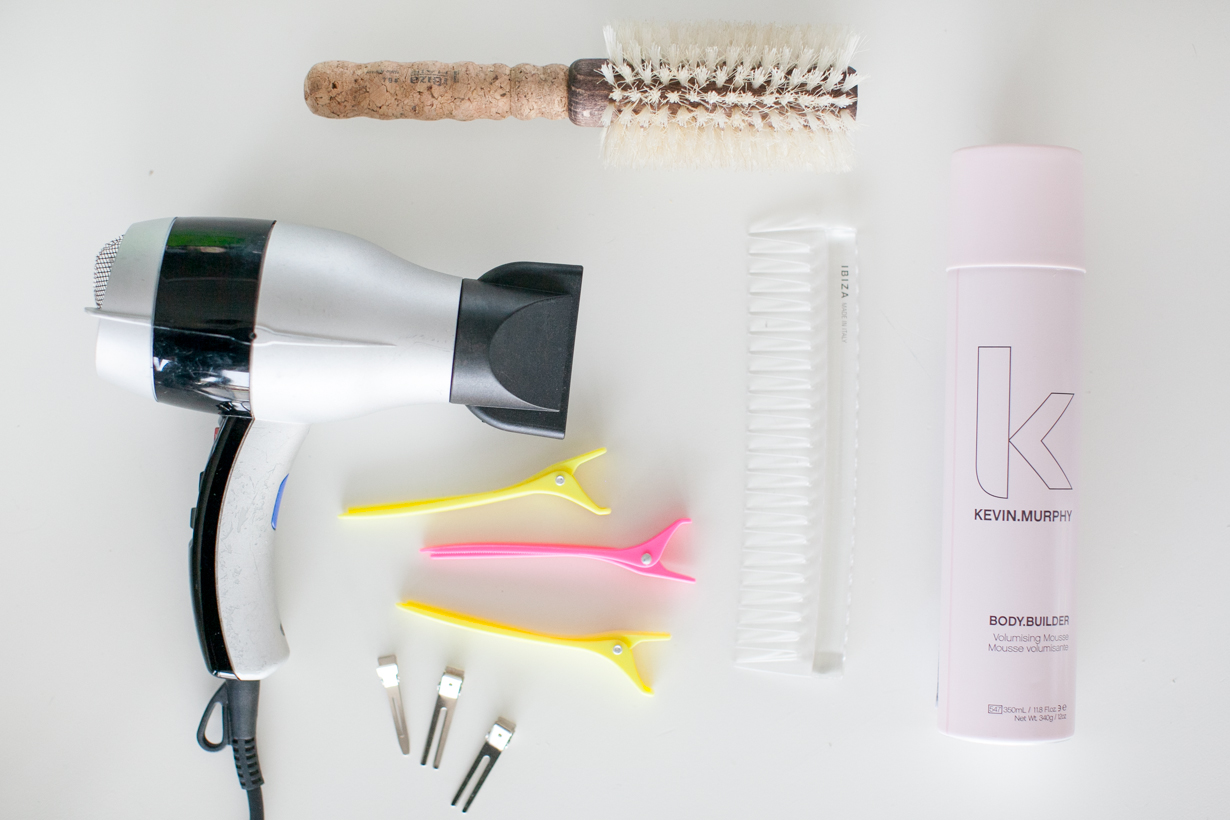
SUPPLIES:
- hair dryer with concentrating nozzle attachment
- round brush
- pin curl clips
- sectioning clips
- large tooth comb
- kevin murphy body builder volumising mousse
DIRECTIONS:
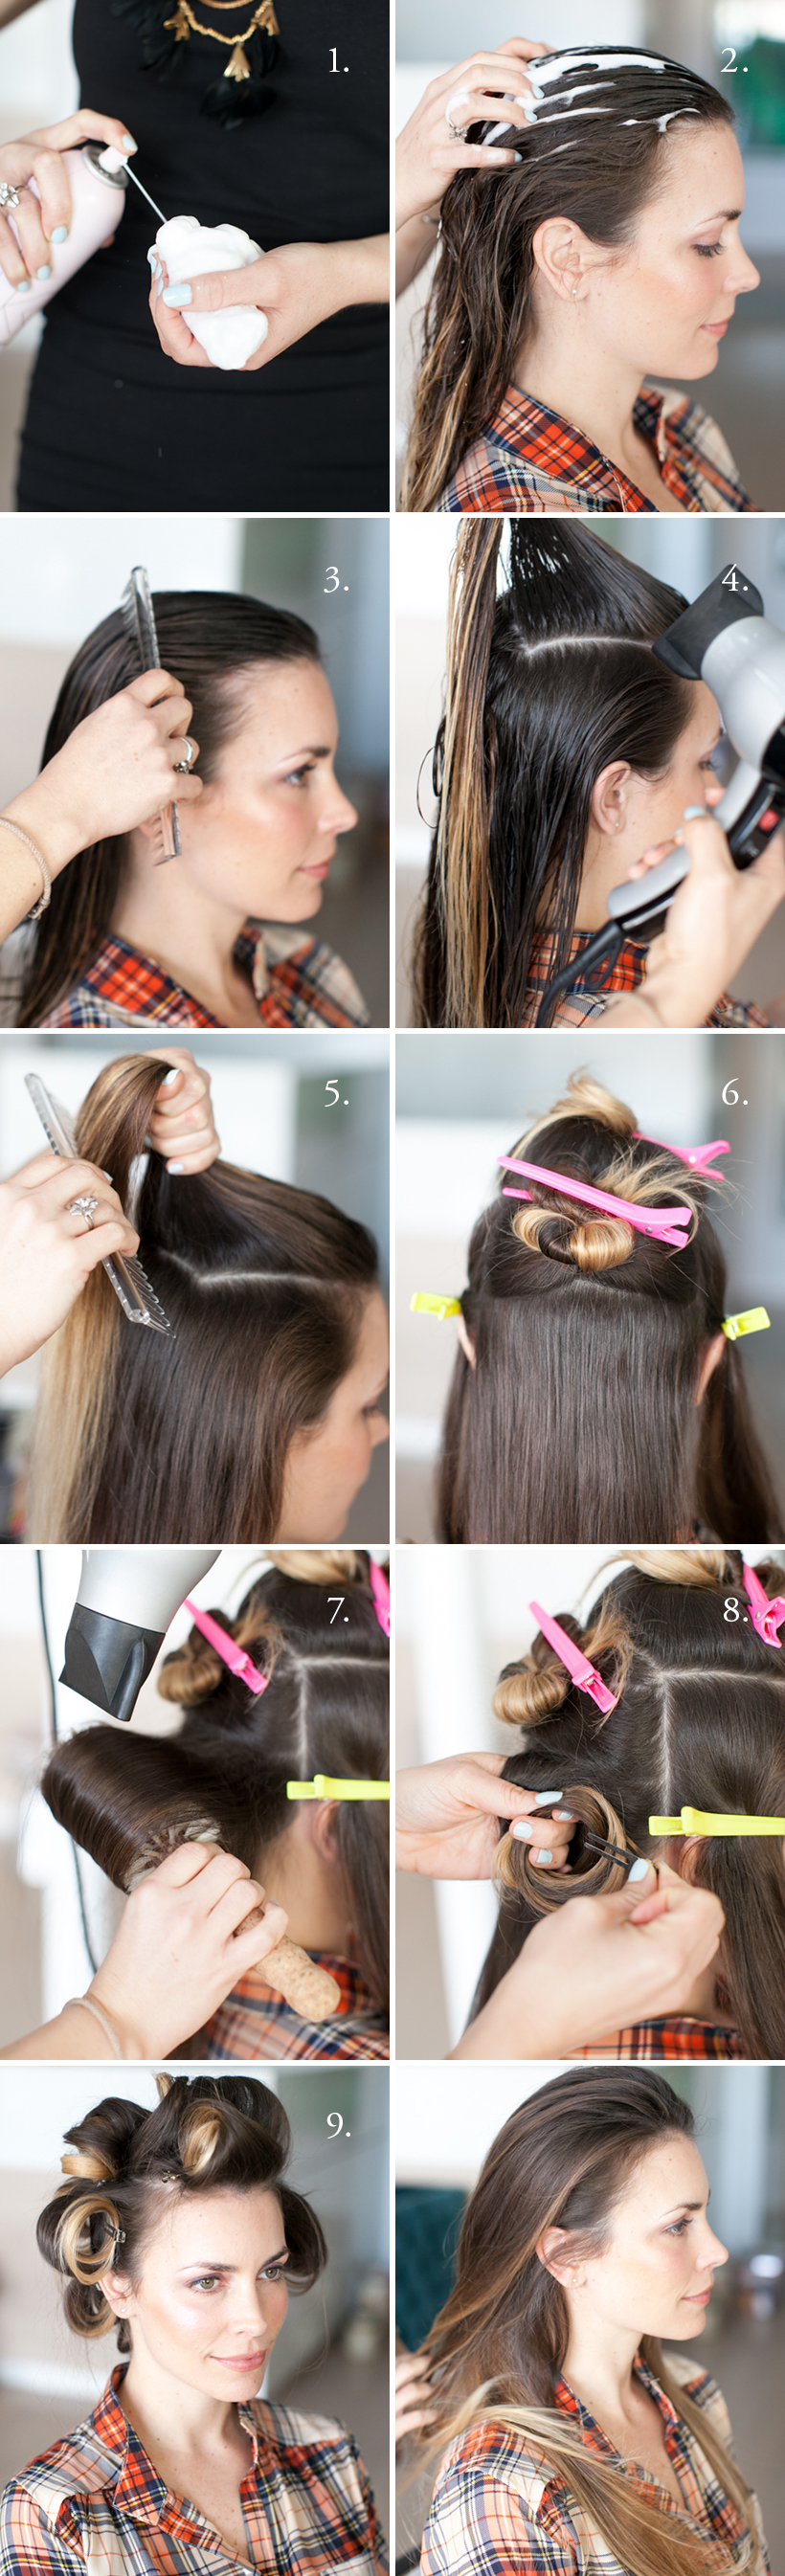
- Start with freshly washed and lightly conditioned damp hair. Comb out tangles and squeeze excess water out by twisting hair and ringing water out from the top to bottom with your hands. (This saves time!)
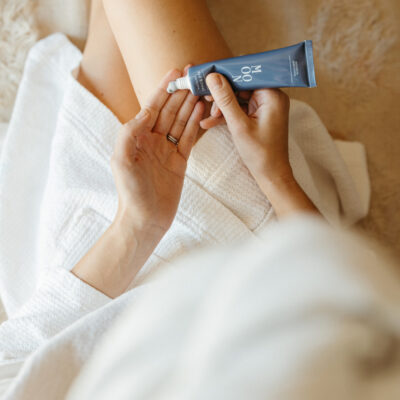
- Apply Kevin Murphy Body Builder evenly throughout hair. This step is important because it gives your hair soft pillowy volume and heat protection since you will be using high heat and need the hold. Make sure you use enough so that your hair has product from root to tip.
- Use a wide tooth comb to lift out a “u” section on the top of your head and blow dry at the roots using tension. Blow dry while pulling up on the hair so that you start building volume at the roots right away. This will ensure long lasting volume and less work with the brush later.
- Repeat this pre drying of the roots on the remainder of the hair using your hands to create tension and direction at the root.
- Once the hair is 80% dry, divide the hair with your comb into 6 neat sections.
- Create an ear to ear parting and then subdivide the front and back sections and secure with clips. I like the twist the hair into a coil to keep it tidy.
- Now starting in the back (hardest to reach first!) blow dry using a quality round brush made for your hair type that has boar bristle. (this is important because the metal bristles will cause breakage) I like Ibiza – they have comfortable cork handles and come in a variety of boar bristles for different hair types. This type of brush will smooth and give volume without tearing your hair.
- Use high heat and aim the blow dryer nozzle straight down for ultimate glossiness. This ensures that the cuticle lays flat, therefore making it less susceptible to frizz and dullness.
- After each section is completely dry with the round brush, use pin curl clips to set the hair. Simply coil the hair and clip right on the base of the coil for the most volume. This last step is crucial for the blow dry to be long lasting- the hair sets in the coils, cooling off completely before you take them out-the longer they set the better!
- Once the hair has totally cooled, take out the clips and shake it out. Finish with Kevin Murphy Session Spray for more hold or a shine serum such as Balmain Argan oil serum for dryer or coarser hair.
Lauren’s Pro Tip: “To make your blowout last longer, use dry shampoo on the roots before a workout and sleep with hair in a softly coiled top knot to keep the volume and bend and reduce bed head,” she says. “Lastly , deep condition once a week and give your hair a few days off by using the DIY blowout technique!”