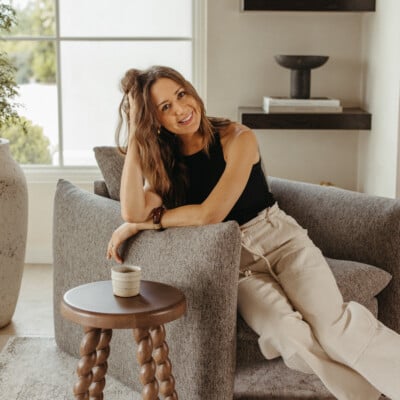
Given the amount of time we spend sharing fitness tips around the office and going to workout classes as a team, it’s a wonder it’s taken us this long to dedicate a regular series to staying fit. Whether you’re a mindful yogi, a die-hard Crossfitter, or finding yourself out of the workout game altogether and in need of motivation, getting that little nudge online in the form of an inspirational Instagram account or simple instructional video can in itself be the burst of energy needed to get you through the work day and into the gym. And even if exercising in public isn’t your thing, there are plenty of resources out there to help get a great workout at home, which leads us to today’s inaugural post: six easy yoga poses designed by our favorite guru, Kate Waitzkin. You can do these in the comfort of your own living room (read: in front of the TV), and when practiced regularly, they can work wonders to relieve stress. The suggested props for these six moves are one bolster (or long, firm pillow), two folded blankets (or towels) and two blocks (or stacks of books)… click through to see Kate demonstrate each one, along with her tips for proper technique, and we’d love to hear your comments about our new, instructional fitness series!
*photography: Jessica Attie; location: Mod Fitness in Austin, TX

Supported Child’s Pose
props: bolster or 2 folded blankets
Start kneeling on a mat or blanket and place your bolster length-wise in front of you. Take your knees hip-distance apart and bring your big toes together. Sit back onto your heels sliding the bolster in between your legs. Gently lay your torso onto the bolster and turn your head to one side. Take slow, deep breaths and allow your body to drop completely into the support. Stay here for 3-5 minutes making sure to alternate the way your head is turned after a few minutes.
Tip: If you have discomfort in your knees or if your hips don’t rest comfortably near your heels, place a rolled towel under your seat.

Supported Downward Facing Dog
props: 1 block
Start on your mat on hands and knees. Place a block on the highest level in line with the center of your chest. Bring your knees directly under your hips and your hands slightly forward of your shoulders. Make sure your wrist creases are parallel to the front edges of the mat, fingers spread wide, palms pressing evenly into the mat. Tuck your toes under, lift your hips up and back into Downward Facing Dog, and bring your forehead to rest on the block. You may need to adjust the placement and/or height of the block until you can fully rest the weight of your head into the block while keeping the natural curve of the neck. Press the top of your thighs back and your heels down. If you feel any strain in the lower back, take your feet wider and/or bend your knees. Take slow, deep breaths and stay here for 1-3 minutes. To come out, lower your knees to the floor and rest in Child’s Pose for a few breaths.

Supported Bound Angle Pose
props: bolster, 2 blocks (or pillows), 1 blanket
Sit in the middle of your mat and set up your bolster length-wise behind you. Place a folded blanket at the back edge of the bolster. Sit facing away from the bolster and bring the back of your pelvis up against the short edge of the bolster. Gently lower yourself back so that you are lying with your spine supported by the bolster, the back of your head supported by the blanket. Bring the soles of your feet together and take your knees wide apart. Place one block (or pillow) under each knee so the legs feel completely held. Hold for 3-5 minutes.

Supported Bridge
props: 1 block
Place your block next to you and lie down flat on your back with your knees bent, feet hip distance apart. Take a few deep breaths here then press your feet and upper arms down into the mat as you lift your hips up into a gentle bridge pose. Place the block directly underneath your sacrum, the triangular-shaped bone at the base of the spine. Start on the lowest block height and, if that feels comfortable, either stay here or consider raising the block up another level. Once you choose the height that is most comfortable and supportive, allow the full weight of your hips to drop into the block. Rest your arms alongside your body, palms facing up. Gently roll your shoulders underneath you to open the chest. Stay here for 3-5 minutes. When you are ready to come out of the pose, lift your hips off the block, move the block to the side and lower down one vertebrate at a time until your hips rest on the floor. Stay here for a few breaths then carefully roll to the side and press up to sit.

Supine Twist
props: folded blanket (optional)
Begin lying on your back with knees bent, feet flat on the floor. Exhale, draw both knees in towards your chest and wrap your hands around your shins. Take a few breaths here. Extend your arms out to a T shape, palms up. On an exhale, drop both knees to the left until they rest on the floor (or a folded blanket). Be sure that both shoulders stay connected to the mat. You may need to place a folded blanket under the legs/knees if the right shoulder is lifting off the floor. Stay here for 1 minute and gently come back to center. Repeat these actions taking the legs to the right.

Supported Legs-Up-The-Wall Pose
props: bolster or 2 folded blankets
Place your support about 6 inches away from the wall with the long edge facing the wall. Depending on your height, you may need to adjust this distance. Sit sideways on the support with your knees bent and one hip and shoulder near the wall. Slowly, lean back onto your elbows as you swing your legs up the wall then bring your shoulders and head down to the floor. The back of your pelvis/hips and low back should be supported by the bolster, and your sitting bones should “spill” over the edge of the bolster nearest the wall. Gently draw your chin towards your chest so the back of the neck stays long. Stay here for 5 minutes (or longer if you are comfortable!).
Tip: This pose may be done with or without the support (shown). If done without, be sure that your tailbone and hips are grounded on the floor, not lifting up, which may require you to move further away from the wall.

Kate Waitzkin is a mama, yoga + meditation teacher and writer living in Austin and has been teaching yoga since 2006. After living, studying + teaching yoga in New York and San Francisco for 12 years, combined, Kate returned to her hometown of Austin in 2012 with her three boys and husband and teaches public classes, private sessions and teacher trainings. Influenced by several traditions and numerous teachers, Kate’s own teaching encourages rhythmic, thoughtful movement, mindful awareness of alignment and breath, deep compassion and ever-present gratitude.