If you’ve been following along, you’ll know that our house renovation has been in the works for quite a while… and like most things in 2020, it’s changed and evolved quite a bit along the way. Although I’ve been sharing the BTS on Instagram, I thought it would be fun to post the full story of the planning process right here. But first, a little background, in case you’re new-ish around here.
Adam and I built our house 10 years ago – we started working on the plans the week after we got back from our honeymoon. It’s been the happiest home for us and full of incredible memories: countless pool parties, Thanksgiving dinners, and of course Phoebe and Henry have both spent their entire lives here. In many ways, it’s been our dream home, and I don’t think I’ve ever felt so attached to a physical place before. But after living here for a decade (aah how is that possible?!), both mine and Adam’s taste has changed in many ways; plus with a few big renovation projects under our belts, we feel like we know a lot more about design and construction than we did back then. So, we decided that this would be the year that we’d tackle some of the newer dreams that we’ve had for our home!
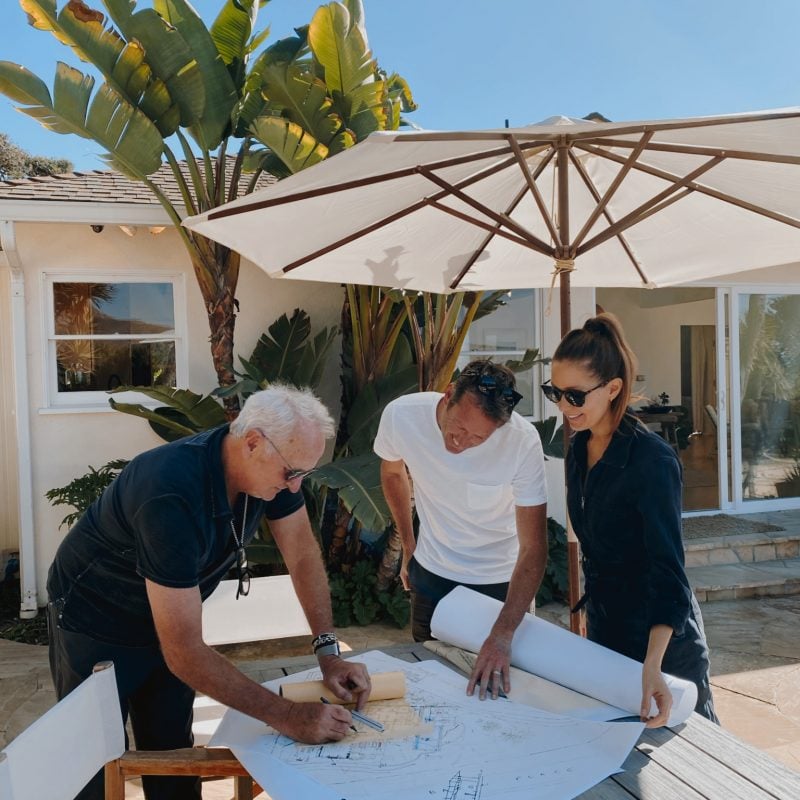
Last fall, we met with architects, Patrick and Paige of 787 Design Studio, and got going on what turned into pretty extensive renovation plans. My dear friend, designer Claire Zinnecker, worked up some fresh furniture layouts, and we brought our builder Monte Goertz in to start working through planning and permitting. Finally, when we were just about to start… Covid hit, and the entire project was put on hold. At first, I was really bummed – I had been so ready to get this show on the road and was excited about all the plans we had for the house. But the thought of being out of our home during quarantine was highly unappealing — as was the case for many, home became our refuge during this time. The delay ended up being a blessing in disguise, because all that time at home gave us a chance to appreciate the many things we loved about living here. We began to question whether we needed to pull off such an expensive, full-scale renovation on a home that we still loved.
So, as the saying goes, creativity was born from constraints. We shifted our thinking to focus on how we could change up just a few things that would give us the most bang for our buck – and not require us to be out of the house for 6 months. How could we use styling, decor, and furniture to freshen up the space, without actually knocking down walls or ripping out all the cabinetry? It was a surprisingly fun exercise to scale things back while still creating something that felt new, and we were able to break ground a few days before we left for Malibu — and wrap things up around the time we got home 5 weeks later.
So, with the completion of the project on the horizon, here’s the plan. We’re keeping our focus on three main areas: the living room, the kitchen, and our master bedroom. Watch the IGTV below to see it in action, and scroll on for my inspiration board, product links, and more.
View this post on Instagram
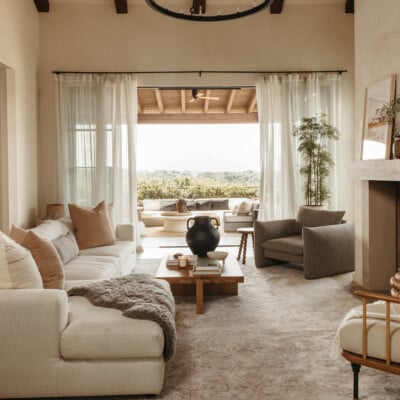
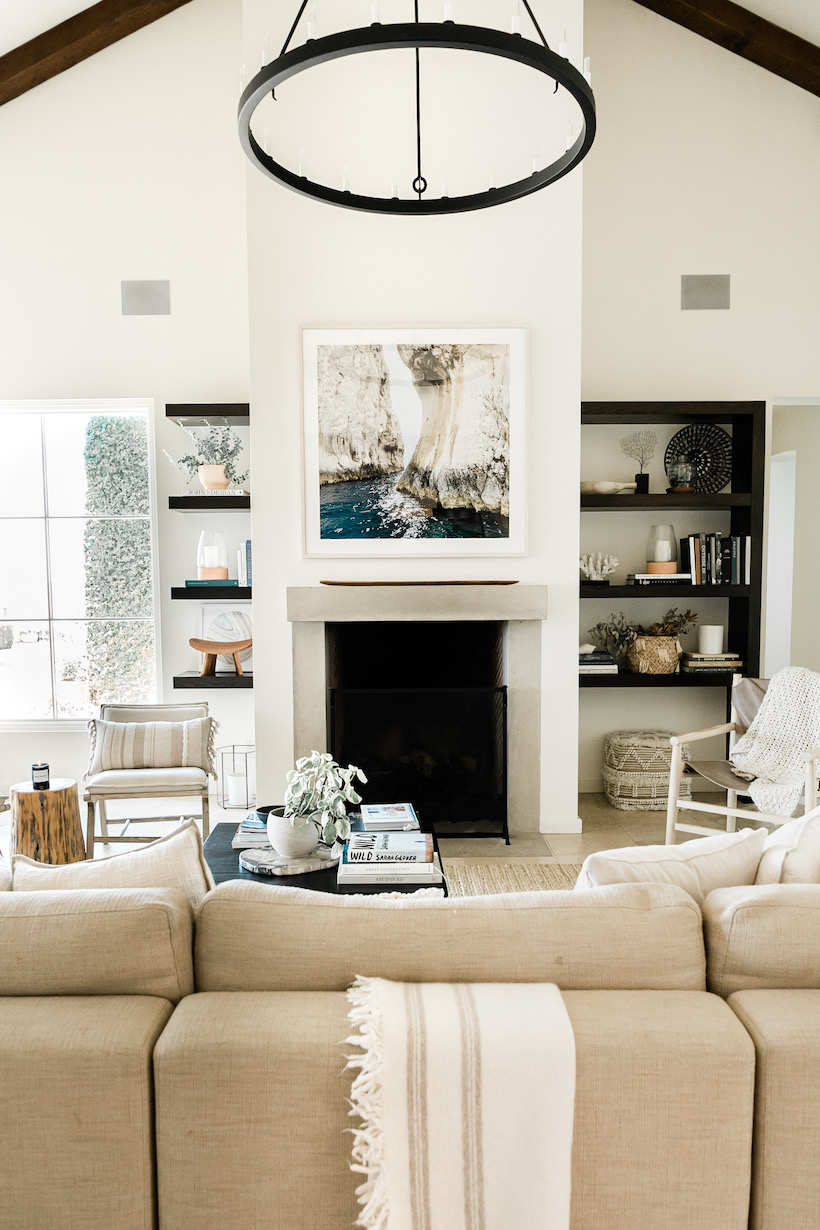
IN THE LIVING ROOM
1 – Plaster walls
The biggest change happening throughout the house is on the walls. I’ve long been obsessed with plaster walls, and we found a beautiful clay product called American Clay that we’re applying everywhere. I’m really excited about the beautiful earthy texture it’ll give our walls. I chose a warm neutral shade called Forté White.
2 – The floors
Over the years, our travertine tile floors have picked up a lot of grime that’s caused them to turn yellowish – plus we’re not big fans of the shiny finish that we chose when we first built the house. Rather than get new floors altogether, we met with a local stone care company who tested a sample of the floors with a technique called honing – with great results. The goal is lighter, more matte floors that feel fresh and clean – at a fraction of the cost of putting in all new flooring.
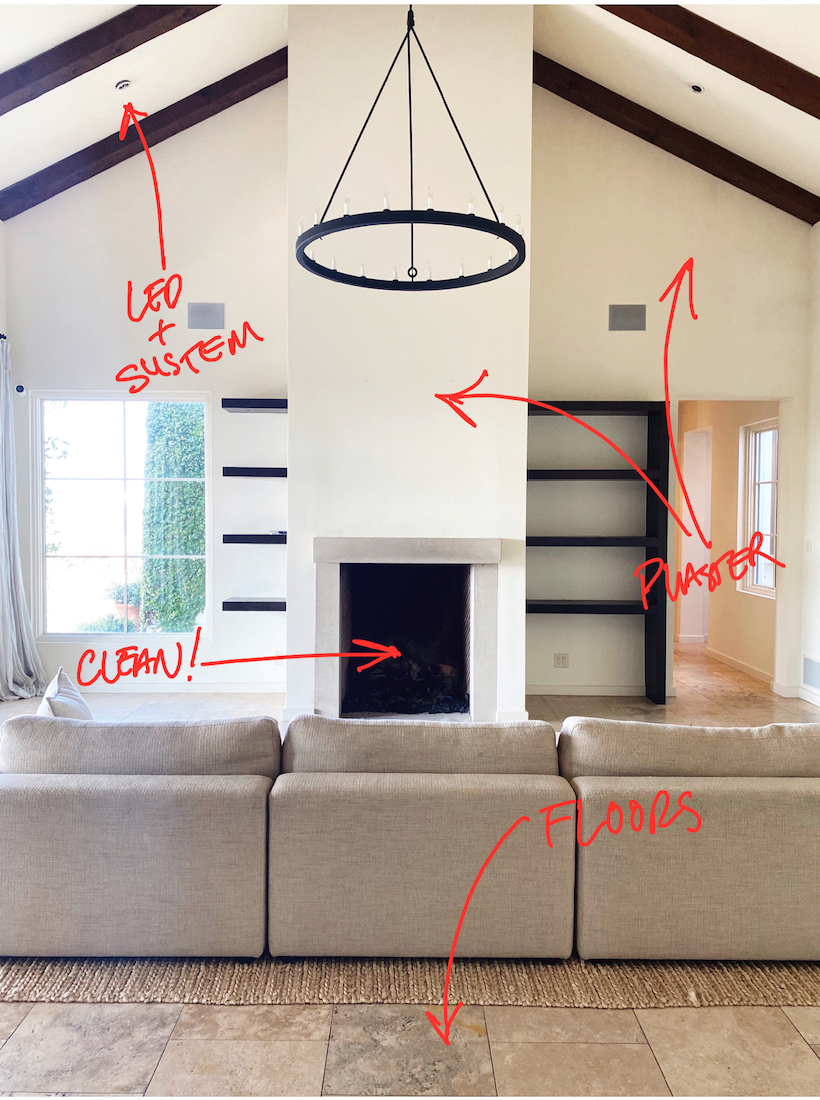
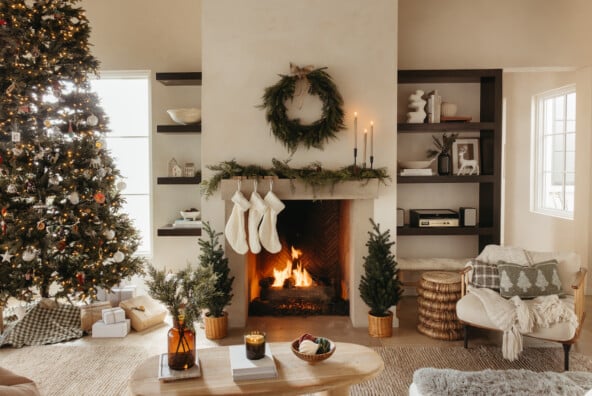
3 – Fireplace freshen-up
A small thing that’ll make a big difference is that we’re cleaning the inside of the fireplace! For $200, a technician will come out and clean the walls and firewood of all the soot build-up, hopefully returning the terra cotta tiles to their original warm shade.
4 – The furniture
After 10 years with our furniture in exactly the same place, I needed a fresh perspective on our furniture layout. Claire saved the day with a few different floor plans to help me think about how we could mix things up. She also helped me source fixtures and furniture, plus answered my countless texts asking for her opinions. Here’s the plan she created with, that we’ll be using as our guide…
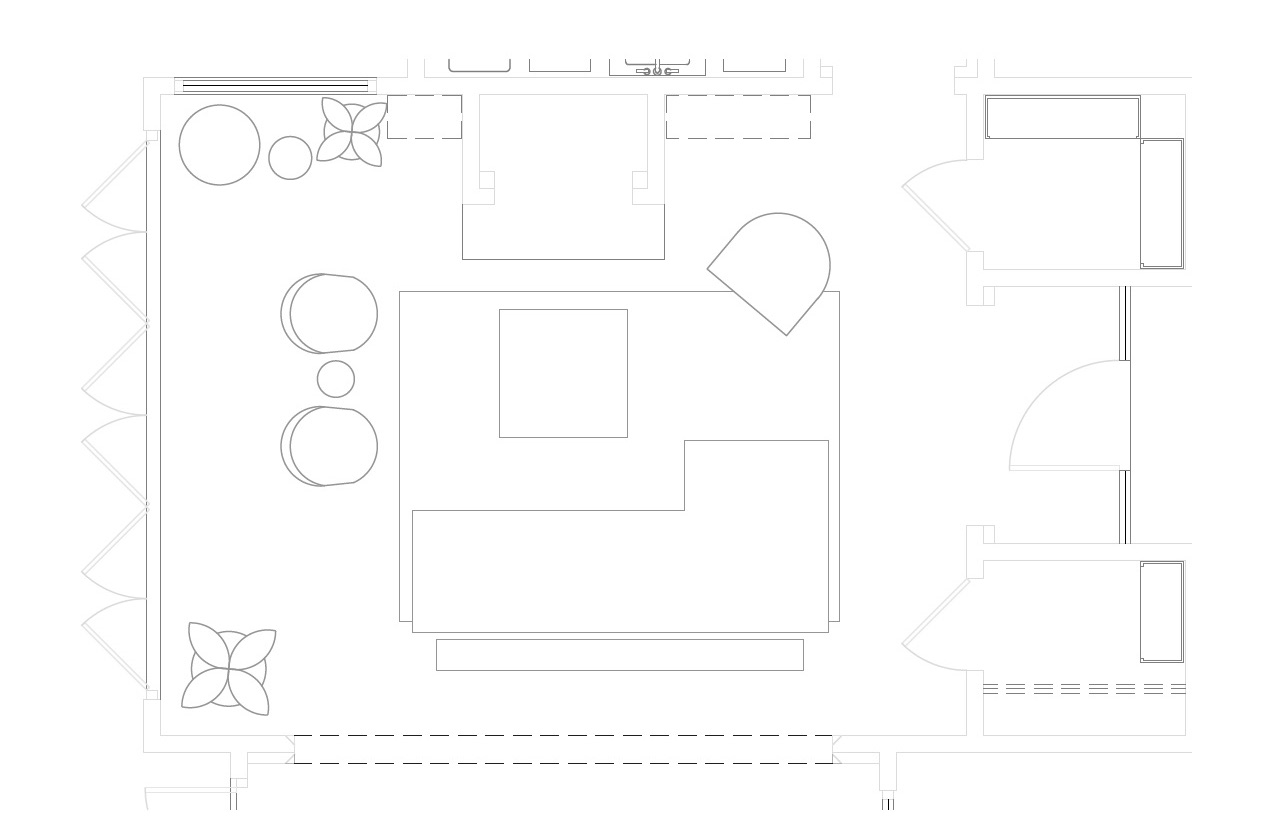
*furniture layout by Claire Zinnecker Design
As for the actual furniture, I’ve had so much fun choosing some new pieces that will completely makeover the vibe of this room. Here’s my inspiration board, including some of the furniture pieces I’ve got on order:
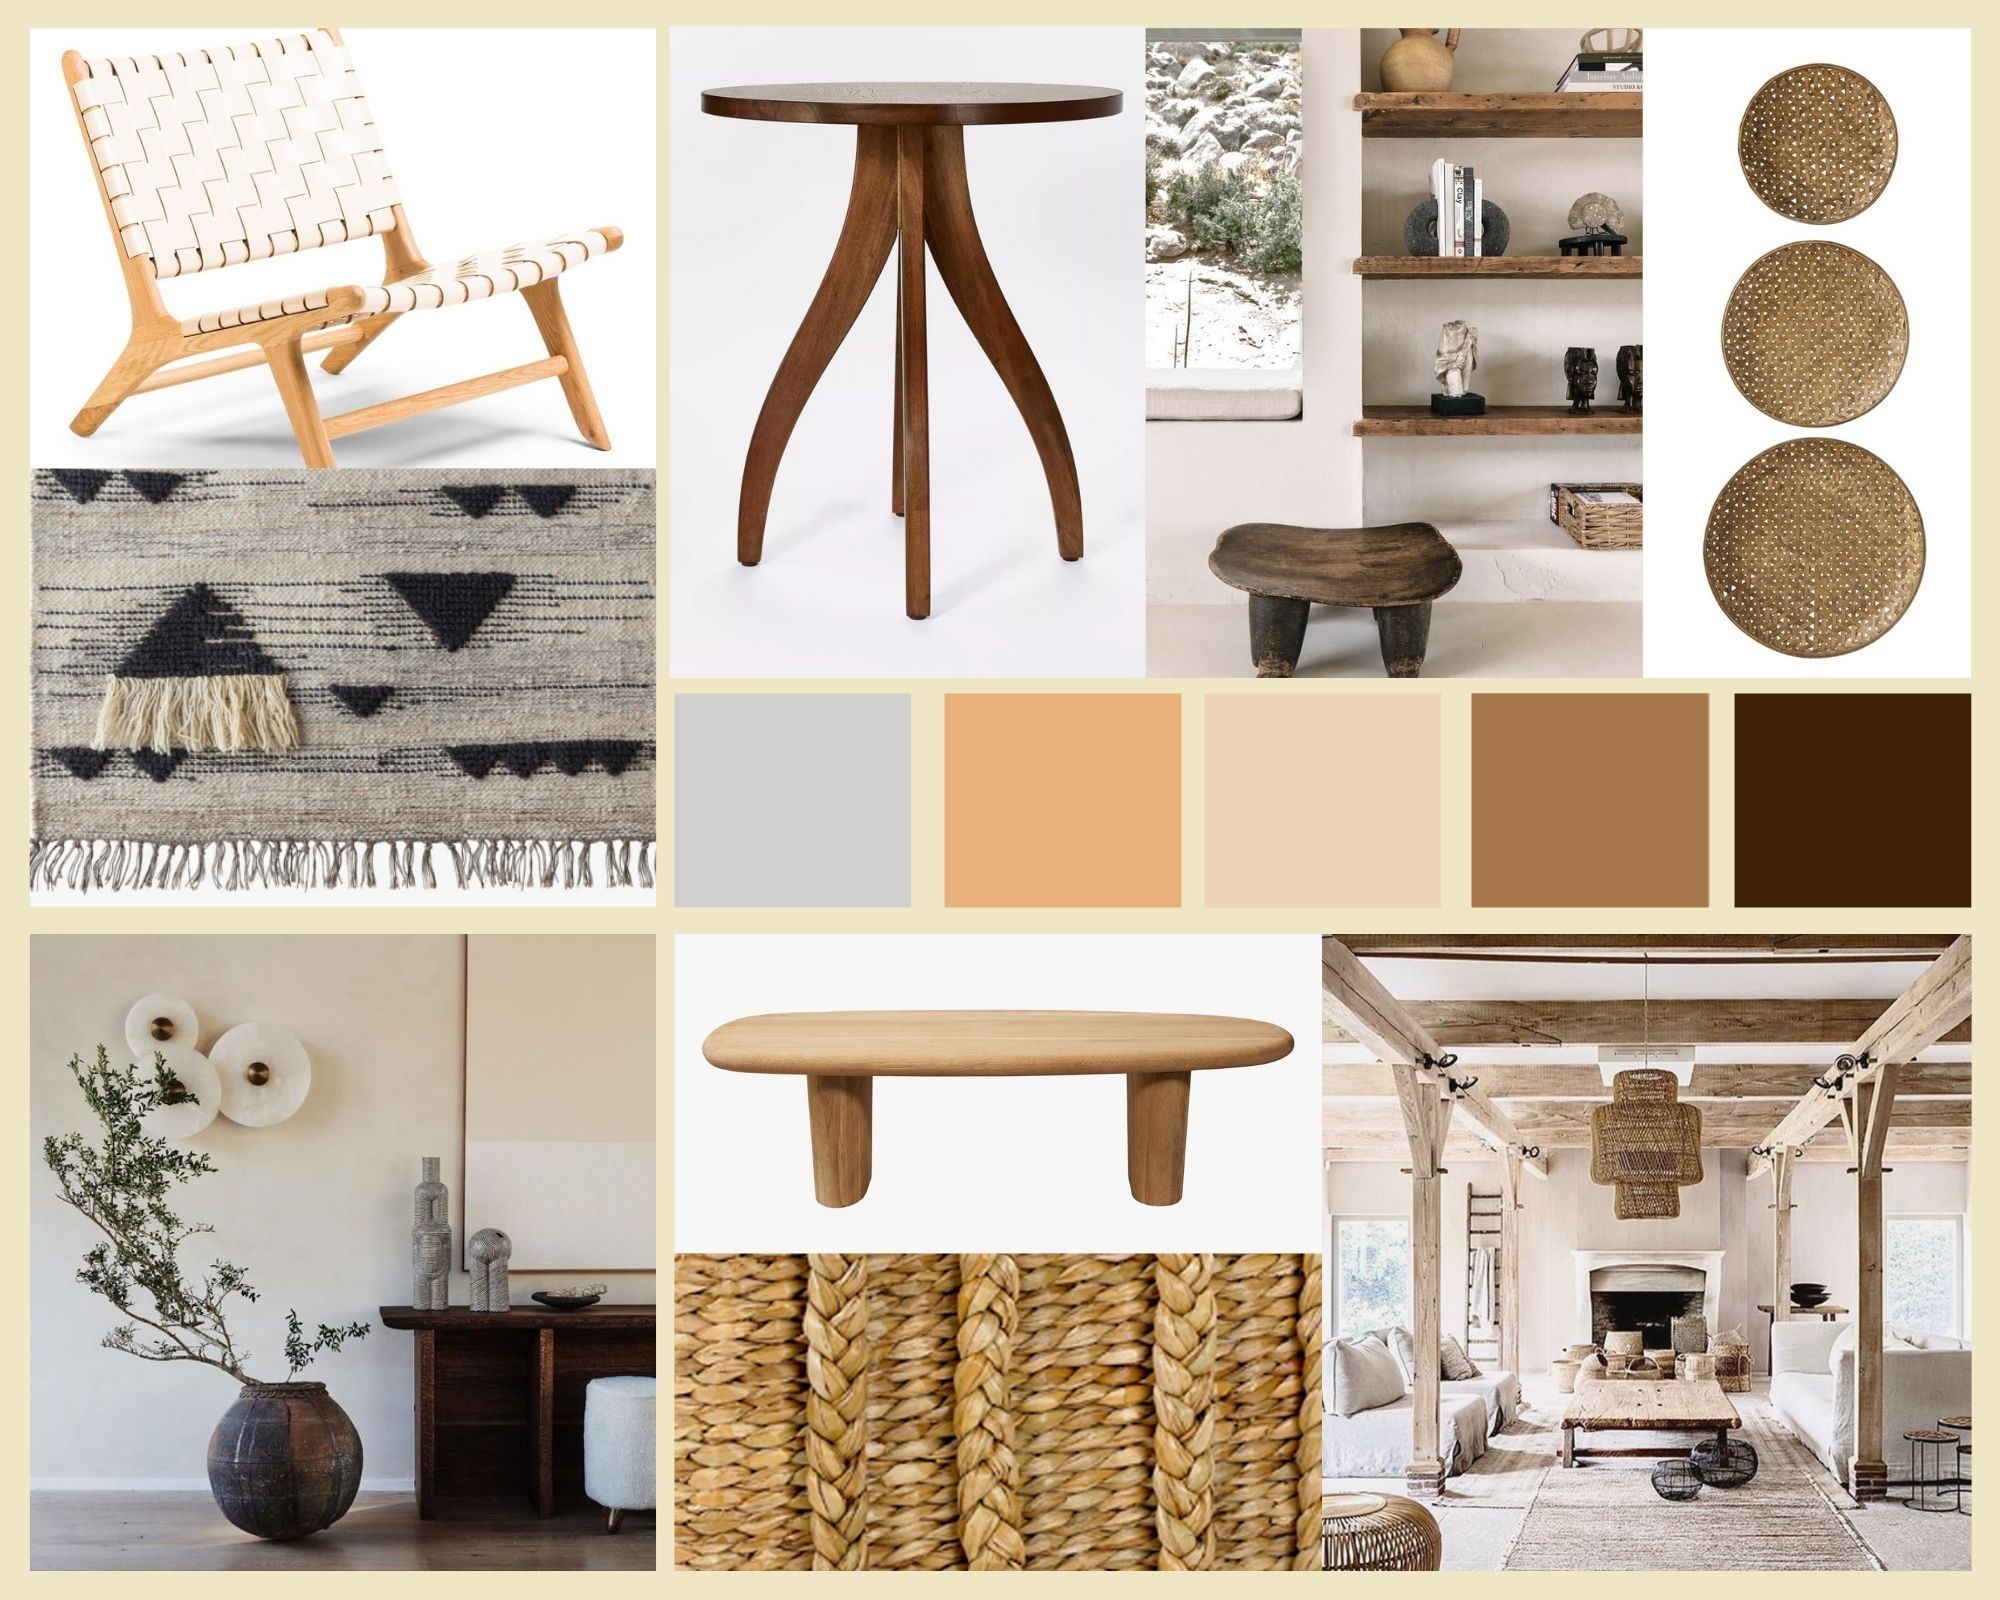
From top-left, clockwise:
Tanner Armchair, Barnaby Lane; Surfside Round Wood End Table, Target; inspiration from Villa Kuro, Tuvalu Bamboo Basket Set, Dear Keaton; inspiration by @sonjaveldafotografie; Briarwood Large Rush Basket, Dear Keaton; Aliso Coffee Table, Dear Keaton; inspiration by @colinking; Asana Ivory Wall Hanging, Dear Keaton
IN THE KITCHEN
The kitchen is where we’ve evolved our plans the most: originally, we were going to demo the existing cabinetry and replace with natural white oak throughout. The plans included an archway that would lead to a breakfast nook addition… which would also require demo’ing the cabinetry on the left side of the kitchen. After much thought and discussion, Adam and I decided to lean into the high contrast dark wood against white plaster, and see if we could translate that look in a way that feels more “us.”
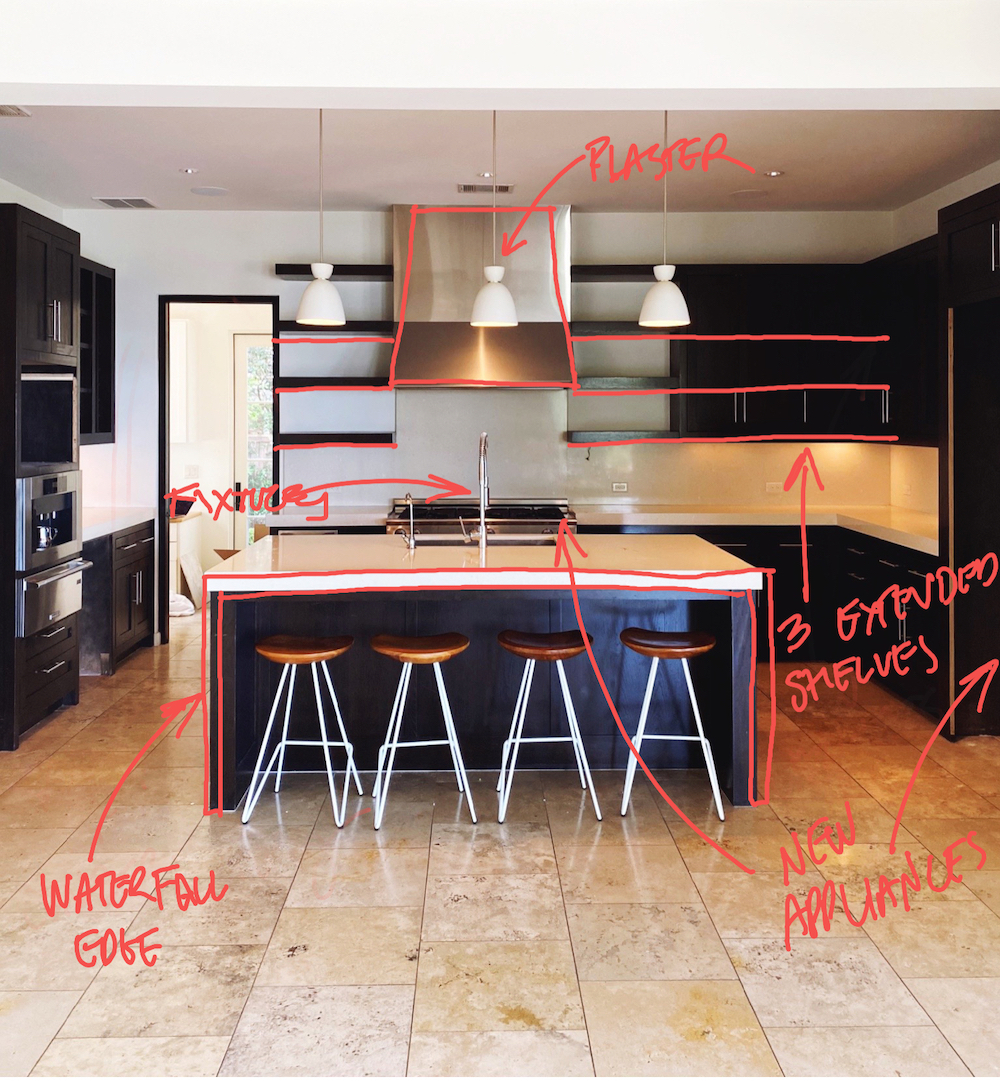
These are the main elements of the new plan:
1 – More open shelving
To prevent the dark wood cabinetry from looking heavy, I decided to demo the cabinets to the right of the hood, in order to extend the open shelving. This was a relatively inexpensive fix that will (hopefully) lighten and brighten the entire kitchen up a ton.
2 – Hood surround
I’ve been wanting to replace our stainless high-shine hood surround with something much softer and organic-feeling. With this image (below) as our inspiration, we designed a subtly tapered surround that would be plastered with the American Clay used in the rest of the house.
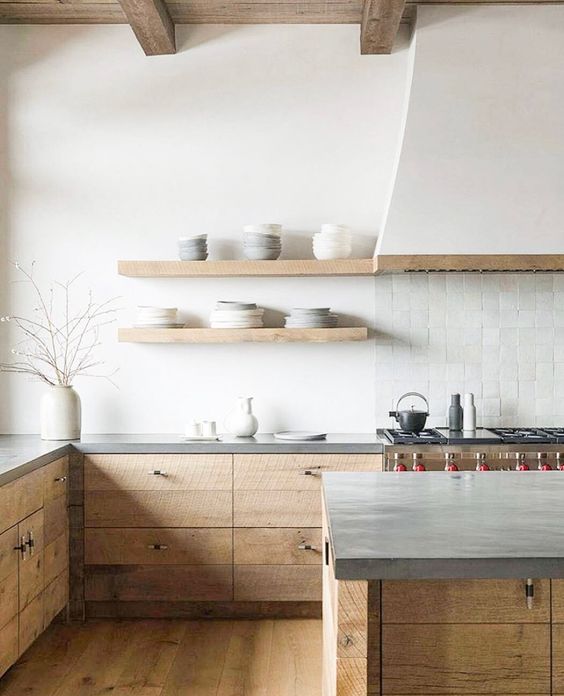
Design by Pearson Design Group / Photography by Audrey Hall
3 – Countertops
I’ve had my eye on Caesarstone’s Cloudburst Concrete for awhile now — it is the most gorgeous soft white, with a finish that actually looks similar to the plaster on the walls. I went all in, using it on countertops, backsplash, and adding a waterfall edge to surround the island.
4 – Appliances
Our old appliances had been acting… old, for the last couple years. It was definitely time to bring in the new, and I am obsessed with Kitchenaid’s new commercial range. With a clean design that nods to professional gear in restaurants, I cannot wait to live – and cook – with my new setup. We’re also chose this gorgeous fridge (already can’t wait to fill this beauty with produce), wine cellar, and Kitchenaid’s beautiful new dishwashers.
5 – Fixtures
One simple move that’ll make a huge difference? I’m swapping out our stainless faucet and stainless cabinet hardware with incredibly affordable versions I ordered off Amazon.
***
We’re in the final countdown, and I can’t wait to share how it all comes together. Up next, final reveals! And in the meantime, come on in for a tour of our house, before the renovation kicked off…
View this post on Instagram