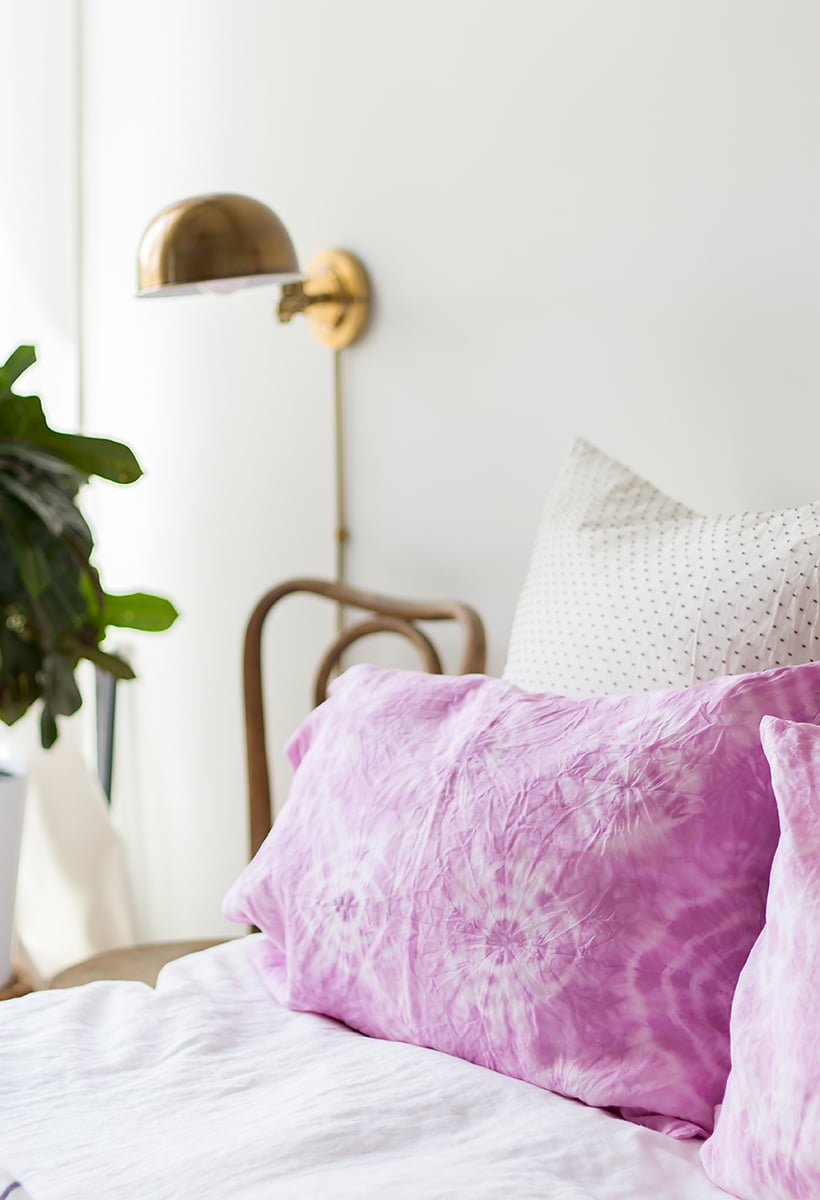
When I first discovered Kristine Vejar’s book The Modern Natural Dyer, I fell in love with the bright colors, amazing textures, and the fact that natural dyeing was one of the few art projects I had yet to try. But after reading a few of her tutorials, I realized natural dyeing involves a lot of chemistry… Who knew all those high school chem classes would actually come in handy?! Since I never had a good grip on pH levels, I went through a couple test runs based on Kristine’s cochineal dye tutorial and created an easy recipe that includes just two ingredients and amazing results. Keep reading to learn how to create these beautiful naturally dyed shibori pillowcases in bright fuchsia!

Start with a natural fabric like linen or cotton. These fabrics will pick up colors better than synthetic materials. I chose these pillowcases in white because of their soft texture. You’ll want to presoak the pillowcases in water to ensure that the color dyes the fabric evenly. Then, fold your pillowcase into thirds longways.

I experimented with a version of the kumo shibori technique, which involves pleating and binding fabric to create a spidery design. Pinch sections of the fabric equal lengths from each other down the entire length of the pillowcase and secure with rubber bands. Repeat the same technique with the other side of the pillowcase in staggering sections. Continue binding the fabric, working your way towards the center of the pillowcase. When you can’t go any further, use rubber bands to bind the fabric into a bundle. Set aside while you create your dye.
Using a mortar and pestle, grind 1 tablespoon of cochineal into a fine powder. In a small pot, combine 1/2 cup of hot water with 1/4 teaspoon of cream of tartar. Stir until the cream of tartar is dissolved and then add in the cochineal powder you created. Bring to a simmer for 15 minutes and stir occasionally.
Tip: To create a variety of shades of fuchsia, play with adding different amounts of cochineal powder and cream of tartar. More cochineal powder will lead to richer shades, while the cream of tartar helps keep the color from fading.
Use cheesecloth to strain the mixture into a large pot. Add water to the pot until you are able to fully submerge your pillowcase bundle in the dye. Bring to a boil and then add your pillowcase bundle into the pot. Turn down to medium heat for 30 minutes, occasionally stirring and flipping your pillowcase to ensure it dyes evenly.

After 30 minutes, turn off the heat and let the pillowcase fully cool down in the pot. Then, remove the bundle from the pot and hand wash in cold water until the water is clear. Remove the rubber bands, feast your eyes on your masterpiece, and hang in the shade to dry.
Throw your newly crafted pillowcases on a couple of fluffy pillows and enjoy! I love the look of a pop of color and pattern on an all-white bed. To preserve the vibrant color of your naturally dyed pillowcase, I recommend hand washing the fabric and hanging to dry after use. The dye will naturally fade in the sun, so try to keep your pieces out of direct sunlight.
photography via Laura Alexandra


These are beautiful! Thanks for the step-by-step instructions, Carmen. Might try it ….. with Phoebe as my helper 🙂
Can you iron after making?