

For me, Valentine’s has always meant chocolate. When I was single, my mom would mail me beautiful chocolate bars every February so I’d always have a Valentine (hi, love language). When Adam and I first started dating, he confessed that his favorite dessert on the planet was chocolate soufflé—so naturally, I spent weeks perfecting mine to make for him. Chocolate is how we say “I love you” in this family, so I couldn’t let the season pass without sharing this one.
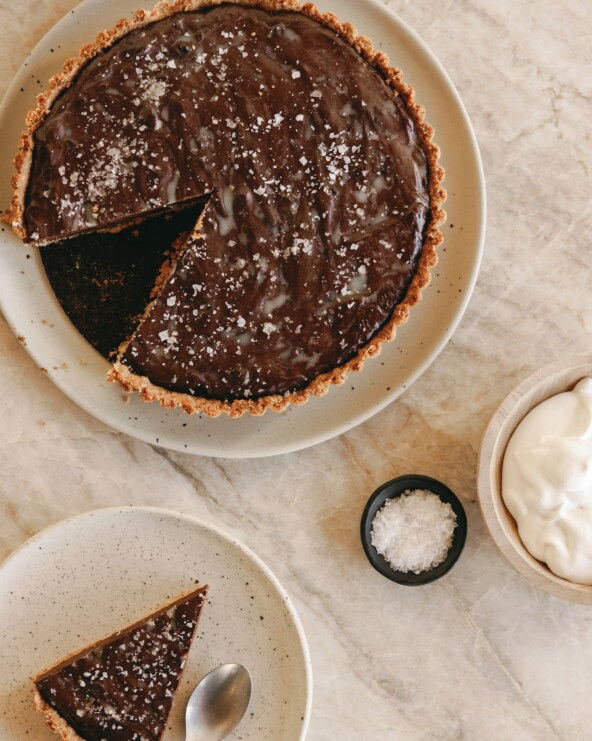
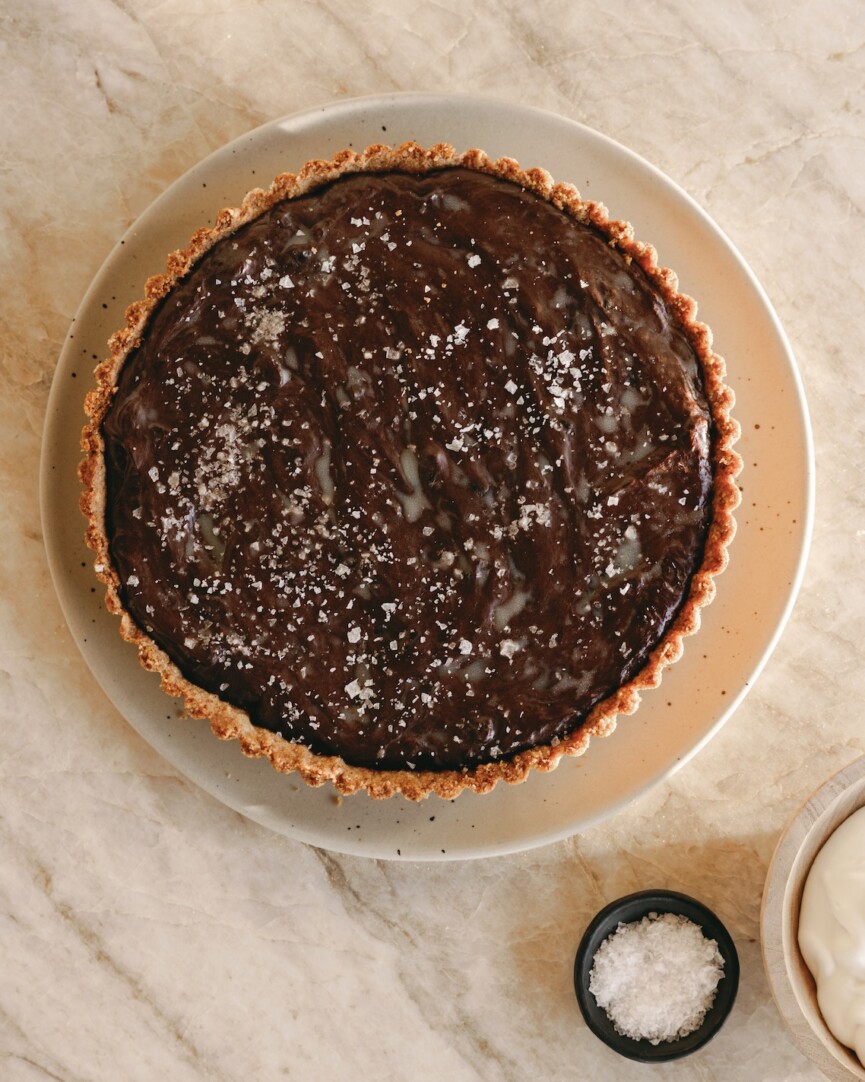
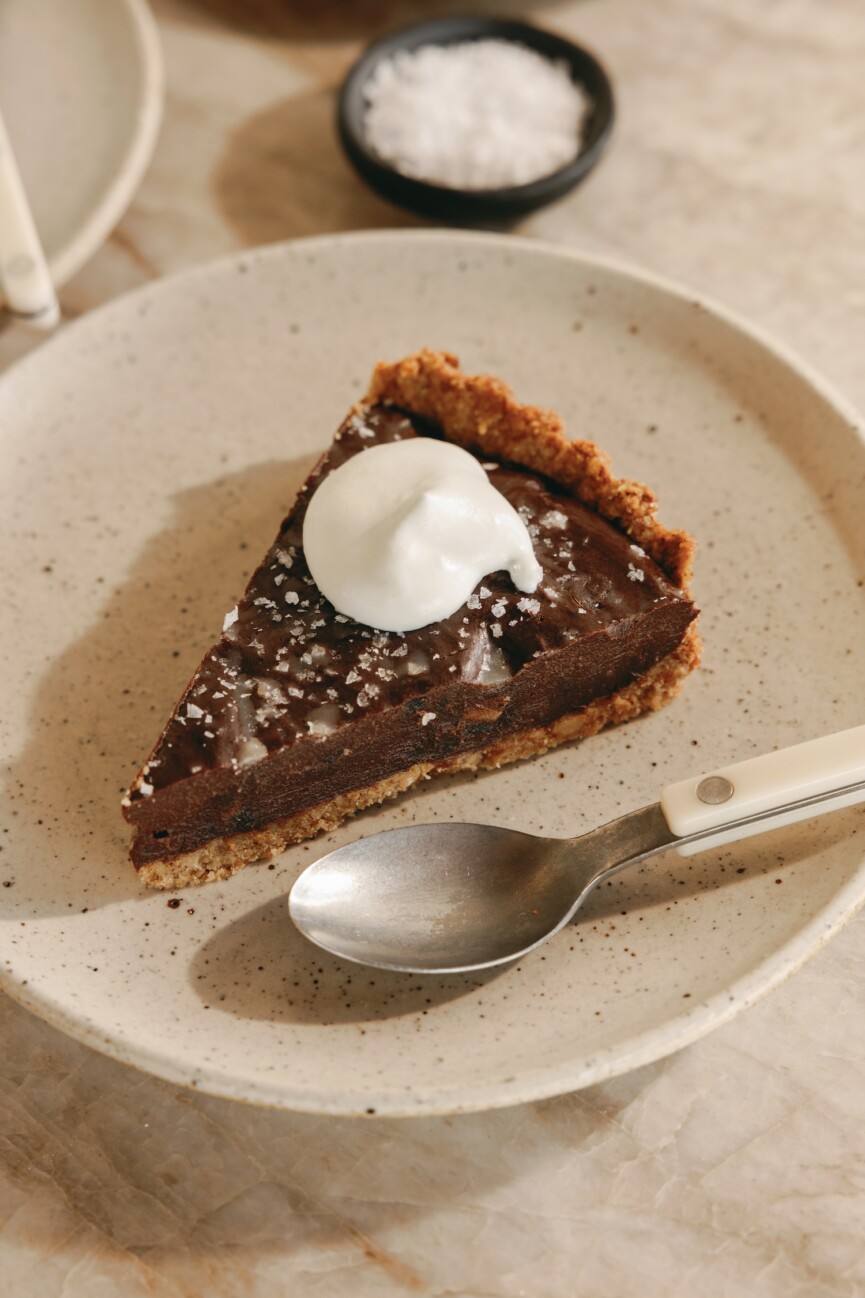
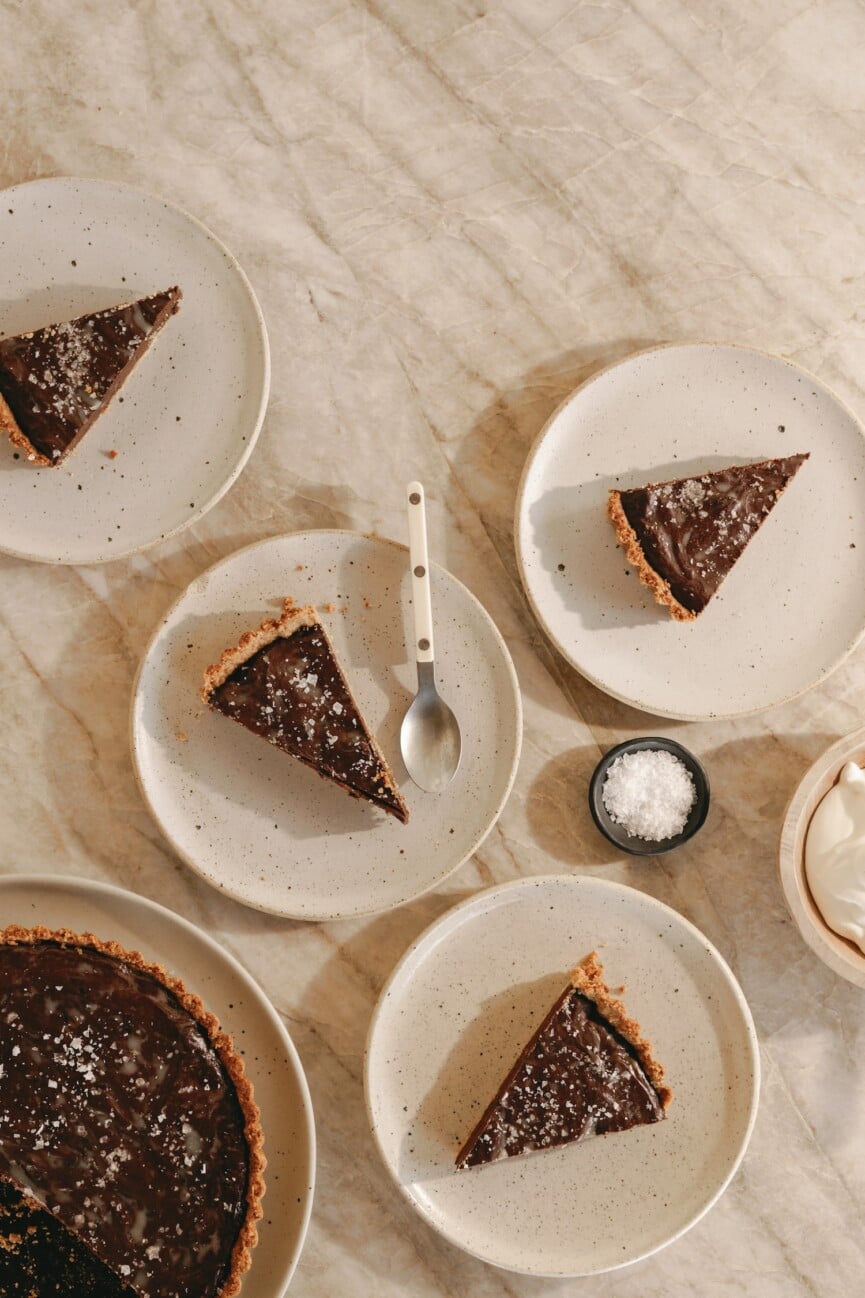
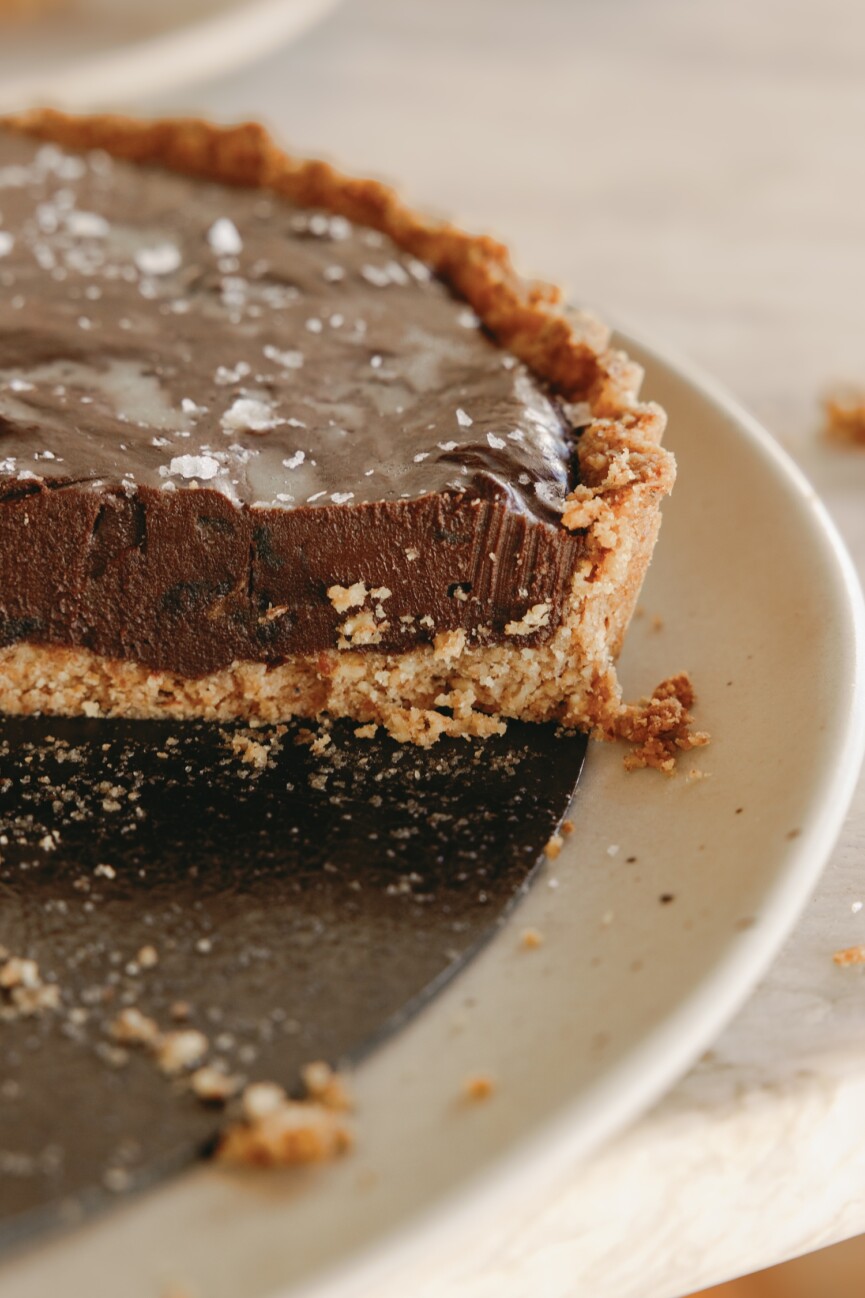
This salted chocolate tart is the kind that makes you close your eyes when you take a bite. Know what I mean? It’s my current go-to when I want a dessert that feels genuinely special without requiring a multi-step process. It starts with a nutty toasted walnut crust, then we pour in the silkiest dark chocolate ganache studded with little pockets of Medjool dates that taste almost like caramel against the chocolate. And you guys know I love a flaky salt dessert situation. It instantly elevates this tart, but more importantly, it intensifies the chocolate flavor. (If you’ve never experienced this magic, you’re in for a treat.)
SO—whether you’re planning a date night in for Valentine’s Day or looking for a special way to treat yourself, this one’s for you.
Why You’ll Love This Salted Chocolate Date Tart
Here’s the thing about this tart: there’s no rolling out dough, no tempering chocolate, no techniques that require watching a YouTube tutorial. You press, you pour, you chill. That’s it. And it actually gets better after a day in the fridge, which makes it perfect for entertaining because you can make it ahead and feel like you have your life together when guests arrive.


A Few Ingredient Notes
The chocolate really matters here. This isn’t the time for whatever’s lingering in your pantry from last Halloween. Since the ganache IS the dessert, you want something high-quality. I usually reach for Guittard or Valrhona (and a hot tip: the Trader Joe’s Pound Plus bars are excellent and won’t break the bank). Look for 70-75% cacao for the just-right level of intensity.
Your dates should be soft and almost sticky when you chop them. If they’ve been sitting in your pantry for a while and feel a little dried out, just soak them in warm water for about 10 minutes before using. It makes all the difference in those caramel-y pockets throughout the filling.
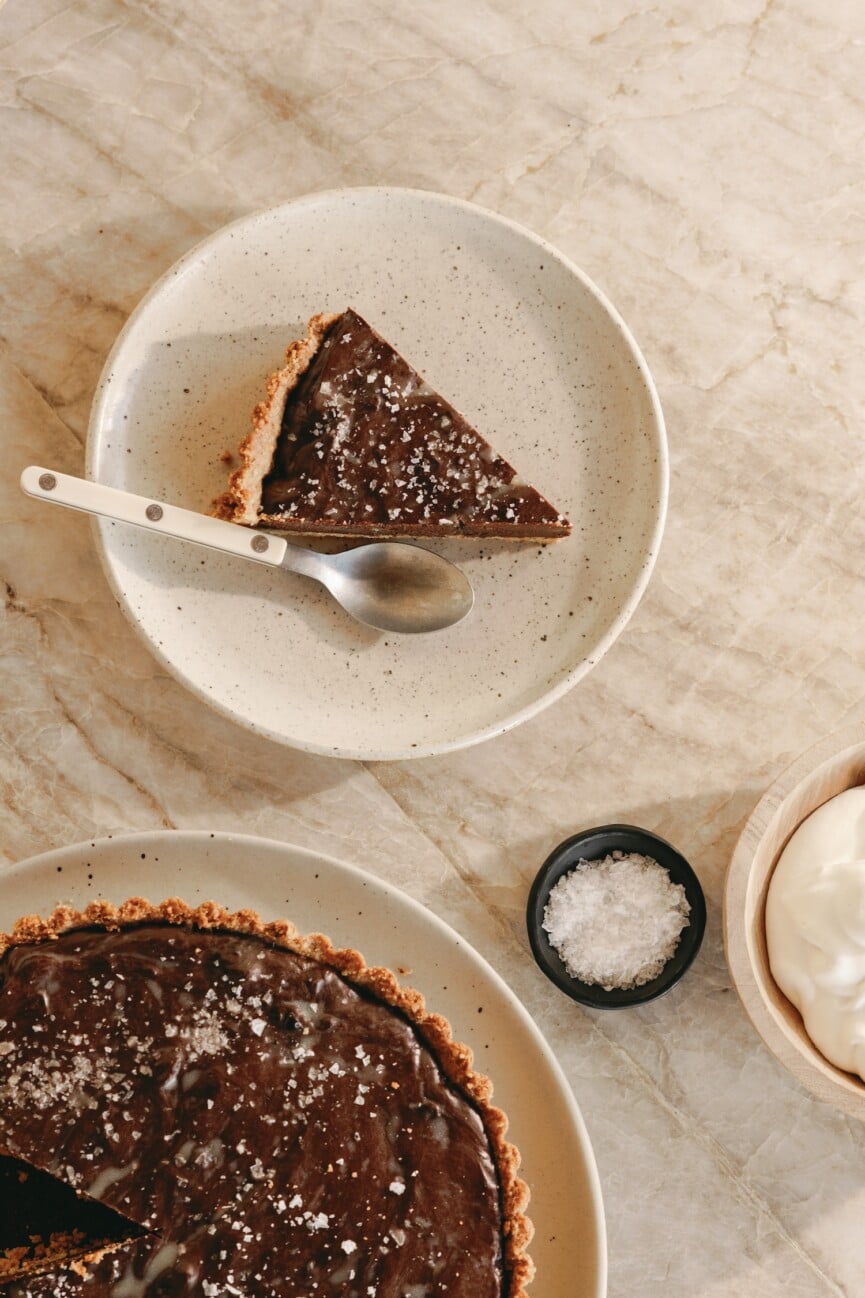
I prefer this tart slightly cool but not cold—pull it from the fridge about 20 minutes before serving so the ganache has that perfect fudgy texture. Too cold, and it firms up; at room temperature, it’s too soft. That sweet spot in between is where the magic happens.
One more thing: if you’re gluten-free (or making this for someone who is), you can swap the flour in the crust for almond flour—use 1/4 cup instead of 1/2 cup. The crust will be a little more delicate, but still completely delicious.
The tart keeps beautifully in the fridge for up to 5 days, covered. Though I’ll be honest—it rarely lasts that long.
I’d love to hear if you make this one! Tag me so I can see your flaky salt Valentine’s situation. xo


Salted Chocolate Date Tart
Description
This no-fuss tart is everything I want in a chocolate dessert: a toasty walnut crust, silky dark chocolate ganache, and little pockets of caramel-y Medjool dates throughout. The flaky salt on top makes it feel extra special
Ingredients
For the walnut crust:
- 1 3/4 cups raw walnut halves
- 1/2 cup all-purpose flour
- 1/4 cup granulated sugar
- 1/4 teaspoon salt
- 6 tablespoons unsalted butter, melted and slightly cooled
For the chocolate date filling:
- 12 oz high-quality dark chocolate (70-75% cacao), finely chopped
- 1 1/4 cups heavy cream
- 2 tablespoons unsalted butter
- 1/4 teaspoon vanilla extract
- Pinch of salt
- 3/4 cup Medjool dates (about 10–12 dates), pitted and roughly chopped
For finishing:
- Flaky sea salt (Maldon is my favorite)
- Lightly sweetened whipped cream for serving (optional)
Instructions
Make the walnut crust:
- Preheat your oven to 350°F. Lightly grease a 9-inch tart pan with a removable bottom.
- Toast the walnuts: Spread the walnuts on a rimmed baking sheet and toast for 8-10 minutes, until fragrant and lightly golden. Let them cool for a few minutes—this step brings out so much flavor.
- Make the crust: In a food processor, pulse the toasted walnuts until finely ground (you want the texture of coarse sand, not nut butter). Add the flour, sugar, and salt, and pulse a few more times to combine. Drizzle in the melted butter and pulse until the mixture looks like wet sand and holds together when you squeeze it.
- Press into the pan: Dump the walnut mixture into your prepared tart pan. Using your fingers (or the bottom of a measuring cup), press it firmly and evenly into the bottom and up the sides of the pan. Make sure it’s compact—this prevents it from crumbling later.
- Bake: Bake for 15-18 minutes, until the crust is golden and smells nutty. If it puffs up at all, gently press it back down with the back of a spoon while it’s still hot. Let it cool completely on a wire rack.
Make the chocolate date filling:
- Heat the cream: In a small saucepan, heat the cream over medium heat until it just starts to simmer—you’ll see little bubbles around the edges. Don’t let it boil.
- Make the ganache: Place the chopped chocolate, butter, vanilla, and salt in a heatproof bowl. Pour the hot cream over the chocolate and let it sit for 2 minutes without touching it. Then whisk gently until completely smooth and glossy. If you have any stubborn chocolate pieces, you can set the bowl over a pot of barely simmering water and stir until smooth.
- Add the dates: Fold the chopped dates into the ganache, distributing them evenly.
- Fill the tart: Pour the ganache into the cooled walnut crust, spreading it into an even layer. Tap the pan gently on the counter a few times to release any air bubbles. Immediately sprinkle the top with flaky salt—don’t be shy, you want to see those crystals.
- Chill: Refrigerate for at least 3 hours, or until the ganache is set but still has a slight give when you press it gently. For clean slices, I usually let it chill overnight.
Serve:
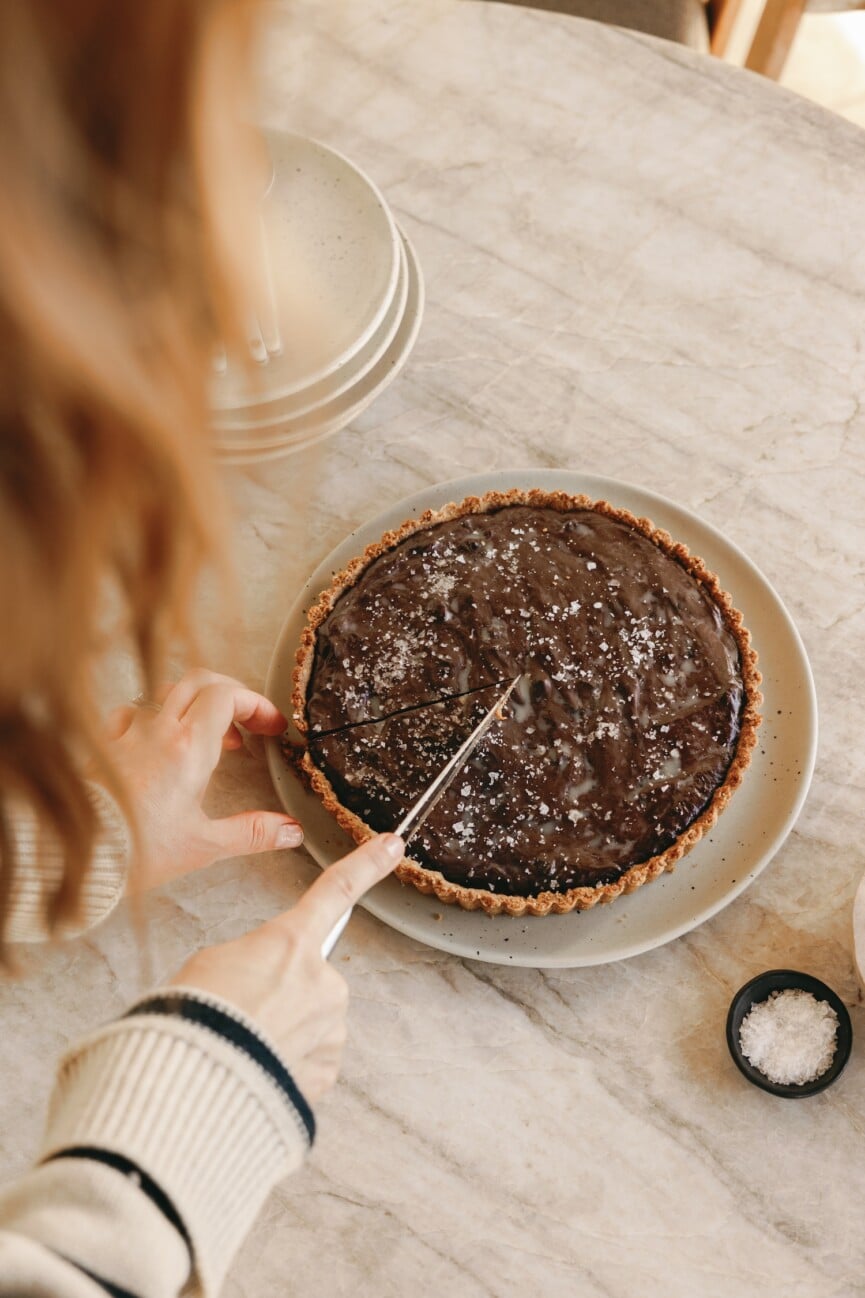
- Remove the tart from the pan (run a thin knife around the edges first if needed, then push up from the bottom). Slice with a hot, dry knife (run it under hot water and wipe dry between cuts). Serve with a dollop of lightly sweetened whipped cream if you want to balance the intensity of the chocolate.


I made this for a dinner party recently and it was such a huge hit! Rich with the perfect flakey sea salt finish. I absolutely recommend this dish!
★★★★★