
*update: this giveaway is now closed. Thanks to everyone who entered, and be sure to hop on over to Minted to check out their great assortment of art!
Phoebe’s artistic talents are at a bit of an “awkward age”: while I want to display all the paintings and projects she brings home from preschool, at age 2 1/2, she’s still not that into expressing herself through art, and most of her projects consist of one or two scribbles on the page before she proclaims, “All done!” In an effort to combine style with sentimentality, I decided to create a gallery wall at the top of our staircase that mixes Phoebe’s art with fine art photography and prints from Minted, my favorite source for both kid and adult art (and major plus: it comes already matted and framed!) As Phoebe gets older and our new baby boy arrives on the scene this spring, my hope is that it’ll be a wall we can continue adding to through the years; one that will evolve and grow right along with our family. And as an early spring treat, we’ve teamed up with Minted to offer a $500 giveaway! Click here for your chance to win and perhaps create a gallery wall in your own space. While you’re over there, be sure to peruse their huge selection of carefully-curated limited edition art prints… it’s constantly being refreshed and I’m always falling in love with some new piece.
*photos by Molly Winters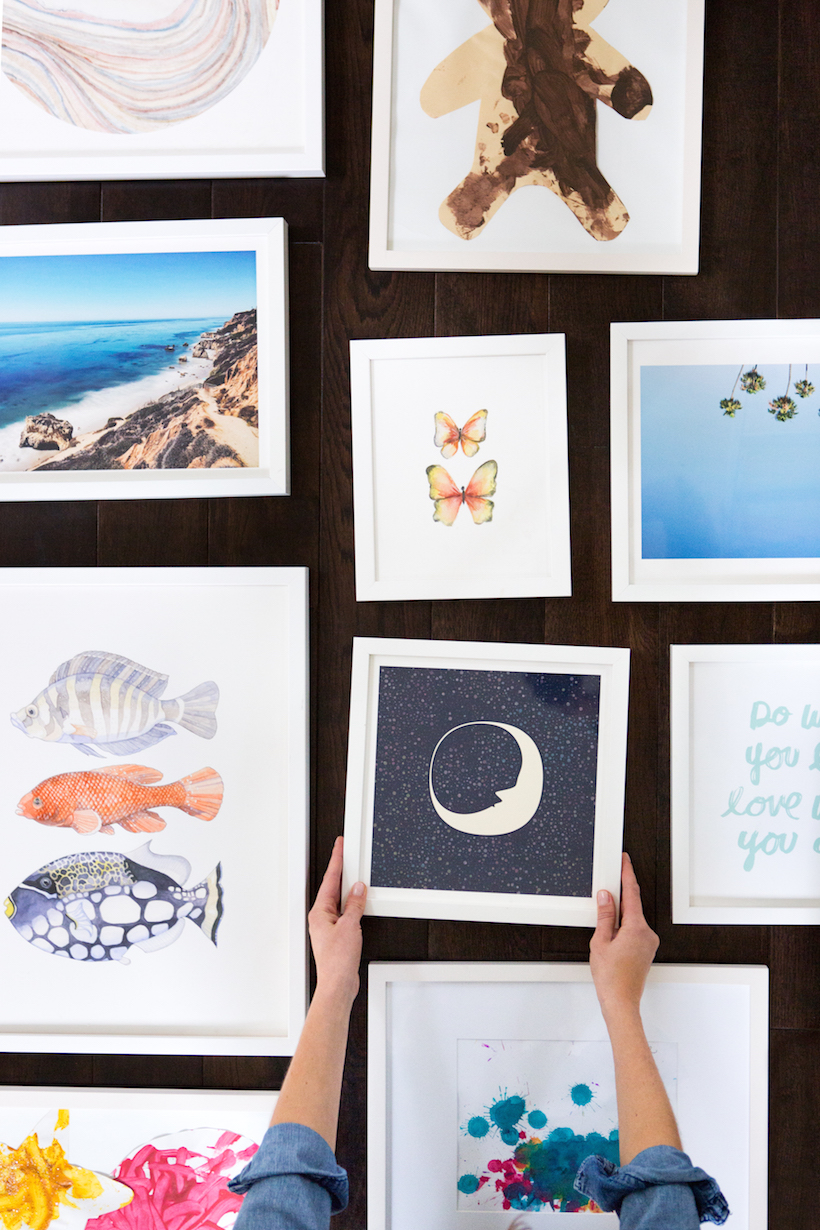 When I’m designing a gallery wall, the first step (after choosing the art of course — more on that later) is to find your perfect layout. Chanel and I played with a few different strategies (perfectly straight edges, organized by column and rows), and finally settled on a design that felt a little looser, created by starting with a straight middle column and working our way out. It took some experimentation, but we tried to keep it feeling balanced on each side — both in the size of the photos and the colors. For this wall, we spread out the lights and the darks so that the eye isn’t immediately drawn to one area of the gallery. The end result feels like an organic diamond — balanced, but still playful. One other note: Chanel got the layout exactly right after I left to go to a meeting, which made us realize that this step of the process might be a one-person job. Though you’ll definitely want a partner for the next few steps…
 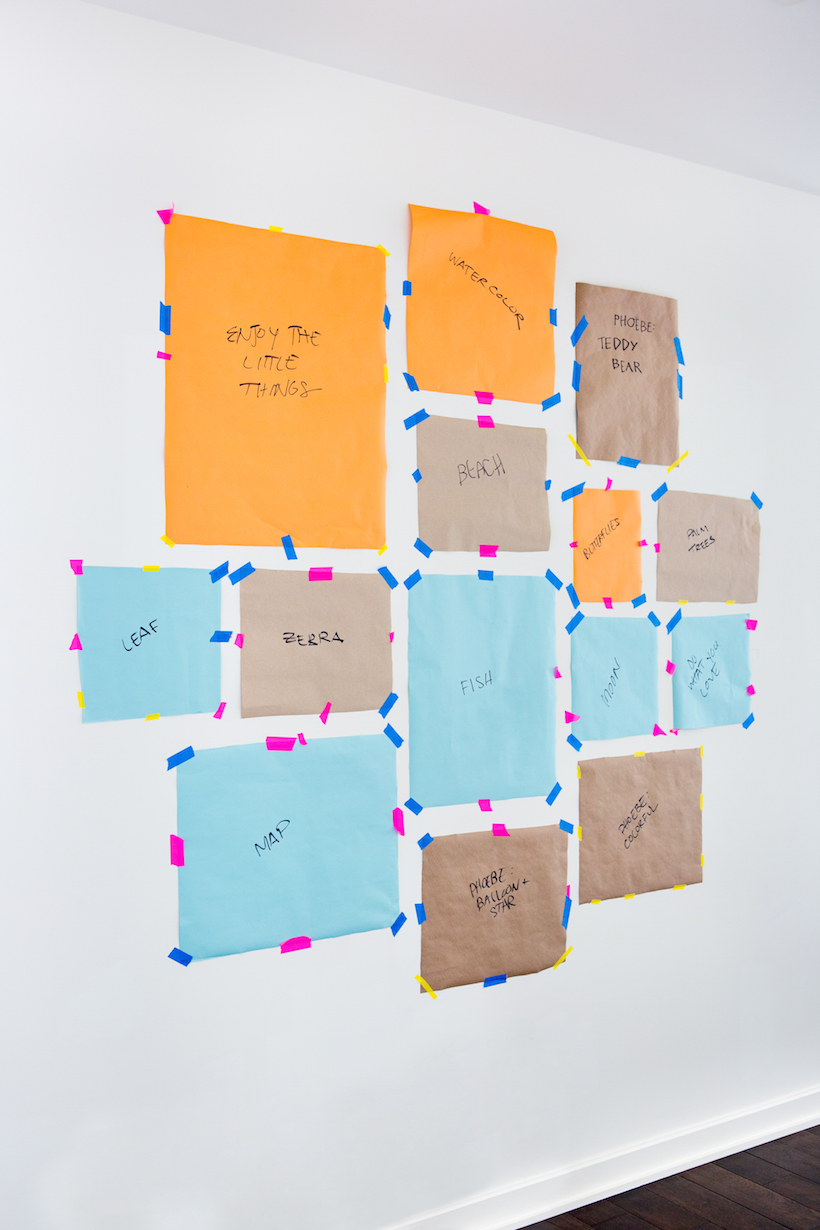 Next step is one that’s often skipped, but that makes things so much easier when it comes time to install the gallery. Using large sheets of paper (wrapping paper works well), trace around the edges of each frame that you’re planning to hang. Cut out, label with which piece of art it represents, then use painter’s tape to apply to the wall in the pattern that you laid out on the floor. The beauty of this step is that it allows you to move things around and correct your measurements before you actually hammer nails into the wall!
 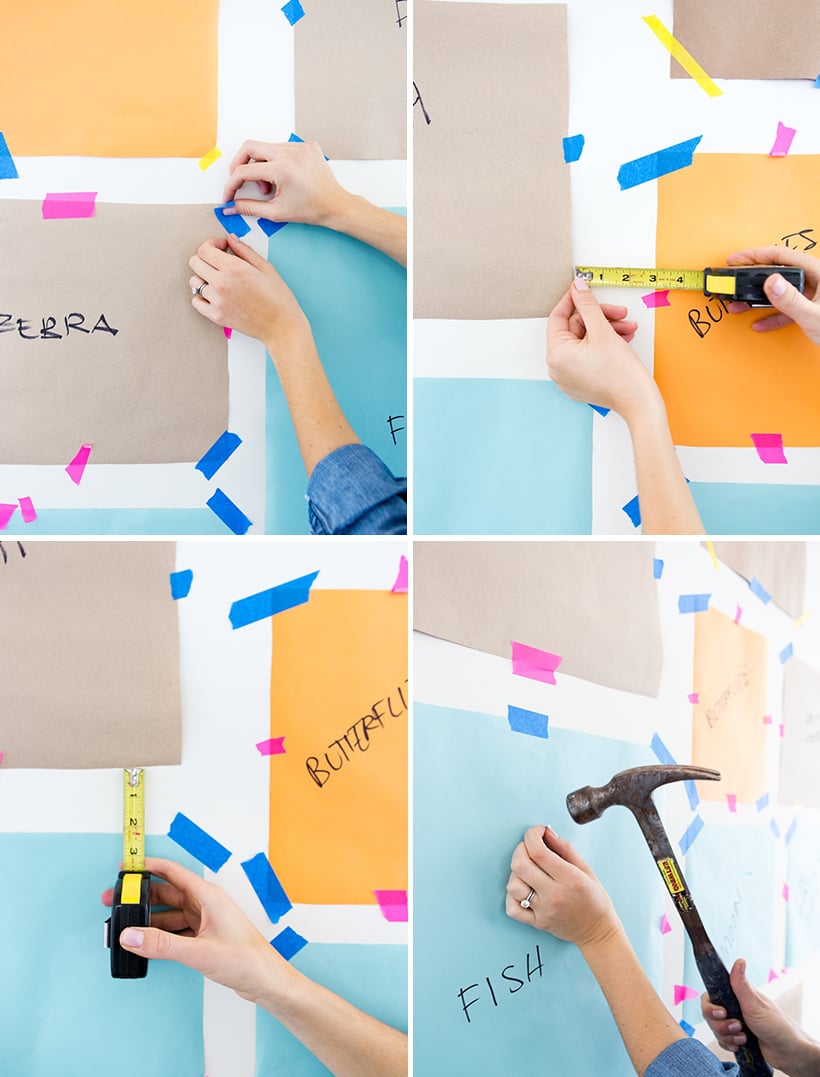 Since we designed our layout starting from the center and moving out, the first step in hanging the paper guides was to find the center point of the gallery wall. My husband and father-in-law did most of the hanging — they used a laser level like this one to draw a line straight down the center. Then, they taped up the pieces of paper that would form the center column. They allowed 2 1/2 inches between the bottom of top of each frame, then for consistency, measured out 2 1/2 inches from the side of each frame to find the edge of where the next columns on the right and left would go. Once everything was taped up, they eyeballed it and made tweaks wherever things didn’t look quite right (another advantage of starting with the taped up paper before you actually break out the hammer.) When it is time to hammer in the nail, make sure you measure on the back of each frame the distance from the top of the frame to the actual place where the nail will go. Once you’ve got that measurement, you can mark it on the piece of paper and hammer away.
 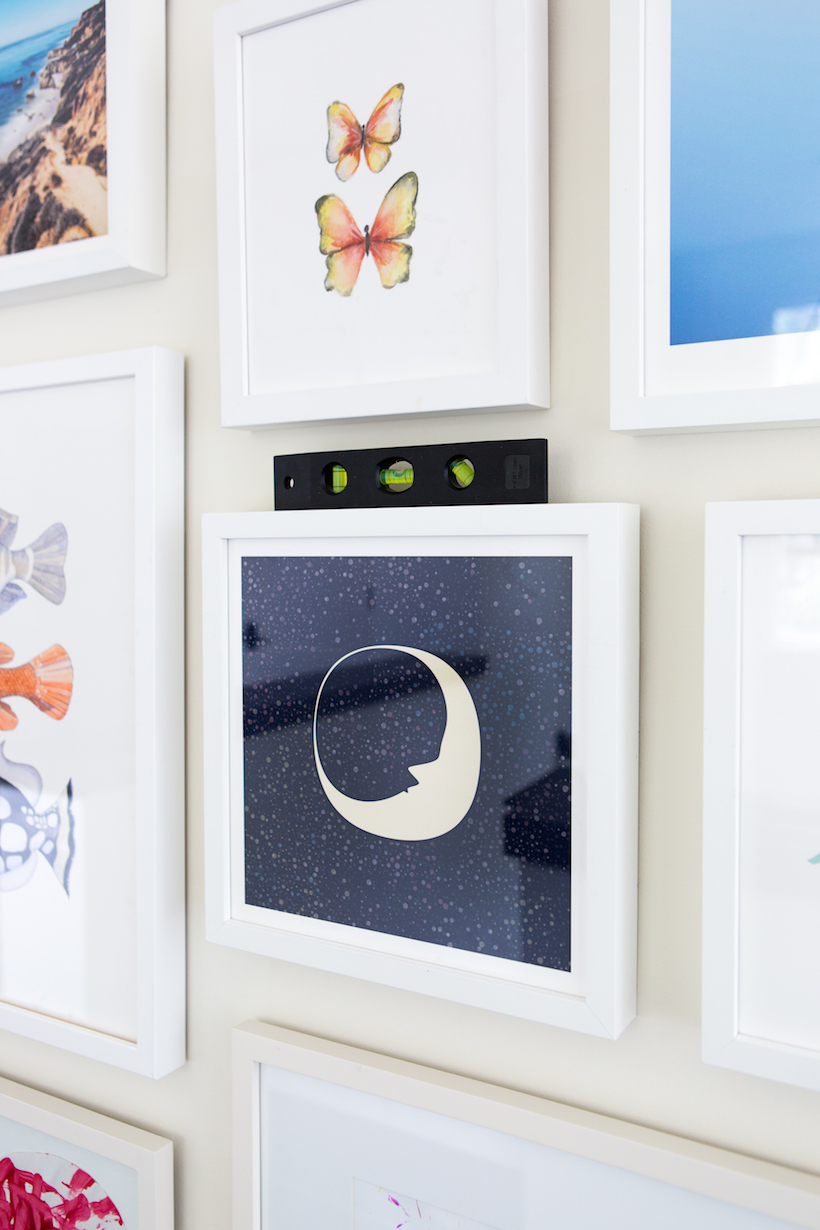 *above: celestial moon, rhopalocera two Almost done! The final step is using a level to make sure that each frame is perfectly straight. Since we just used a nail to hang each one, it’s easy to make slight adjustments… the only potential downside is that I have a feeling these might get uneven very easily, especially when little hands discover them and start wanting to make their own “adjustments.” I’m thinking about applying some stick-on furniture bumpers to the bottom corners of each frame to help hold it in place. I’d love to hear about if any of you guys have tried a good solution for this!
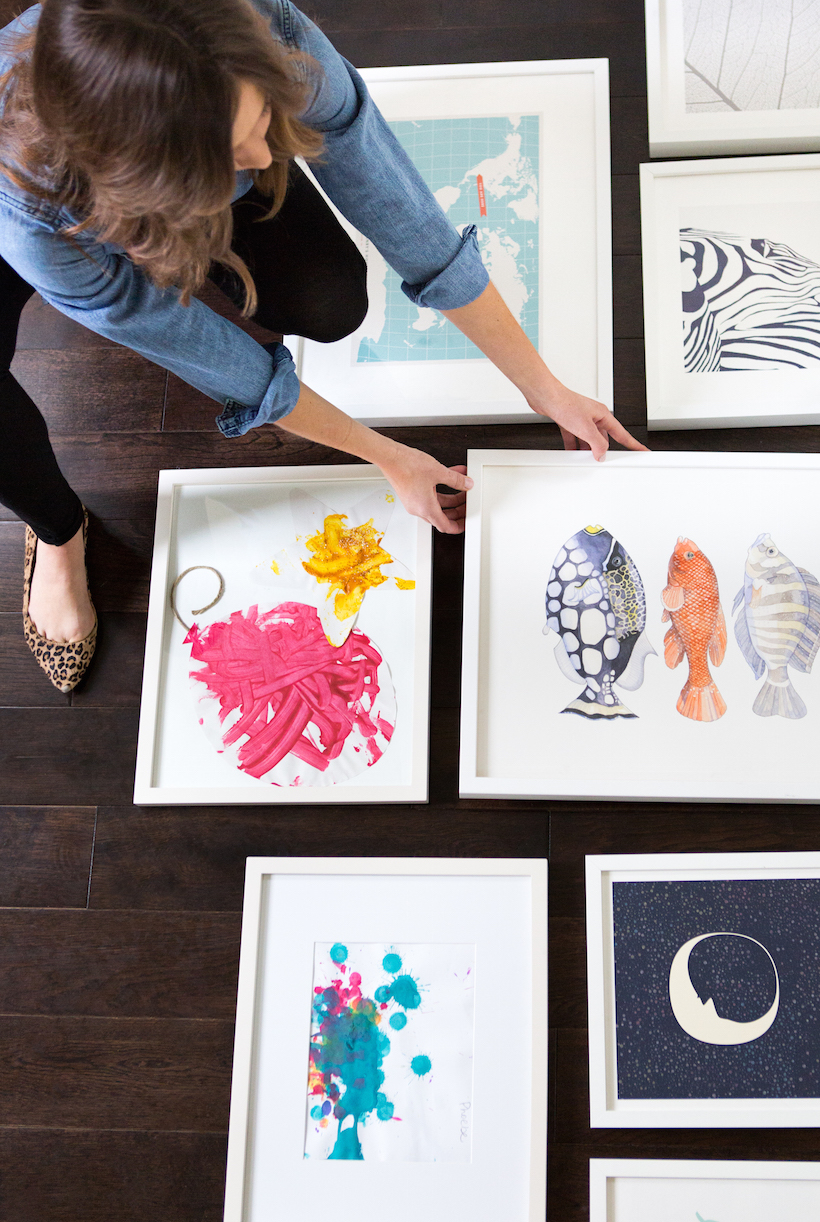
  *above: enjoy, mineral 03, california coastline, rhopalocera two, upside, leaf, hello zebra!, three fish, celestial moon, do what you love, you are here I’m so happy with how it came together! Okay, now a few words on what’s actually the most important part of any gallery wall: the art itself! Minted has so many cool pieces to choose from sourced exclusively from their dynamic community of independent artists, so narrowing it down was really the hardest part. I wanted the wall to have an easy eclectic vibe, but still with a color palette that felt cohesive. I decided to tie it all together with a subtle beachy theme in all shades of blue, plus brown and pops of orange. To make sure I loved how everything looked together, I created a secret Pinterest board, then pinned all my selections to see them side by side.
 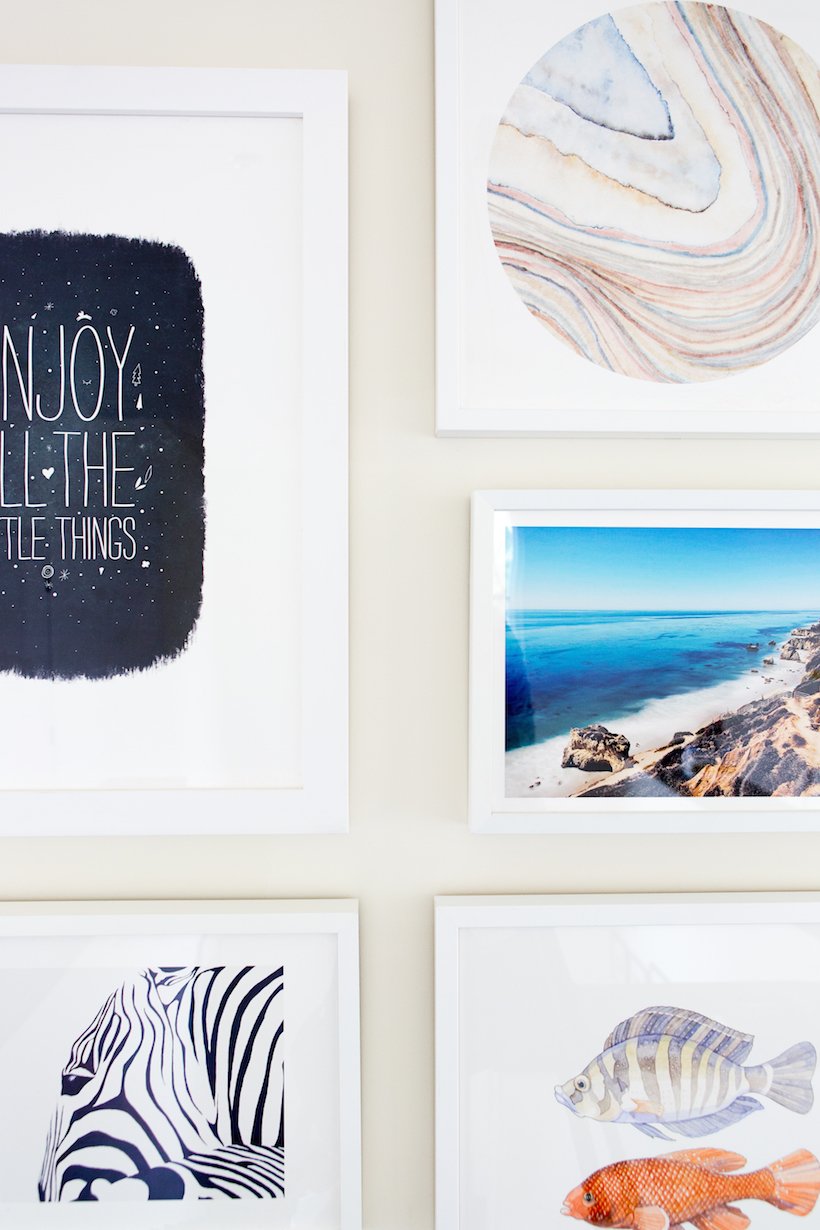 *above: enjoy, mineral 03, california coastline, hello zebra!, three fish When it came time to place the order, all that was left to do was decide on frame colors and sizes. With Minted’s selections, the possibilities are endless, as you can make the prints your own with tons of customization options (pick your dimension or color way). I chose a variety of sizes, and stuck with a clean palette of all-white frames.
 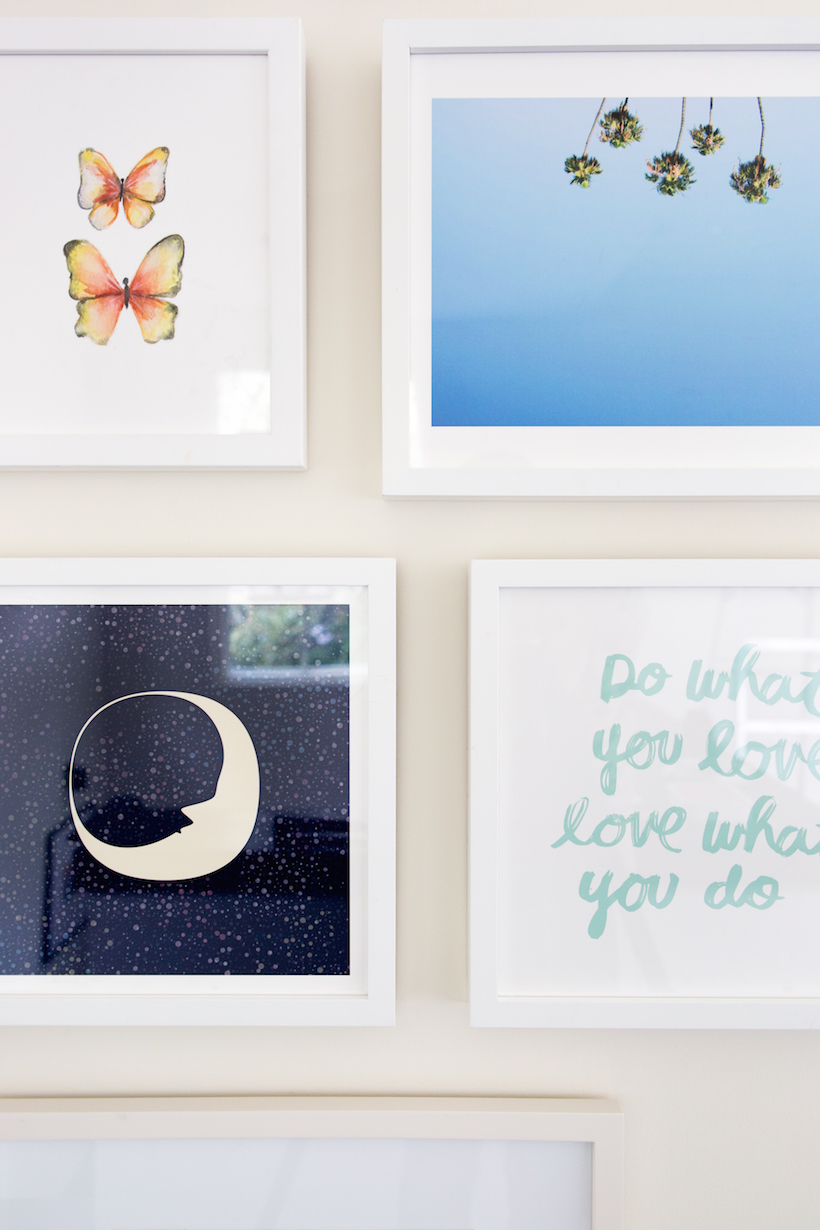 *above: rhopalocera two, upside, celestial moon, do what you love I also decided to weave in a few of my favorite paintings that Phoebe’s created, and framed them simply in white frames I picked up at the craft store. They added a touch of whimsy and made the gallery wall feel really personal — and of course, P loves having her masterpieces displayed for all to see. The beauty of a gallery wall that’s not too perfectly lined up is that we can constantly replace pieces, or add new ones into the mix and watch it expand as our family grows. **Hope you’re feeling inspired to create a gallery wall of your own! First step: scoring some amazing art! Pop on over to Minted to enter to win $500 to spend any way you like. Contest ends this Sunday 3/15 at midnight, and we’ll announce the winner on Monday. Good luck!**
*photos by Molly Winters
This turned out so cute- I love it!
Thanks for a great tutorial on how to create an art wall. That laser level sounds like the way to go! By the way, I think the drawings by Phoebe might be my favorites 🙂
Thanks for the great post. I’m working on creating a gallery wall in my living room and want to incorporate my children’s are work, I love the cohesiveness of the frames and mats. I feel so inspired!
thanks for this post! gonna try this in this weekend!
http://nurielfashion.blogspot.com/2015/03/prints-are-backo.html
I love this! I have been wanting to do something like this with my kid’s art but have no idea where to start. Any chance you could share your frame sizes? Thanks!
I love a good gallery wall! One thing that has saved my sanity (I have two boys, 8 and 10) is putting those Command adhesive strips at the bottom corners so that they don’t budge when they’re bumped. They work wonderfully, are easy to remove when things get changed, and are only really visible if you’re looking from the side (and even then, they’re barely noticeable on light walls)
that is genius! thanks michelle!
How tall are your ceilings?
Where did you purchase your frames? I always struggle with finding the right frames for gallery walls.
One of the best things about Minted artwork is that you can purchase it already framed! Mine are the simple white gallery frames – though there are tons of options to choose from.
Is it possible to tell me what size the prints are? Thanks, Shannon