It’s the classic summertime barbecue scene: all the guys stand around the grill, prodding steaks or burgers and drinking beer while the women stay as far away from the fire as possible. Kidding! Y’all, this is 2020, and while I used to let the grill be Adam’s territory only, those days are gone. And you know what I’ve learned?
Once you know a few basic techniques, grilling is pretty much the easiest way you could dream of getting dinner on the table.
If you know how to turn on the gas and have great equipment to work with, you have what it takes to grill. (Unless we’re talking about charcoal, which is a whole other situation that I actually do stay away from.)
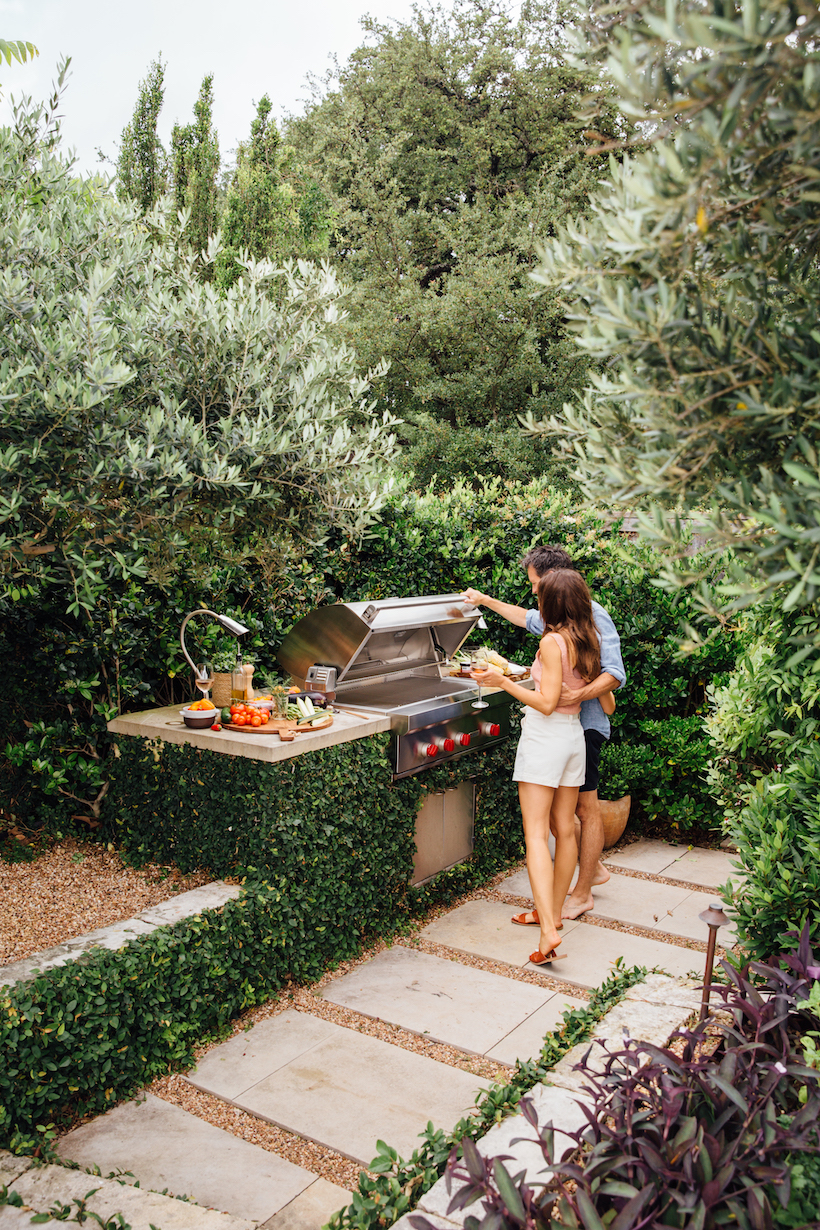
Even though the secret’s out, Adam still loves to man the grill (thank God), and now we tag team and treat a night at the barbecue as our favorite summertime date, where we both pour a glass of wine and enjoy the process together. Since grilling can feel a little intimidating if you’re new to the game, I teamed up with Wolf, of Sub-Zero, Wolf, and Cove, the gold standard in kitchen appliances, to lay out my 7 basic rules that every aspiring summer cook should know. Nail these essential techniques, and you’re well on your way to Grill Master status.

1. Give it a rest.
When it comes to chicken, beef, or pork, remove it from the fridge 30 minutes before cook time. You don’t want to throw a cold piece of meat onto the grill — the outside will char while the inside will still be underdone since it started off so cold. When you slowly let meat come closer to room temperature, it’ll cook more evenly.
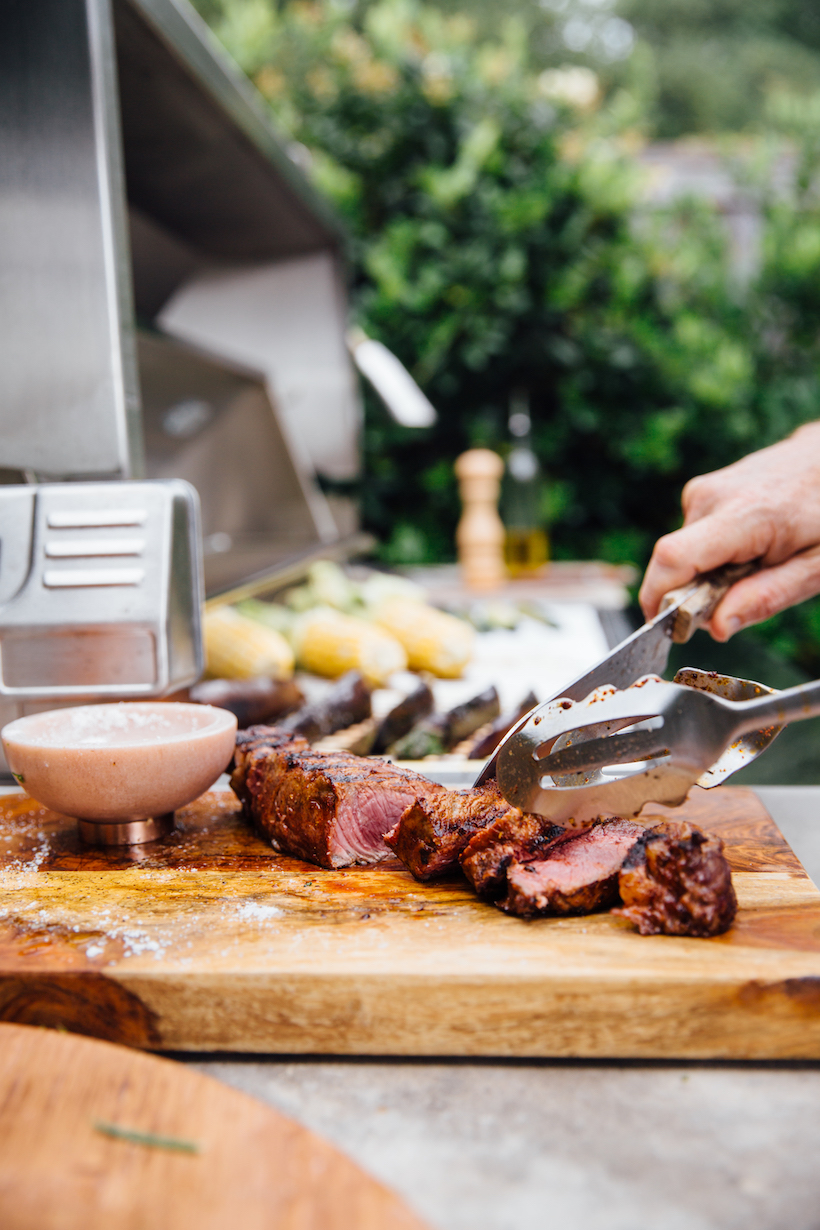
After meat comes off the grill, let it rest on a foil-tented plate for 5 – 10 minutes. This gives time for the juices to redistribute and stay in the meat before you cut into it.
2. Prepare the grill.
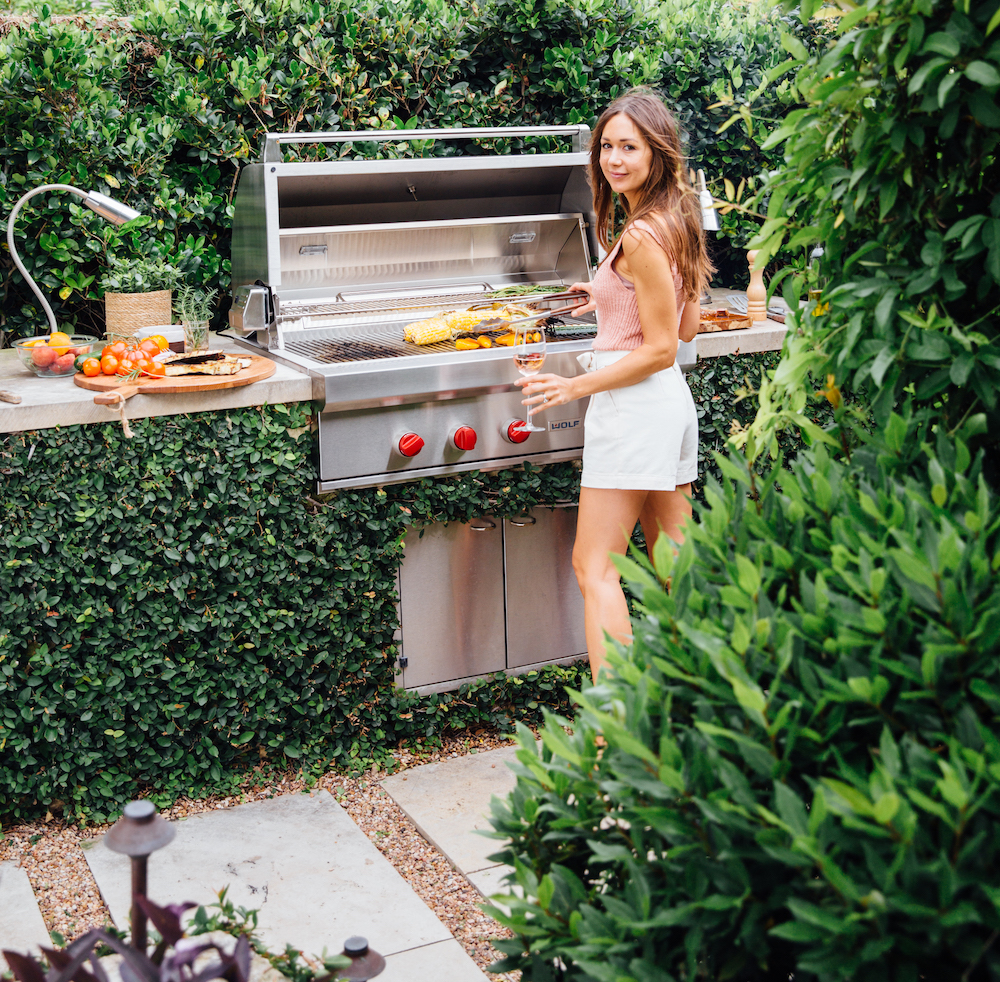
To say that I am in love with our new Wolf 42″ outdoor grill would not be an exaggeration – since we basically live in our backyard during warm weather months, our grill is an extension of our home, and not only is this grill beautiful – it’s engineered in double-wall stainless steel that withstands UV rays, salt and moisture so it’ll stay beautiful no matter the elements. I’m so happy I went with Wolf for our new grill — all of their appliances are beautiful, reliable, easy to operate, and practical for long-term outdoor use. Let’s face it, Austin weather can be unpredictable, and I love knowing my grill will not suffer whatsoever as a result!
When your meat is nice and ready, I’ve learned that there are a few key steps to getting your grill ready for perfection. You’ll want to preheat it with the lid closed for at least 15 minutes to make sure it reaches the right temperature – having a preheated grate will create that sear and also help prevent food from sticking.
When the grate is hot, use a grill brush to remove any bits of food that have stuck to the grate.

3. Choose your heat.
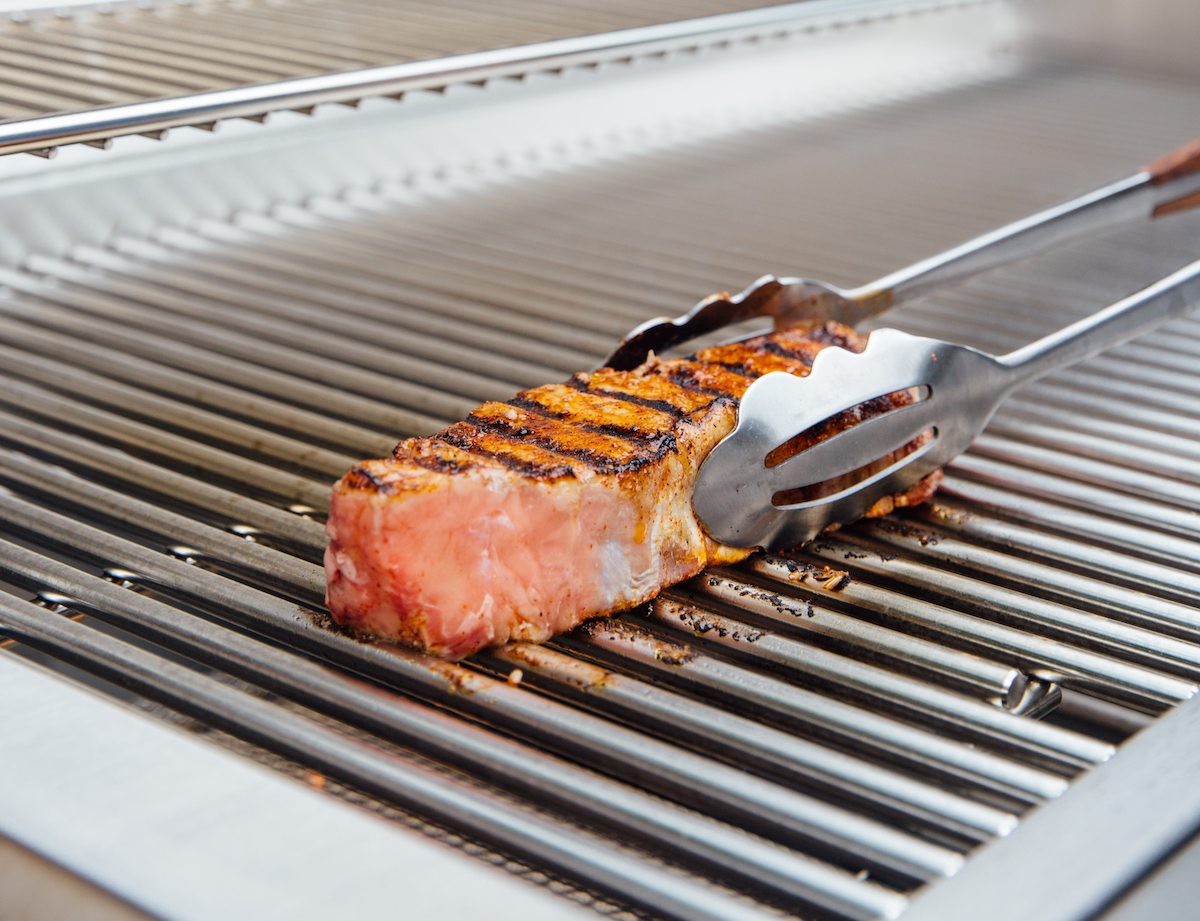
There are two types of heat that you can choose depending on what you’re grilling: direct and radiant. Use direct heat to put a professional sear on ribs, steaks and chicken, which seals in juices and flavor while creating the perfect interior fork-tender texture. Generally, you’ll want to use direct heat on anything that’s smaller and can cook in less than 15 minutes or so.
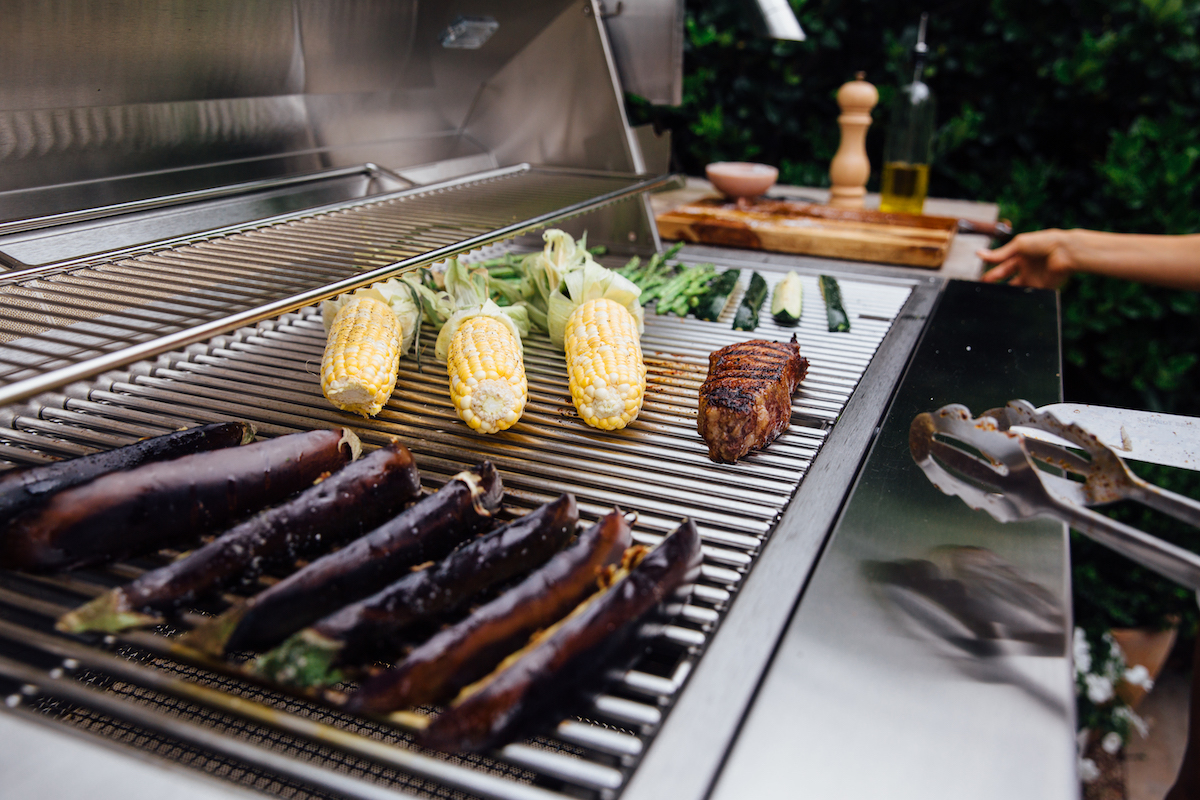
Indirect, or radiant, heat is best for larger cuts of meat, or bone-in meat, that require a bit longer cooking time without drying it out. This is also great for anything you want to cook lower and slower, like eggplant which I like to give plenty of time on the grill to get tender and broken down. If you’ve got your food over direct heat and it looks like the exterior is cooking a little too quickly for the interior to be done (or flare ups happen), just move it to a cooler part of the grill (our grill has three individually contained burners so you can juggle multiple dishes and temperatures at once).
For our perfect New York Strip Steak, we sear it over direct heat on each side, then move to the indirect heat to finish out the final minutes of cooking. Since my veggies cook pretty quickly, most of them can be cooked start-to-finish over direct heat only.
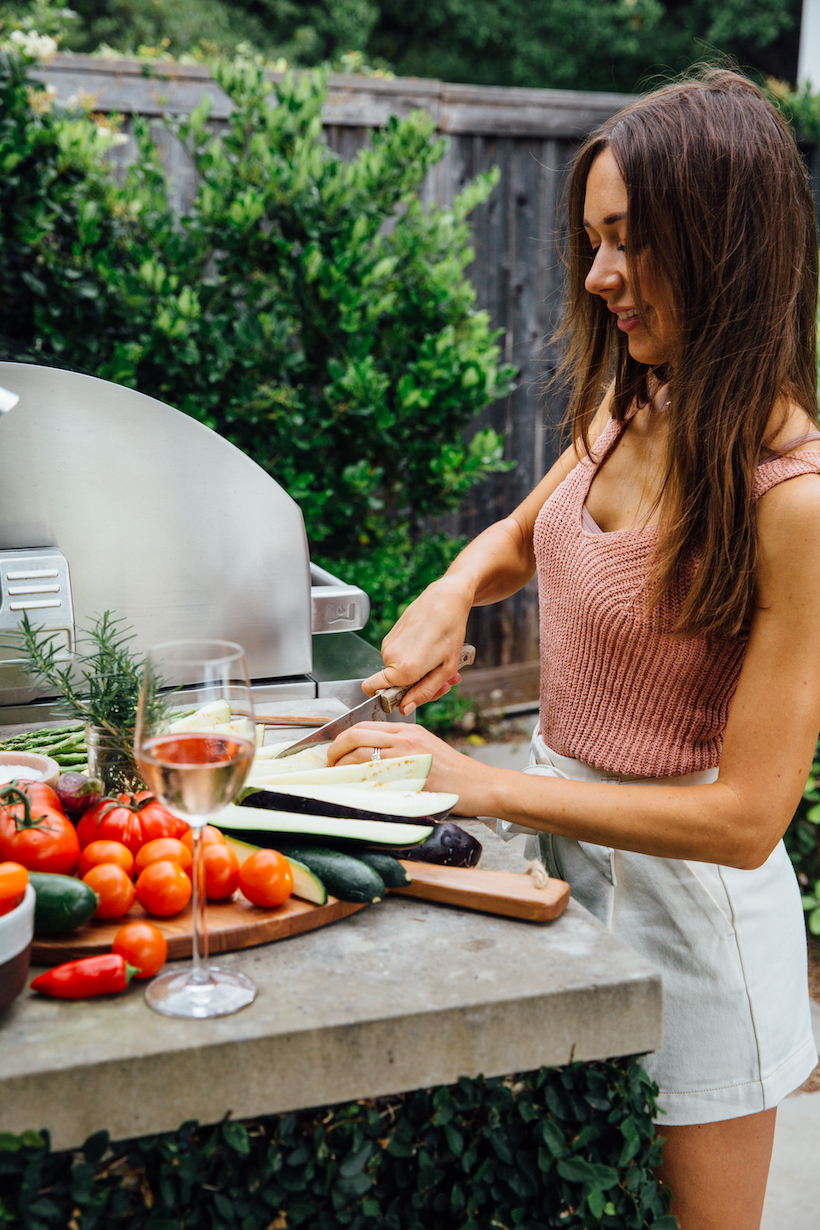
4. It’s all in the cut.
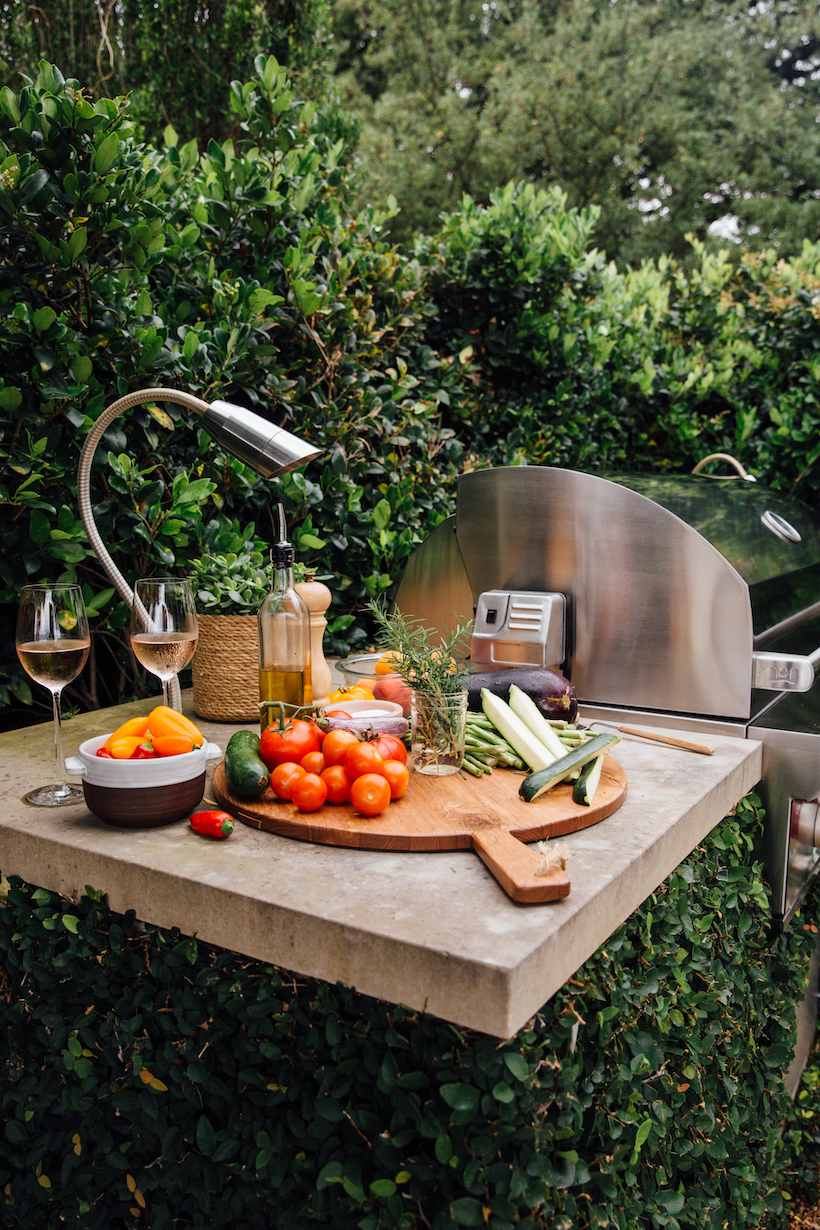
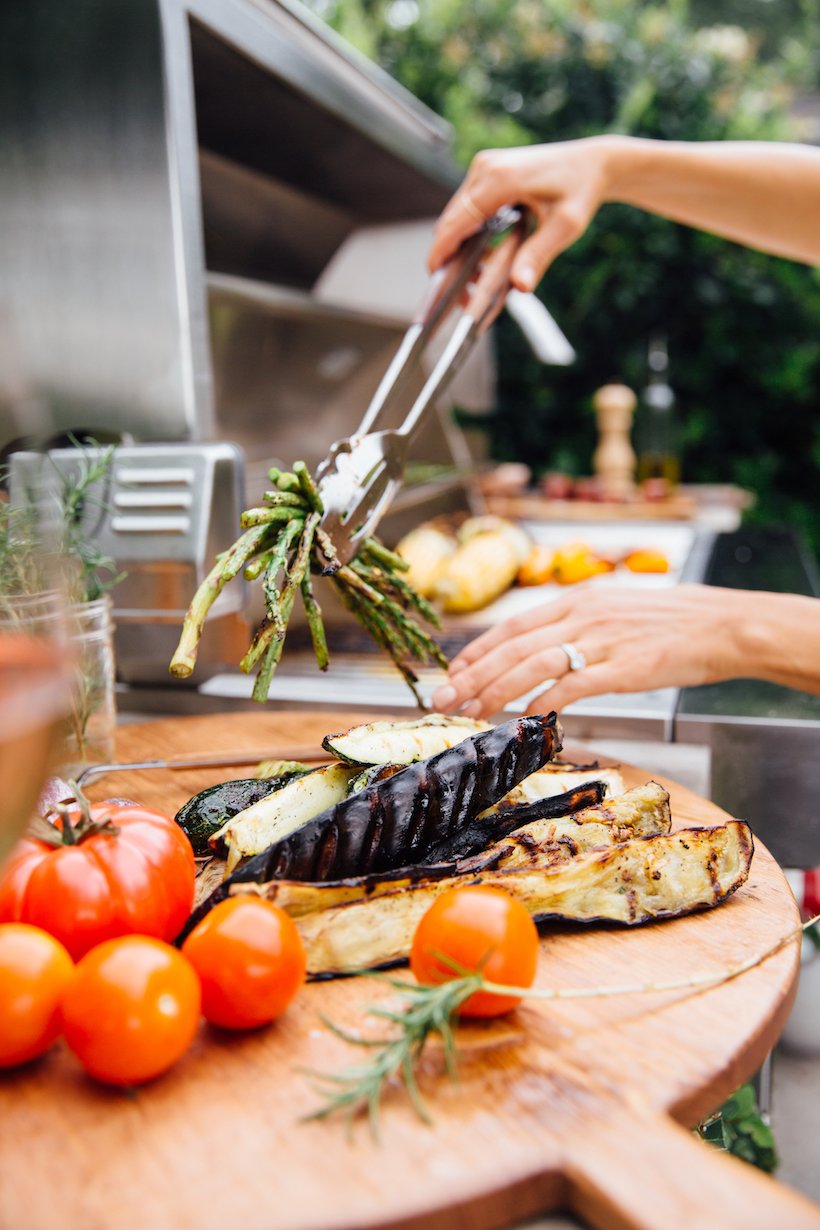
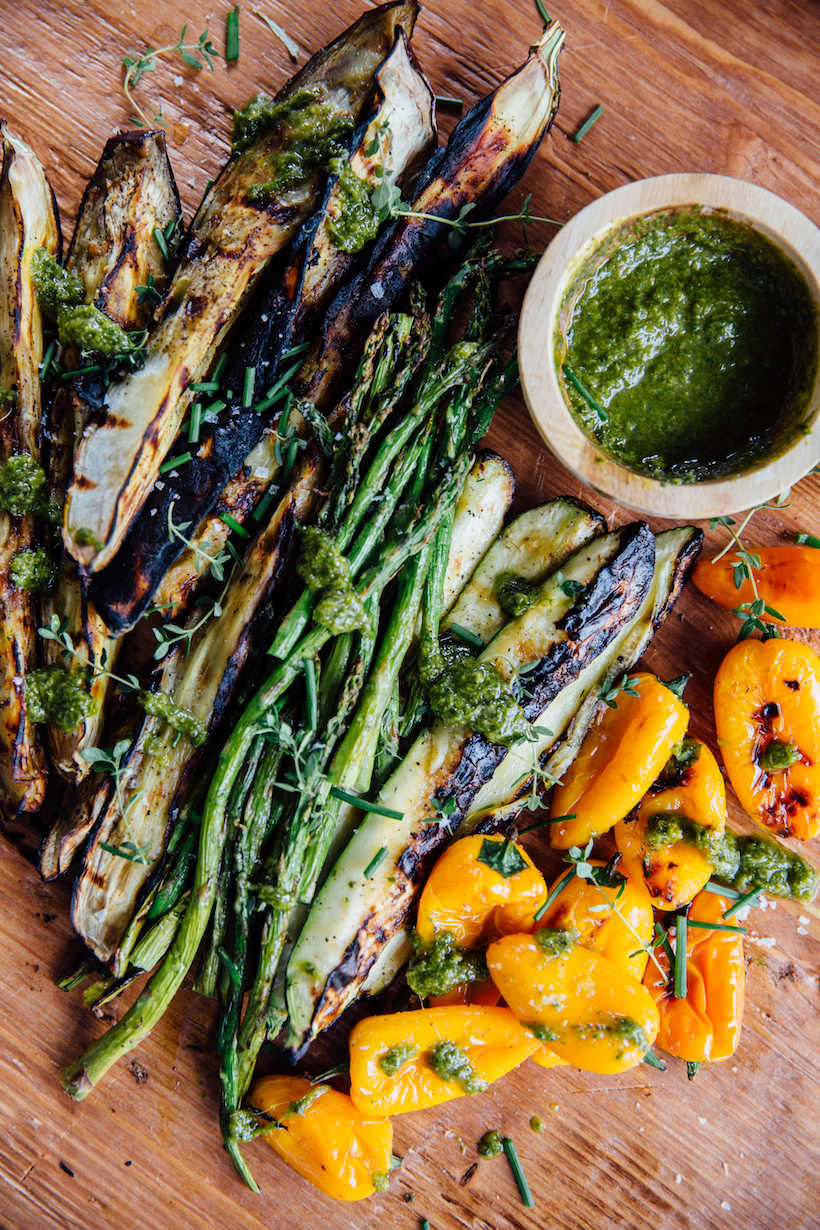
My favorite way to eat my veggies is with a little char; almost all of them are better with a quick toss on the grill. There are a handful of vegetables that are better if you blanch them first (carrots, sweet potatoes, winter squash), but for the rest, a little oil and a sprinkle of seasoning are all they need.
That said, you’ve got to be a little strategic with how you cut your veggies before putting them on the grill. First, you want the pieces to be large enough to not fall through the grill grate. Sure, you can use a veggie basket or skewers, but I like to throw them right on to keep things easy.
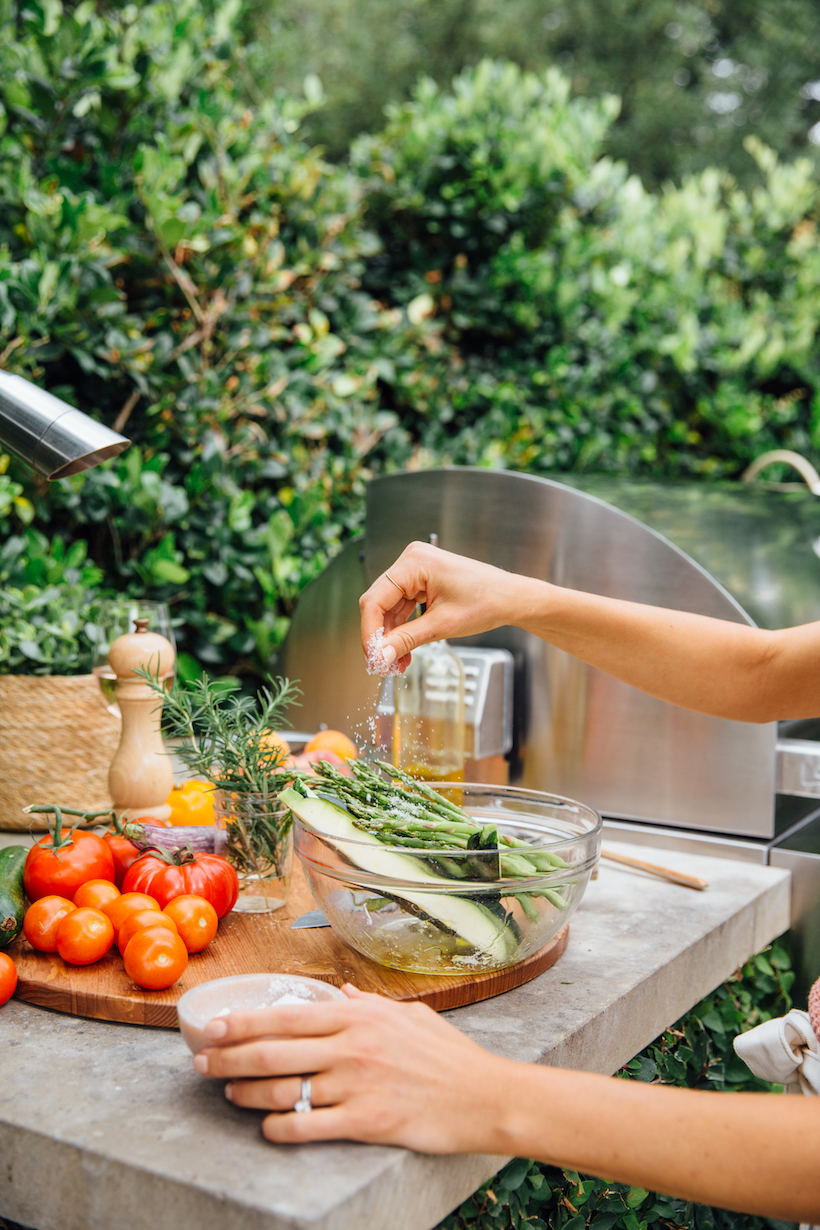
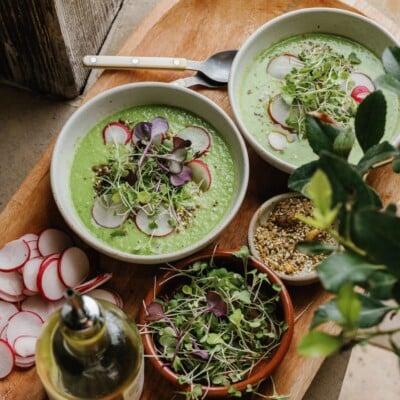
Second, you want your veggies to be cut in similar sizes so that everything cooks in roughly the same amount of time. Asparagus and green beans get left whole (just snap off the woody ends), zucchini and eggplant are cut into long spears that look so pretty when they’re plated, and tomatoes and bell peppers can just be halved and placed face down on the grates. Grilled veggies are my go-to side for all my summer meals because it just doesn’t get easier (or more delish.) I’ll mix it up by serving them with an interesting dipping sauce like chimichurri or a citrus aioli.

5. Put a lid on it.
I was always confused about whether you were supposed to grill with the lid on or off, until I went to a cooking class several years ago, and the teacher explained to me that keeping the lid closed is what traps that yummy smokiness that happens when the fat and juices vaporize. The lesson? Keep the lid down as much as possible to get max heat retention and max flavor.
6. Resist the urge to turn.
You know when you see guys with their tongs flipping food on the grill like crazy? Yeah, don’t do that. Allowing the surface area of your food to stay in one spot for a while is what creates that delicious caramelization, which is kinda the whole point of grilling in the first place. So resist the urge to turn your food more than once, and you’ll be rewarded with those gorgeous grill marks and sweet crunchy crust.

7. You can grill almost anything (even dessert.)
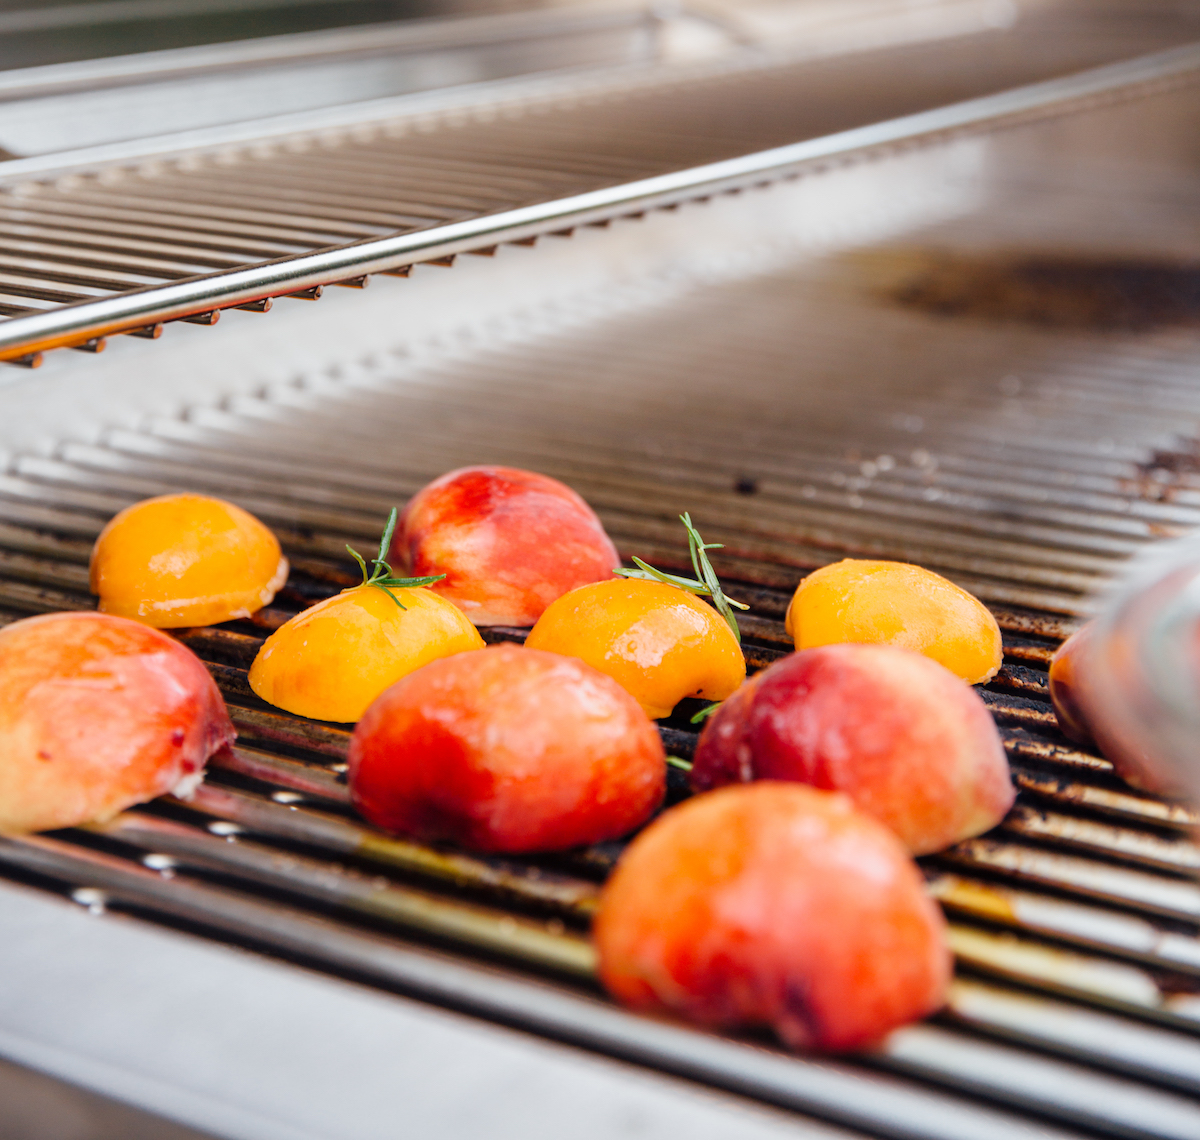
It’s fun to experiment with grilling unexpected food – and turns out, you can grill way more than meat and vegetables. My current favorite summertime dessert is grilled peaches with ice cream, and it’s a perfect technique to use on any type of stone fruit since it gets sweeter with heat and holds up well on the grill. You can also grill slices of pound cake and foil-wrapped s’mores – dessert over the flame is such an unexpected way to end an evening.
Get my recipe for Honey-Grilled Peaches & Apricots with Ice Cream here!
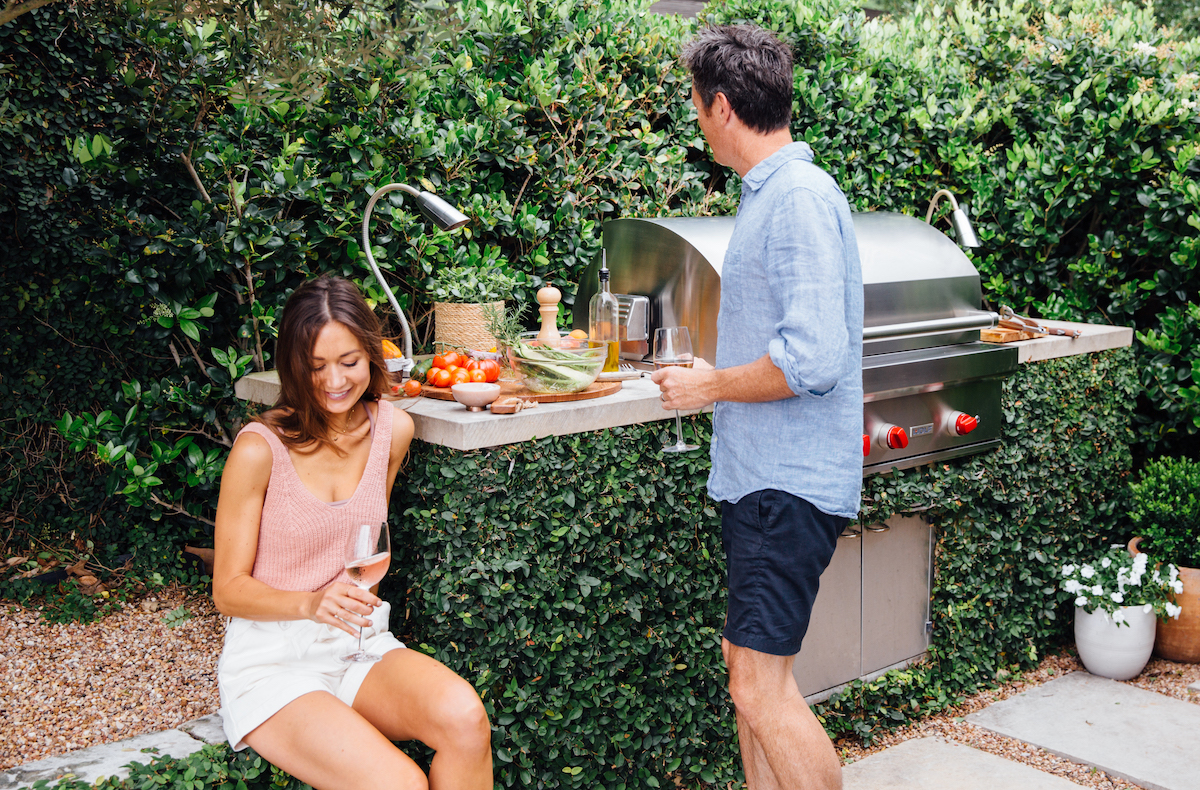
There’s something about spending a night around the grill that makes me want to set down my phone and relish in the moments spent with family and friends on carefree summer nights, and believe me when I say: You can do it! Cheers to making some delicious memories in the season ahead!
Scroll on for my go-to recipe for Grilled New York Strip Steak with “Shortcut” Chimichurri, which I also drizzle over all my grilled veggies. Adam and I eat this for dinner almost every weekend in the summer! And big thanks to Sub-Zero, Wolf, and Cove for teaming up on this post with us and making all our backyard grill dreams come true.
Grilled New York Strip Steak with Chimichurri
Serves 4
7 Grilling Rules That Every Summer Cook Should Know
Prep
75 minutes
Cook
30 minutes
Categories
Ingredients
- 2 New York Strip Steaks, about 1 1/2" thick, fat trimmed
- extra-virgin olive oil
- Grill Mates Montreal Steak Seasoning
- "shortcut" chimichurri (recipe follows)
Instructions
- One hour before grilling, remove the steaks from the fridge and allow to come to room temperature.
- Preheat grill to 350 degrees. Pat steaks dry with paper towels, drizzle both sides with olive oil, then season liberally on all sides with Montreal Steak Seasoning.
- Place steaks on grill and shut the hood, watching to make sure it maintains an even temperature of 350 degrees. Check occasionally to make sure there are no flare-ups - if there are, use tongs to gently move the steaks to a cooler part of the grate.
- Cook steaks 8 minutes per side, turning only once, for medium-rare. Remove to a cutting board and let rest for 10 minutes before slicing into 1" strips. Eat!
"Shortcut" Chimichurri
Ingredients
- 1 package Grill Mates Zesty Herb Marinade
- 1/3 cup water
- 3 tablespoons white vinegar
- 3 tablespoons olive oil
- 1 bunch fresh cilantro, stems & leaves
Instructions
Add all the chimichurri ingredients to a blender and purée until almost smooth. I like to leave some pretty flecks of the fresh cilantro visible. Transfer to a small bowl and serve extra alongside sweet potatoes and steak.