

Thanks to my love of cooking and trying out new dishes, I have the unofficial distinction among our friends as designated “recipe tester.” My friends love it when I occasionally invite them to a girls nights where we all get to make something new and adventurous together. And then of course the “eating it” part.
While watching Crazy Rich Asians, I was particularly struck by the scene where the family came together to make dumplings. It was beautiful to watch how meaningful the art of dumpling making was to the family and how it brought everyone together. So, I took a deep dive.


After reading what felt like 100 blog posts and watching many technique videos, I decided to make pork and veggie potstickers. These pork potstickers, commonly called gyoza (the Japanese version of Chinese jiaozi), are pan fried and then steamed. I made them and, of course, posted photos of my culinary adventure on Instagram. Cue the flood of DM’s from my gals requesting a cooking night.
These potstickers are exactly what a girls night needs. The prep is easy enough to give everyone a task, folding the dumpling is simple enough that you can chat at the same time, and – best of all – they’re quick to cook!
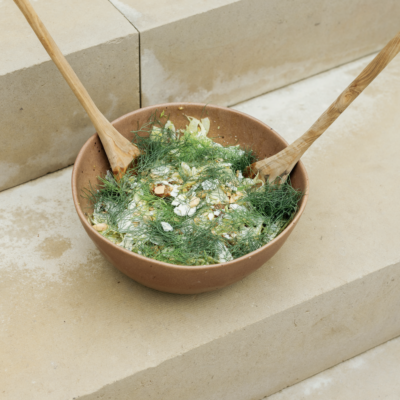
Have your gals bring a bottle of wine, throw together an Asian salad to enjoy on the side, and you’re all set.

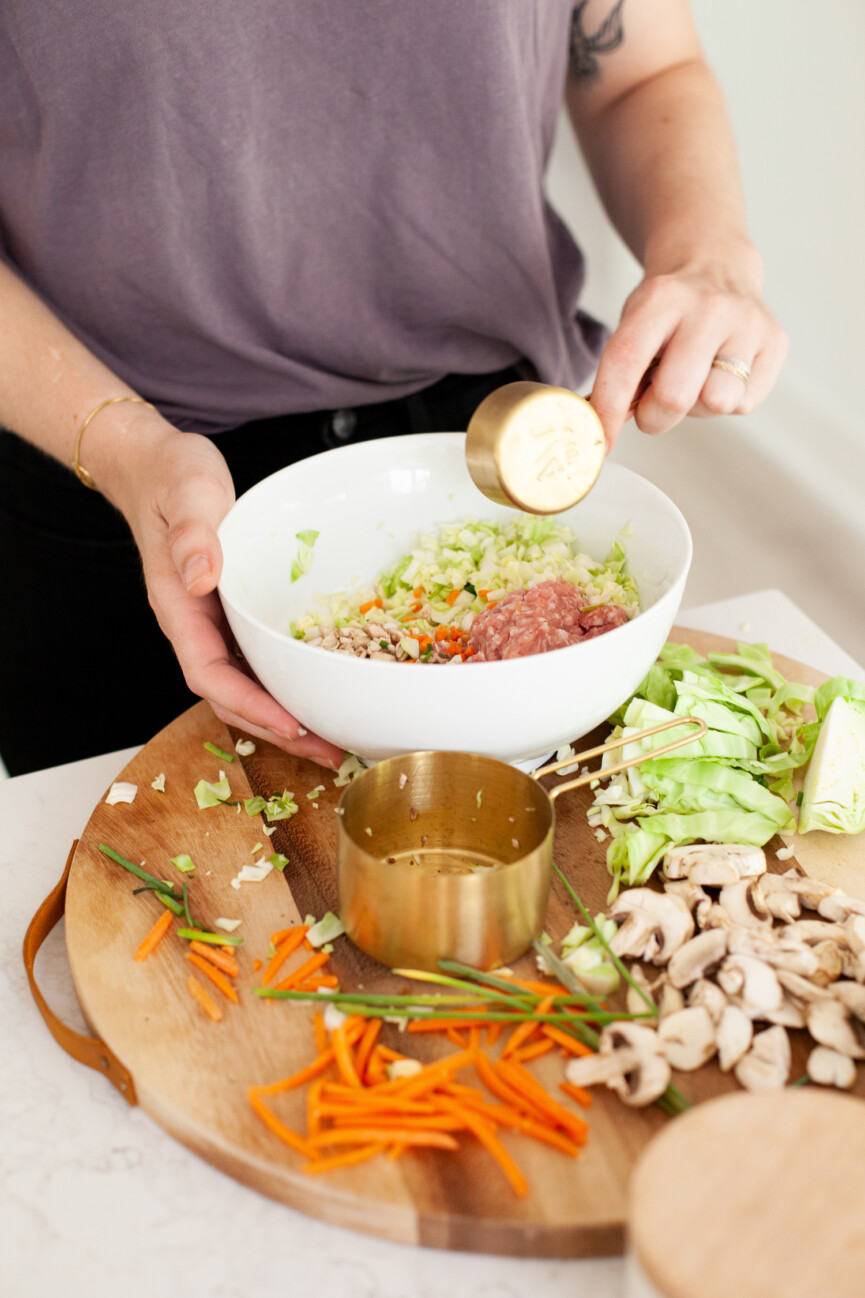

The filling for these potstickers includes pork, carrots, mushrooms, cabbage, chives, garlic, ginger, and some yummy asian sauces. Give your friends a cutting board and sharp knife because everything needs to be finely chopped!
All of the ingredients for the the filling will go into one bowl, so clean up is a breeze. Once everything is in the bowl, someone gets to go hands first into the bowl and mix it all up.
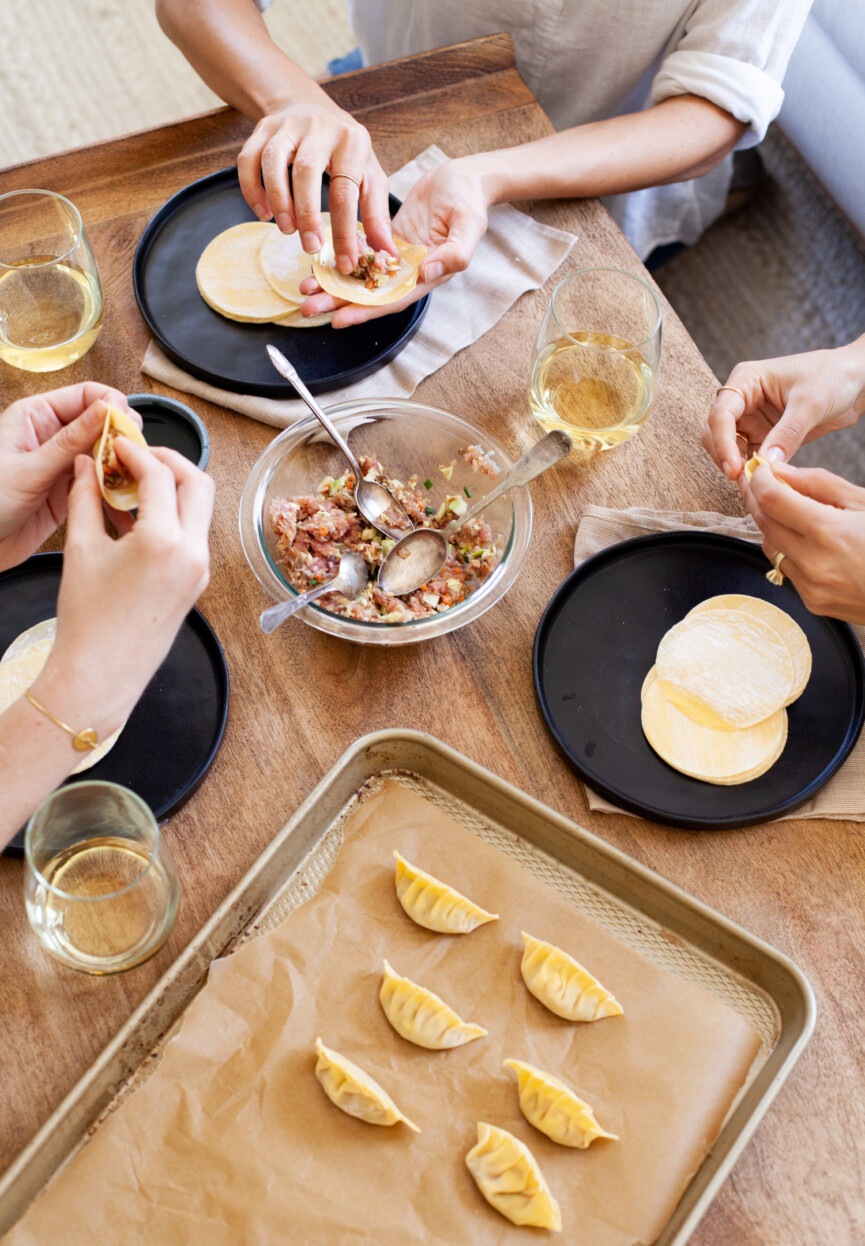
After the filling is mixed together, add water to a small bowl, open up the defrosted dumpling wrappers, and get comfy: now comes the fun part!
Step One
Dip a finger into the bowl of water and wet the edges of the dumpling wrapper. The water ensures that the dough sticks together when it’s pinched closed, so it only needs to be along the edge of the wrapper and only on the side that is facing you.
Step Two
Add the filling to the center of the wrapper. I recommend using a small spoon or a tablespoon to scoop the meat mixture to help control the portions. Overstuffing the dumpling won’t allow it to cook all the way through and the last thing anyone wants is raw pork!
Step Three
Hold the freshly filled dumpling between the thumb and middle finger of your dominant hand. Use your pointer finger to press the filling down so that it forms a more cylindrical shape.
Step Four
Last up is the most complicated step. Using your free hand, pinch the corner where the dumpling fold is. Then, using the pointer finger and thumb of the hand holding the dumpling, pleat a section of the front side of the dumpling wrapper and press it against the back side. And repeat until you’ve made it to the other side of the dumpling.


Remind everyone to just have fun with it! It’s a technique that takes a little while to perfect, so keep practicing. No matter how they look, they will cook up perfectly as long as the dumplings are sealed.
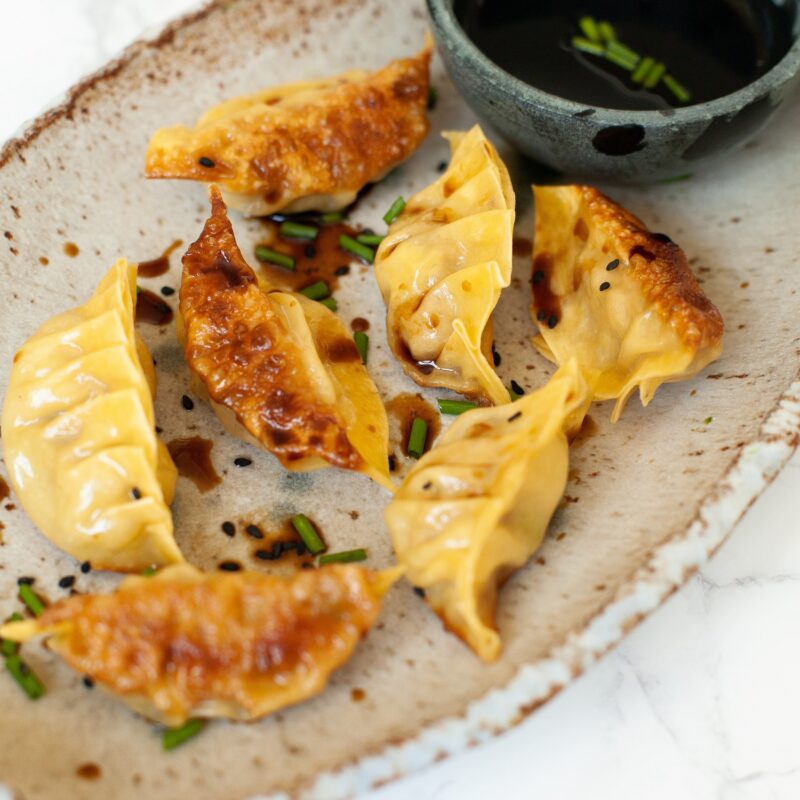
When the filling has been all used up, it’s time to cook those bad boys. The crispy, caramelized bottom that pan-frying gives the dumplings is one of my favorite things about them. Once they’re brown on the bottom, toss in some water and cover with a lid so that they finish cooking.
The smile on everyone’s face after their first bite is pure joy. And the best thing about this recipe? It makes about 50 potstickers, so there’s plenty to go around!
Print
Pork, Mushroom, and Cabbage Potstickers
Description
How to Host a Potsticker-Making Dinner Party
Ingredients
- 1/2 pound ground pork
- 1/2 cup finely chopped mushrooms
- 1/8 cup finely chopped carrots
- 3/4 cup finely chopped cabbage
- 1/2 tablespoon finely chopped chives
- 1 garlic clove, minced
- 1/2 tablespoon ginger, minced
- 1/2 tablespoon white wine vinegar
- 1/2 tablespoon Mirin
- 1 tablespoon soy sauce + 1/2 cup for dipping
- Olive oil or wok oil
- Prepackaged frozen round dumpling wrappers
Instructions
- Remove dumpling wrappers from freezer and let them defrost.
- Add all ingredients besides dipping soy sauce, olive oil/wok oil, and dumpling wrappers into a bowl and mix together with your hands.
- With one wrapper in hand, wet the edges of the wrapper with your finger, add about a tablespoon of the pork mixture to the middle of the wrapper.
- Holding the filled wrapper cradled between your thumb and middle finger, use your index finger to flatten the pork mixture.
- Using your thumb and index finger, create pleats in the dumpling wrapper and press it against the other side of the wrapper to close the dumpling.
- When all dumplings have been made, heat a large pan with about 3 tablespoons of olive oil or wok oil until shimmering.
- Add dumplings to the hot oil. Don’t move the dumplings.
- Once they have gotten brown and crispy on the bottom, keeping the heat pretty high, add about a half cup of water to the pan and cover with a lid.
- Keep dumplings in the covered pan for about 5 minutes or until the dumpling wrapper is slightly see-through and al dente.
- Remove from pan, dip in soy sauce, and try not to eat them all!

Oh my gosh, these look delicious! And what a great idea to get everyone involved!
xoxo
Cathy, your Poor Little It Girl
https://poorlittleitgirl.com
Love a good potsticker. I also love the idea of having all your friends help with dinner. What a great way to spend time together.
xo Jessica
My Style Vita
Yum, these look so good! I am definitely going to make them. Thanks for the recipe and also the excellent instructions.