
Crème brûlée is one of the few desserts that makes everyone’s “special occasion” list. Elegant yet approachable, light yet creamy, sweet yet bitter, it’s one of those dishes that has a little something for everyone.
So why do we never make it at home, instead reserving it for fancy, candlelit dinners? I say why not bring those special occasion vibes home for your next night spent around the dinner table with your favorite people. After all, isn’t that the best kind of special occasion there is?
Crème Brûlée is simple. This recipe has only six ingredients, but could easily be whittled down to four. It takes just minutes of active cooking time so you’re not slaving away in the kitchen all day (read: perfect for a dinner party) and you get to use a kitchen torch!
There may be techniques that feel unfamiliar — tempering the egg yolks, baking the custards in a water bath — but I assure you, these steps require no more special skill than baking a cake or making a batch of chocolate chip cookies. (Hint: if your egg yolks get a little lumpy from the hot cream, you can just strain the custard and keep on going.) And the end result? An insanely creamy, crunchy, caramel-topped personal custard.
This dessert is ultimate indulgence, and you can claim — hey, I made that.
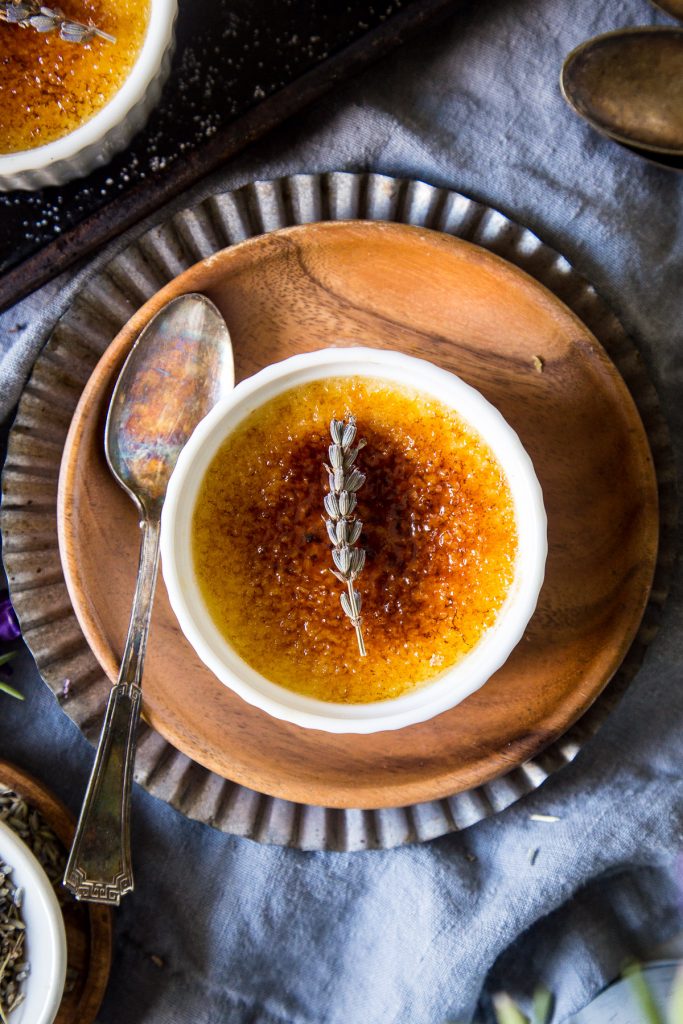
This particular version is a nod to spring’s flowers. We’ve had a particularly beautiful wildflower season in Texas — the hills and roadsides in Austin have been bursting with the most beautiful blues, oranges and yellows. The explosion of spring color has inspired me to add hints of floral flavors to my baked goods, and while I haven’t spotted any on the hillsides, I chose to use lavender here because it’s one of my absolute favorite flowers to bake with.
When gently infused into the liquid in a dessert, it adds soft, delicate floral notes that feels elegant and perfectly seasonal. Use too much and you risk an overpowering, perfume-like flavor, so use sparingly to ensure your crème brûlée feels more touch of spring and less Bath & Body Works.
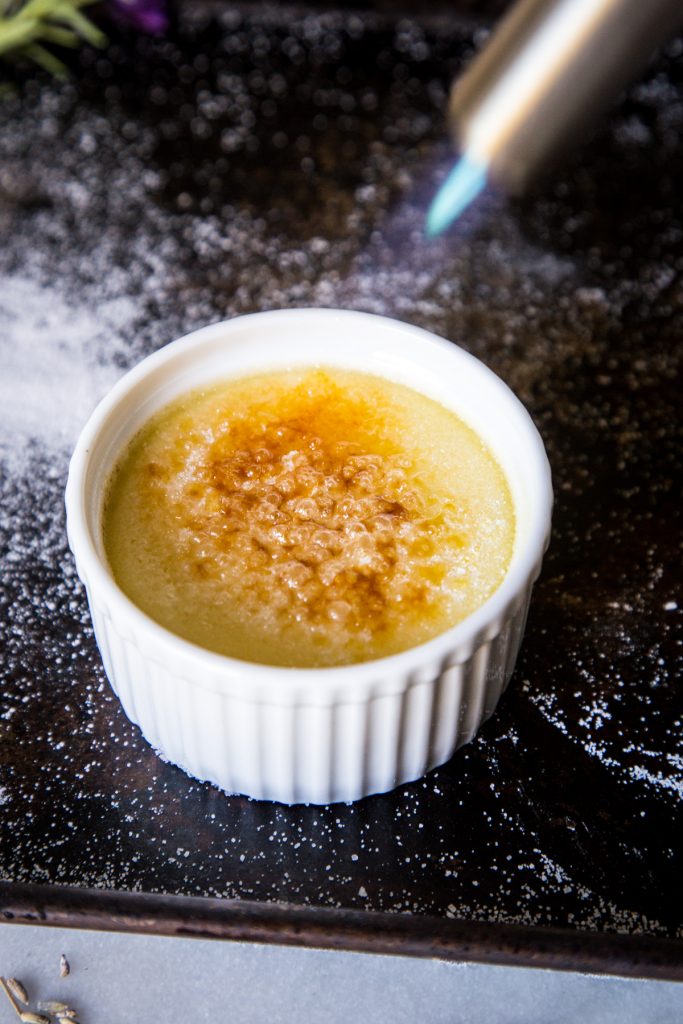
I’ll note that this recipe does require a kitchen torch for brûléeing the tops. I have heard about a method that uses the broiler to caramelize the tops of the custard, but I haven’t tried it myself so I can’t vouch for its success (or failure). I, personally, don’t own a kitchen torch but found several generous coworkers who were willing to let me borrow theirs and I encourage you to do the same. If not, they’re available relatively affordably online. Enjoy!
Lavender Crème Brûlée
Serves Yields 5 Crème Brûlées made in 6 oz. ramekins
This Lavender Crème Brûlée Will Steal The Show At Your Next Dinner Party
Categories
Lavender Crème Brûlée
Ingredients
- 2 cups heavy cream
- 1 tablespoon dried, culinary grade lavender
- ½ teaspoon pure vanilla extract
- Pinch salt
- ½ cup sugar, plus 10 teaspoons for the brûlée topping
- 4 large egg yolks
Instructions
- Preheat the oven to 325F with a rack in the middle position. Position five 6oz. ramekins in a baking dish and set aside. Mine fit nicely in a 9x9 brownie pan, but you could also use a 13x9 inch pan. Feel free to use any ramekin size you own, but be sure to adjust baking time based on size.
- Add the cream, lavender and salt to a medium saucepan and heat over low until the cream begins to simmer. Turn heat off and let the lavender steep in the cream for 15 minutes. Stir in the vanilla extract.
- In a mixing bowl, whisk the egg yolks and sugar until pale, about 3 minutes. Don't combine the eggs and sugar until the cream is done steeping -- if you do it too soon the sugar will bind with the water in the eggs and will become lumpy.
- Temper the yolk and sugar mixture with the warm cream, by slowly pouring a ladle of the warm cream into the mixing bowl while whisking the entire time. Repeat two or three times more until all the cream is whisked into the egg yolk mixture. Strain into a liquid measure cup with spout in order to make it easier to pour into your ramekins.
- Divide your custard evenly between the prepared ramekins, filling each to be about three-quarters full. Let sit for a moment then skim any bubbles off the top of each -- this will help ensure a smooth, pretty surface on your baked custards.
- Bring a kettle of water to a boil for your hot water bath. Fill the pan with hot water until the water comes about two-thirds of the way up each ramekin. Be careful not to get any water in the custards. Tip: I find it easiest to place the pan with the ramekins on the center rack of the oven before filling with water -- this helps ensure there is no splashing when trying to transfer from counter to oven.
- Bake the custards for 25-30 minutes. The custards are done when the custards have a uniform jiggle from edge to center, and/or when you touch the center, it springs back a bit without leaving your finger wet. If the custards set like Jell-O, they’re over-baked and may be a little dense (but still very much edible).
- Place the pan of custards on a rack to cool. After 15 minutes, remove the ramekins from the water bath, and allow to cool completely on the rack. Transfer to the refrigerator to chill for at least 3 hours.
- To brûlée the tops, sprinkle each chilled custard with 2 teaspoons of granulated sugar. Ignite your kitchen torch and heat the sugar, holding the flame about 3 inches from the custard. Move the flame in a circular motion to ensure you're heating the sugar evenly from the edge to the center. The sugar will melt, bead up, and then start to turn an amber color. The longer you torch the surface, the darker the color will become. I recommend stopping when you have a nice amber color. Let cool for a few minutes until the melted sugar hardens and the sides of the ramekins are cool to the touch.
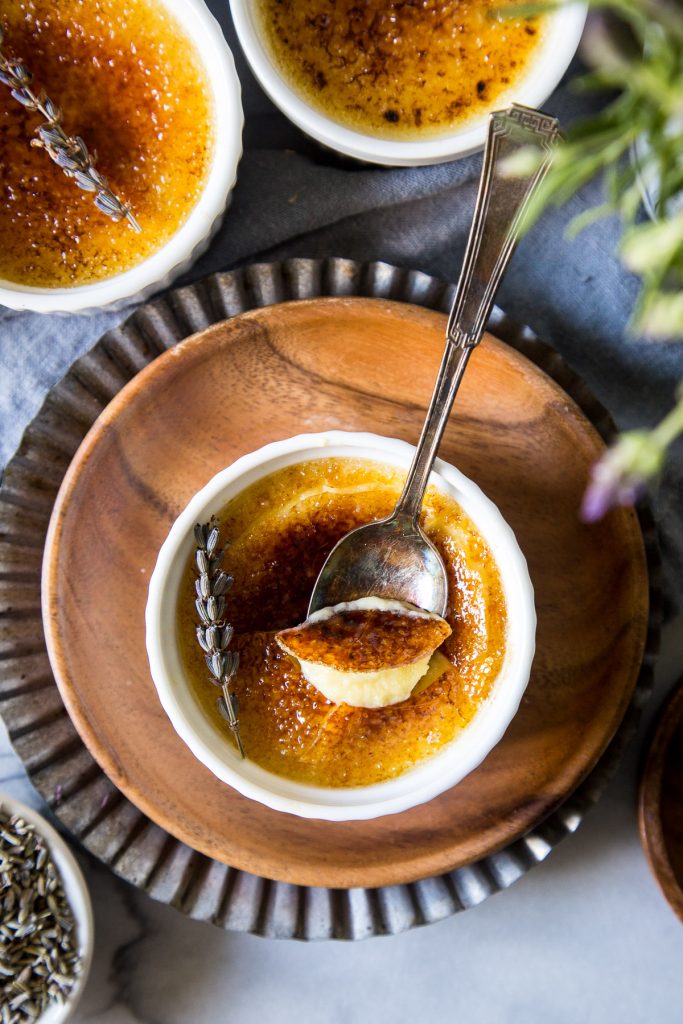
- Serve within twenty minutes or the sugar surface may begin to soften. Use a spoon to gently crack the hard sugar surface (the best part!) and enjoy every bite with a bit of both custard and caramelized sugar.

Comments (2)