“Hip openers” are often requested in yoga classes and for good reason as excessive tightness in the muscles supporting and surrounding the hips can lead to a number of structural misalignments and, eventually, discomfort in the body, including lower-back and knee pain. That said, while the primary role of the hip joint is stabilization, range of motion is also important so, as with most things in life, balance is key. With this in mind, as you explore this sequence targeting the muscles surrounding your hips, be mindful that over-stretching is not the goal and more sensation is not necessarily better. Pay attention to the signals your body is giving you and don’t be afraid to back out of or adjust the pose a bit if need be.

Supine Bound Angle
Props: optional blocks
Lay down in the center of your mat with your knees bent and your feet flat on the floor about hip-distance apart. Rest your arms alongside your body with your palms open towards the ceiling. Slowly bring the soles of your feet together and allow your knees to open out towards the sides of your mat. You may feel sensation on your inner thighs, but if you feel any strain in your groin or lower back, place a block (or pillow) under your knees or thighs to support your legs. Stay here for 1 – 3 minutes taking slow deep breaths in and out through your nose.
To come out of the pose, use your hands to support your legs as you draw your knees together. Gently roll to one side and press yourself up to a seat.
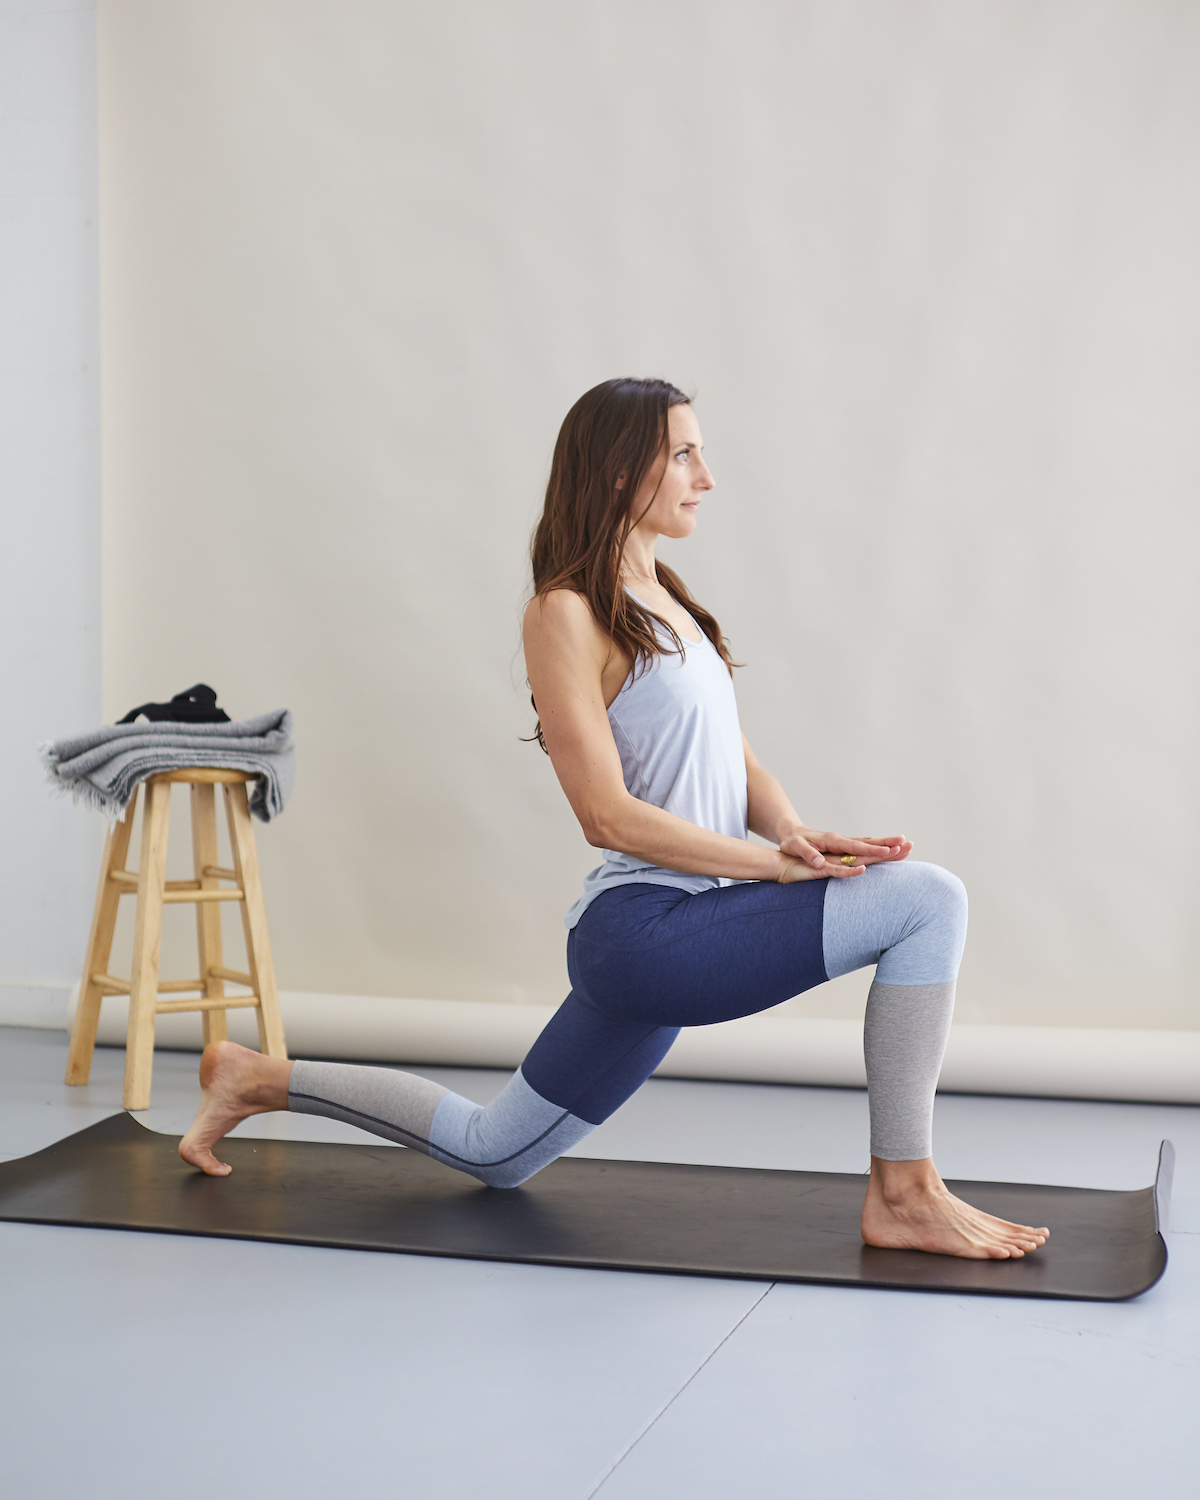
Low Crescent Variation
Props: optional blanket
Start in Downward Facing Dog. Step your right foot forward between your hands and place your back knee down. If you have any sensitivity in your back knee, place a folded blanket underneath it for support. Make sure your right knee is aligned over the center of your right foot. Stack your hands on top of your front thigh. Allow your hips to come slightly forward in space as you maintain a gentle lift in your lower belly and lengthen your tailbone down away from your lower back. Gently lift your chest and roll your shoulders open and back. Gaze at the horizon as you relax your jaw and the sides of your neck. Stay here for 8 – 10 breaths.
To come out of the pose, release your hands down to frame your front foot and step back to Downward Facing Dog. Repeat on the second side.
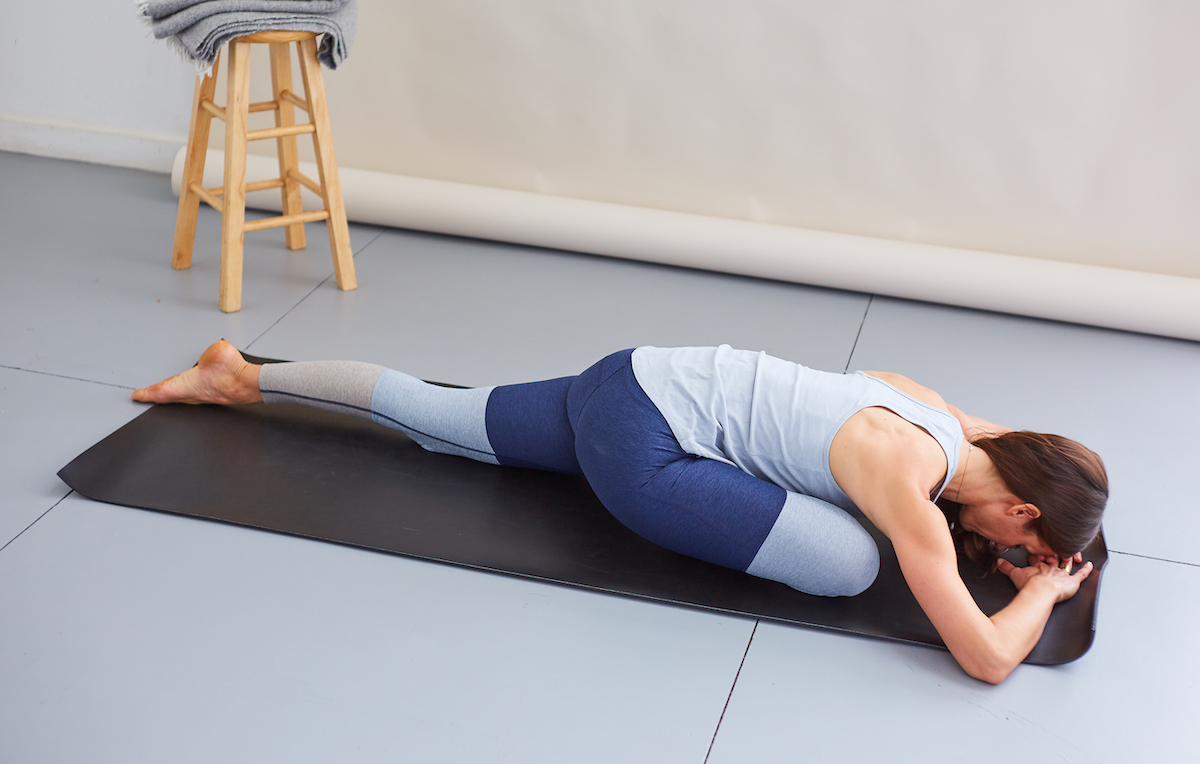
Pigeon Pose
Props: optional blanket
From Downward Facing Dog, bring your right knee forward towards your right wrist. Gently, place your knee down on the earth just behind and slightly to the right of your wrist. Lower your back knee down. For some, the front shin may be parallel with the front edge of your mat, but for most (including me!), the right shin will be on a diagonal with the heel closer to your left hip or pubic bone. Be sure your back leg is extending straight back. Gently draw your left hip forward in space and your right hip back – ideally both hip points are shining forward equally. If you find your weight is shifting into your right seat, place a folded blanket under your right sit bone. As you feel ready, begin to fold forward and place your forehead on a blanket or your stacked hands. If you feel any pain in your front knee, slowly come out of the pose and take a Reclined Figure Four shape on your back.
Stay here for 10 – 12 breaths. To come out of the pose, walk your hands back to lift your torso up and return to Downward Facing Dog. Repeat on the second side.
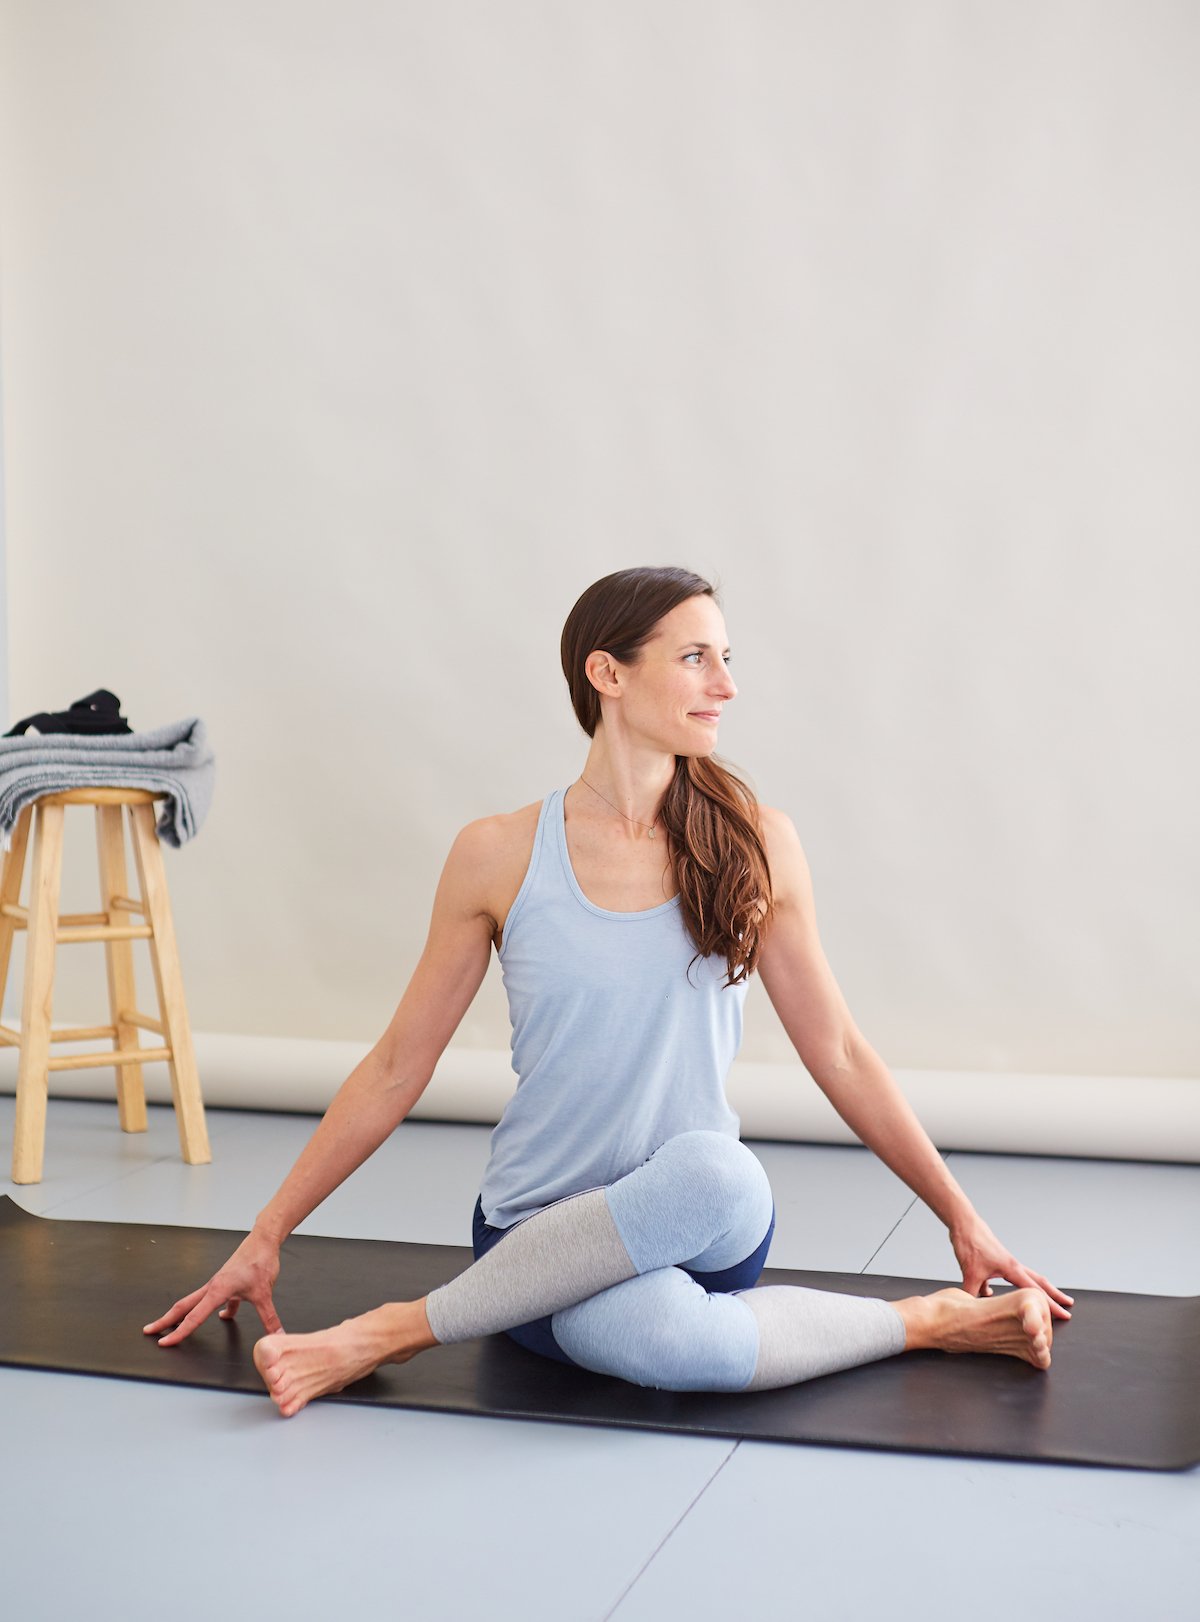
Cow Face Pose Variation
Props: optional blanket
Sit in the center of your mat with your legs stretched out in front of you. If you feel your weight shifting towards the back of your seat and your lower back rounding, sit on a folded blanket (or two!) until you are able to maintain a lifted spine. Bend your knees and bring your feet to rest on your mat hip-distance apart. Slide your right heel underneath your left leg just to the outside of your left hip. Now cross your left leg on top of your right so your knees stack – your left heel will now come to rest outside of your right hip. For this variation, place your hands outside of your hips. To protect your knees, flex both feet as best you can. Your heels may be close to your hips or further away (as mine are in this image) – choose the placement that feels best in your body.
Stay upright or to deepen the opening in your hips, maintain length in your spine and begin to walk your hands forward folding over your legs. If this shape causes pain in your knees, come into a simple cross-legged seat and consider folding forward.
Stay here for 10 – 12 breaths. To come out of the pose, release the top leg then the bottom leg coming back to sit with both legs extending in front of you. Repeat on the second side. If you chose the seated cross-legged variation, simply switch the cross of your legs and repeat.