There was one design detail in our house that I wanted to change so much, it actually set in motion our entire remodel. Can anyone guess? Although it might seem fairly inoffensive, the huge stainless steel hood surround that’s above our stove was truly the bane of my existence. I have no idea why I didn’t do more research on kitchen hood design options when we built our house 12 years ago, but as my style evolved through the years, the shiny behemoth piece of metal in the center of our open kitchen really started to annoy me. And so began my journey in figuring out how I could accomplish a kitchen makeover on a budget. I was thrilled to team up with KitchenAid for some absolutely beautiful new appliances – including the hood liner that went with my lovely new plaster hood surround – as well as Caesarstone again, with whom we previously partnered on our studio kitchen renovation a few years back.
I went way down the Pinterest rabbit hole and fell in love with this plaster hood surround that became the inspiration for our minimalist, earthy kitchen makeover.
The process evolved quite a bit along the way, and I couldn’t be happier with the end result. Scroll on for the before and afters, the design process, plus all the photos of the new space (with links to shop.)
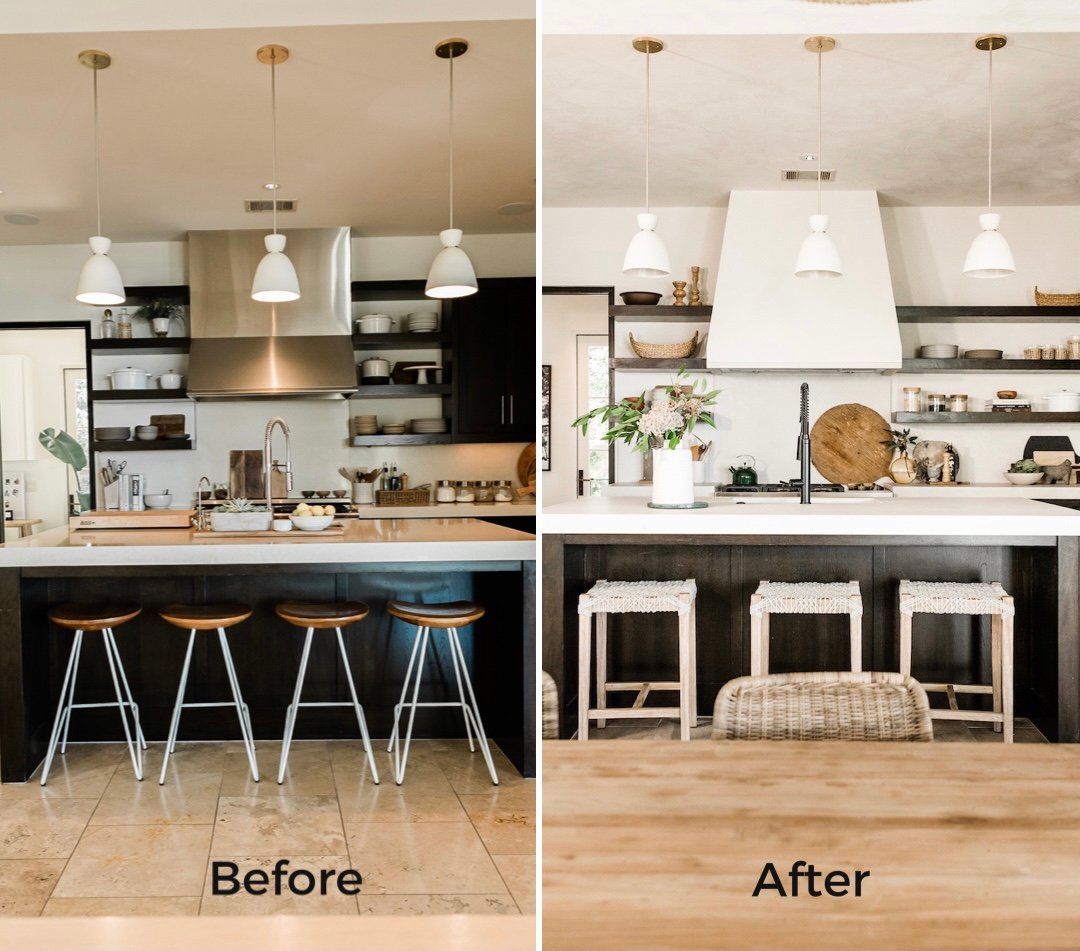
As I shared in last week’s living room reveal, our remodel started as a major renovation, and then along the way, we decided to scale things back and focus just on what would make the biggest difference for our budget. (I shared lots more about our original plans versus what we ended up doing in this IGTV episode.)
Initially, we thought we’d change out all the cabinetry and replace it with a more natural light oak, but once we realized how expensive that was going to be, we decided to see what we could do with the espresso-stained cabinets and shelving we already had. In case you missed it, custom cabinetry is not cheap, and doing this one element would have basically blown our entire kitchen budget. Today, I’m so excited to share the final result with you guys! Scroll on as I break down exactly what we did to achieve this kitchen makeover on a budget.
White Plaster Hood Surround
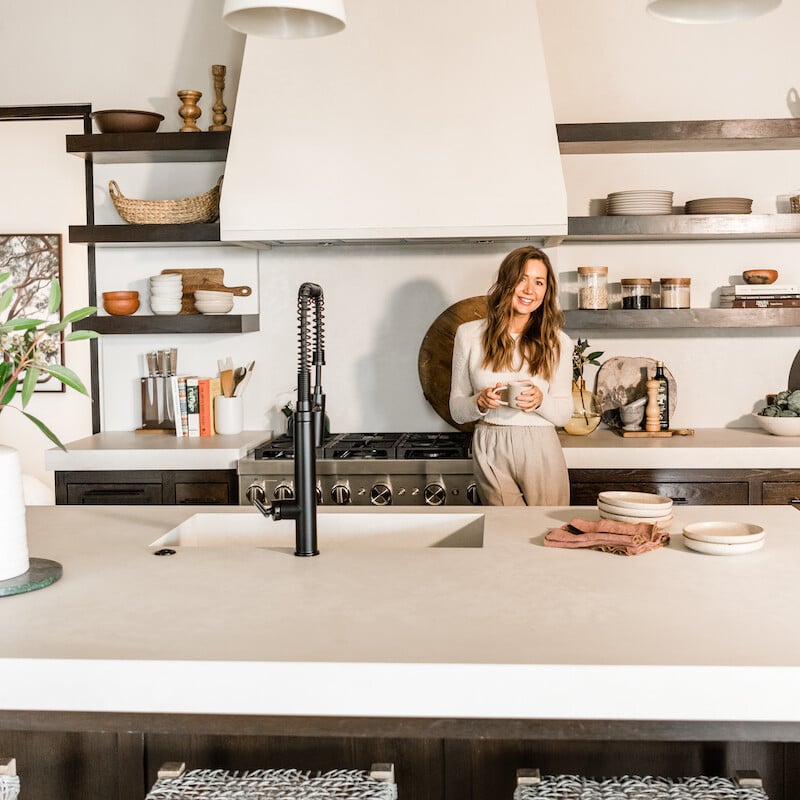
Our framer constructed a slightly angled surround for our KitchenAid custom hood liner that we then plastered over with American Clay in forté white (which I talk a lot more about over here.) I love this solution: the hood features a hidden ventilation system that’s mounted to the inside of the surround, giving a much more streamlined look.
This was a major game-changer for the entire house since our open floor plan gives the hood direct visibility when you walk through the front door. The organic shape and material just feels so me and really sets the tone for the style of the kitchen. It was amazing how this ONE move brought the space out of the aughts and into 2021.
Although it looks simple, the hood surround actually ended up being a bit of a design challenge, since we designed and built it custom for the space. We knew that we had to get the slanted angles just right—the first pass was a little crooked, and thankfully our framer was able to easily correct it. Once the hood surround was built, I realized our measurements for the surround had been a little off, revealing a tiny bit of the stainless hood insert at the bottom. So, to to give the edge a clean look, I had a remnant piece of Caesarstone from our cabinetry cut into a 2-inch wide piece of trim to “cap” the bottom.
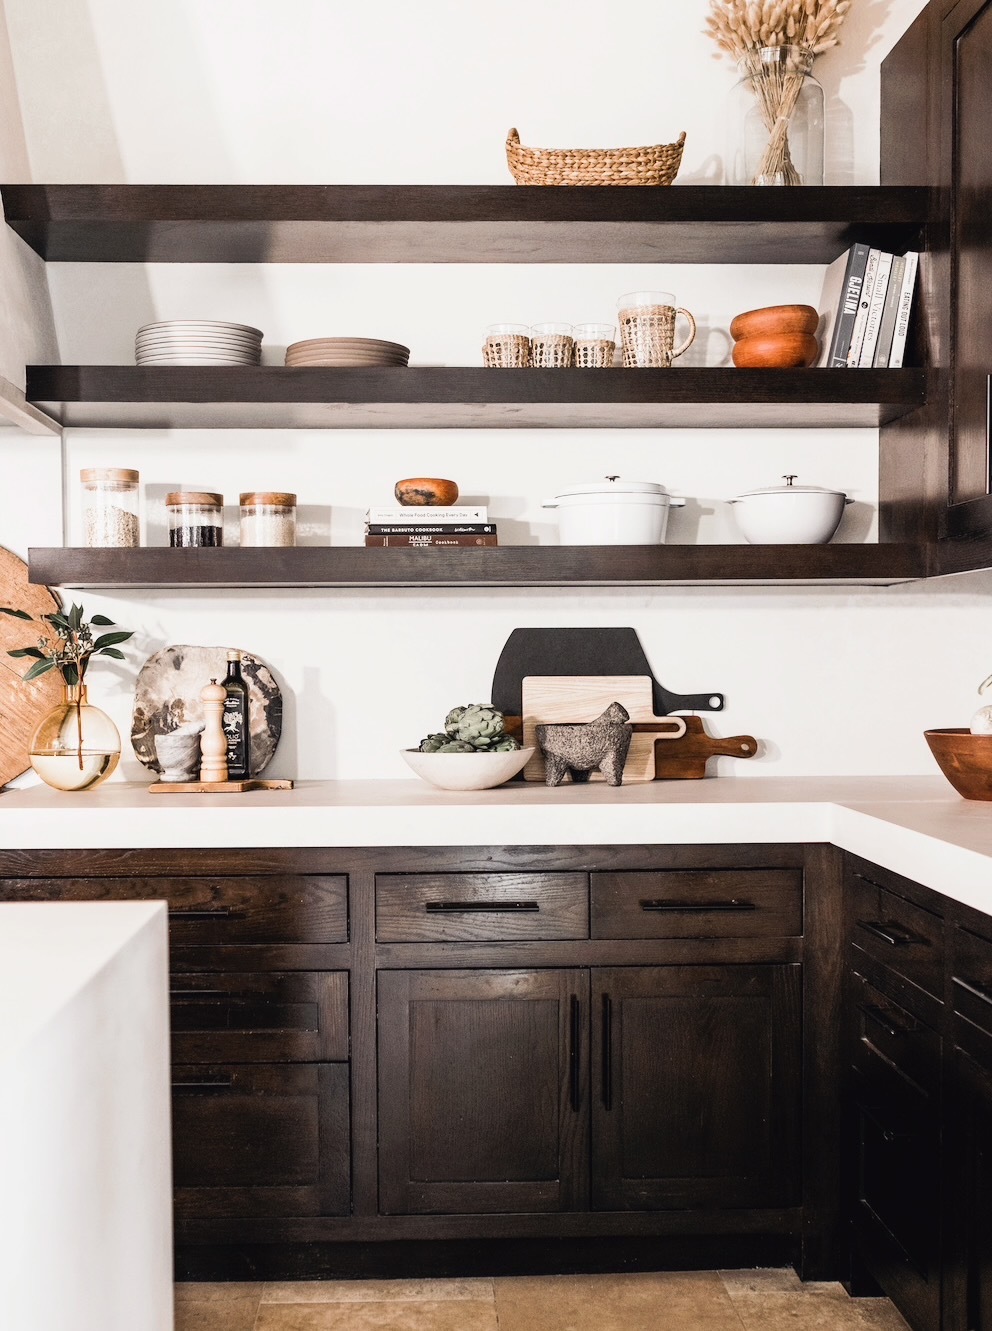
More Open Shelving
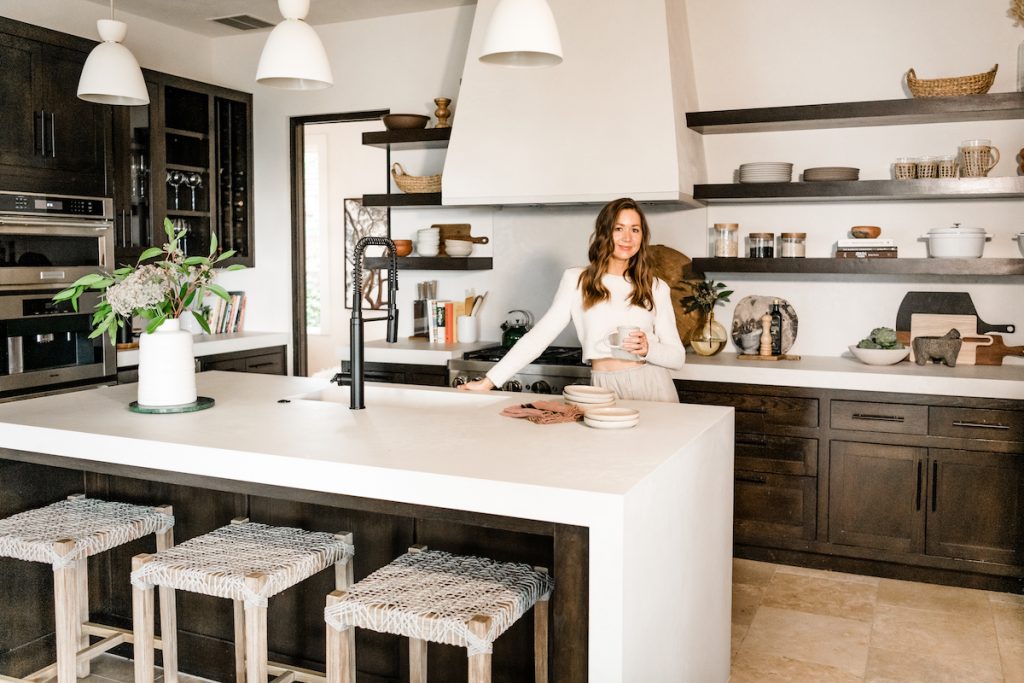
Instead of demo’ing all the cabinetry, we tore out just the three cabinets in the corner and extended the open shelving to let in more natural light and give us more open space to display our favorite things. The end result is much less heavy and brightens the entire kitchen up. I’m honestly shocked at what a difference this small tweak made.
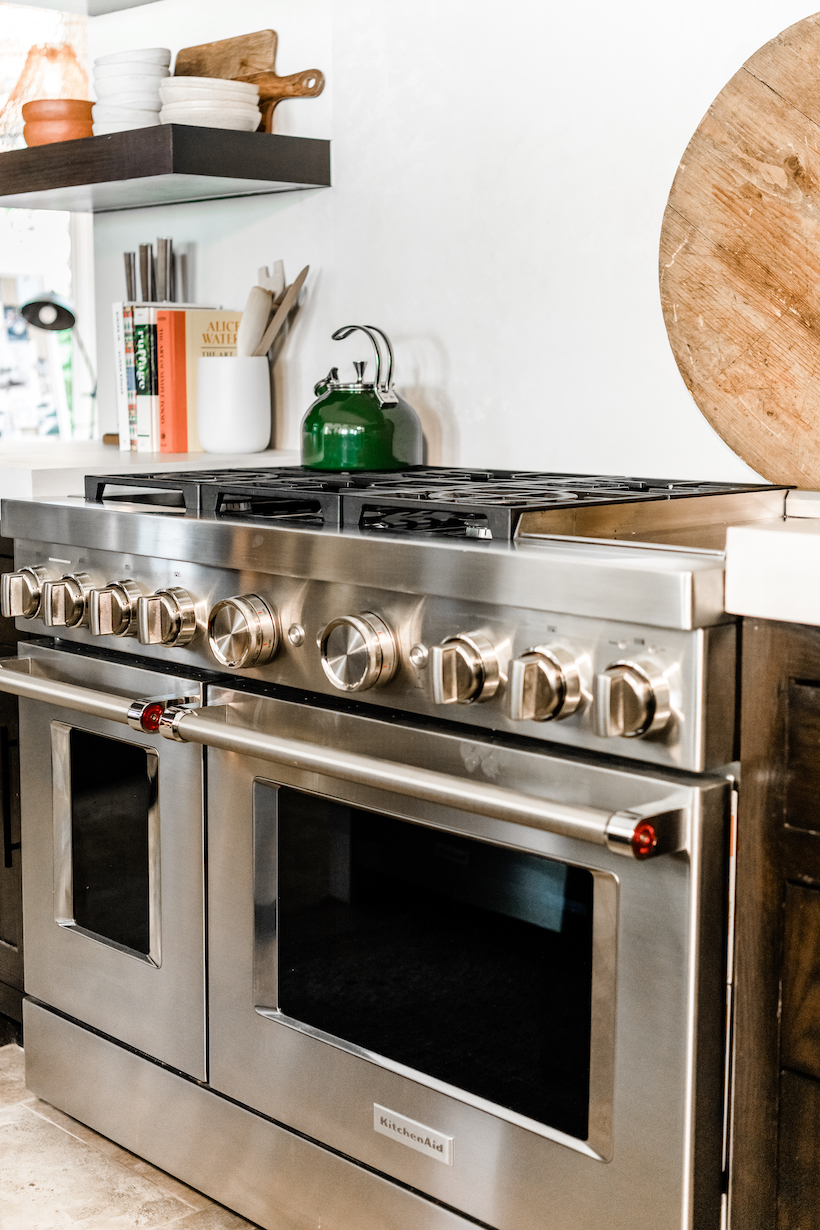
Our New KitchenAid® Range
Our previous appliances had been in the space since we built our house 11 years ago, and let’s just say I’d just about cooked them into the ground—my smaller oven on the left had totally given out, and the larger oven wasn’t regulating temperature properly. I’ve loved KitchenAid products since we installed them in our studio kitchen a few years back, and I’ve wanted them in my home ever since. This remodel was the perfect opportunity to do it. Having them in our kitchen has reignited my love for cooking and I find myself looking forward to making dinner each night (and not even dread the clean-up thanks to my new KitchenAid® dishwashers, which we talk about over here.)
So, let’s talk about this range, aka the new love of my life. It’s the KitchenAid® 48″ Smart Commercial-Style Dual Fuel Range and it is truly made for the passionate at-home cook. The dual flame burners are super powerful and can be easily adjusted to sear, simmer, stir-fry, and saute (and I’ve honestly never seen water boil so quickly.) The double oven got us through Thanksgiving without any fighting over whether the stuffing or sweet potatoes should get oven space (they both fit), and they’re made to circulate hot air throughout the entire oven, providing consistent temperatures for baked goods, golden roast chicken, and perfectly caramelized vegetables. And that’s all besides the fact that it’s gorgeous. If you like bold pops of color, this range is perfect because it’s available in eight other colors. It’s truly the best of both form and function, and I honestly cannot recommend this range more highly.
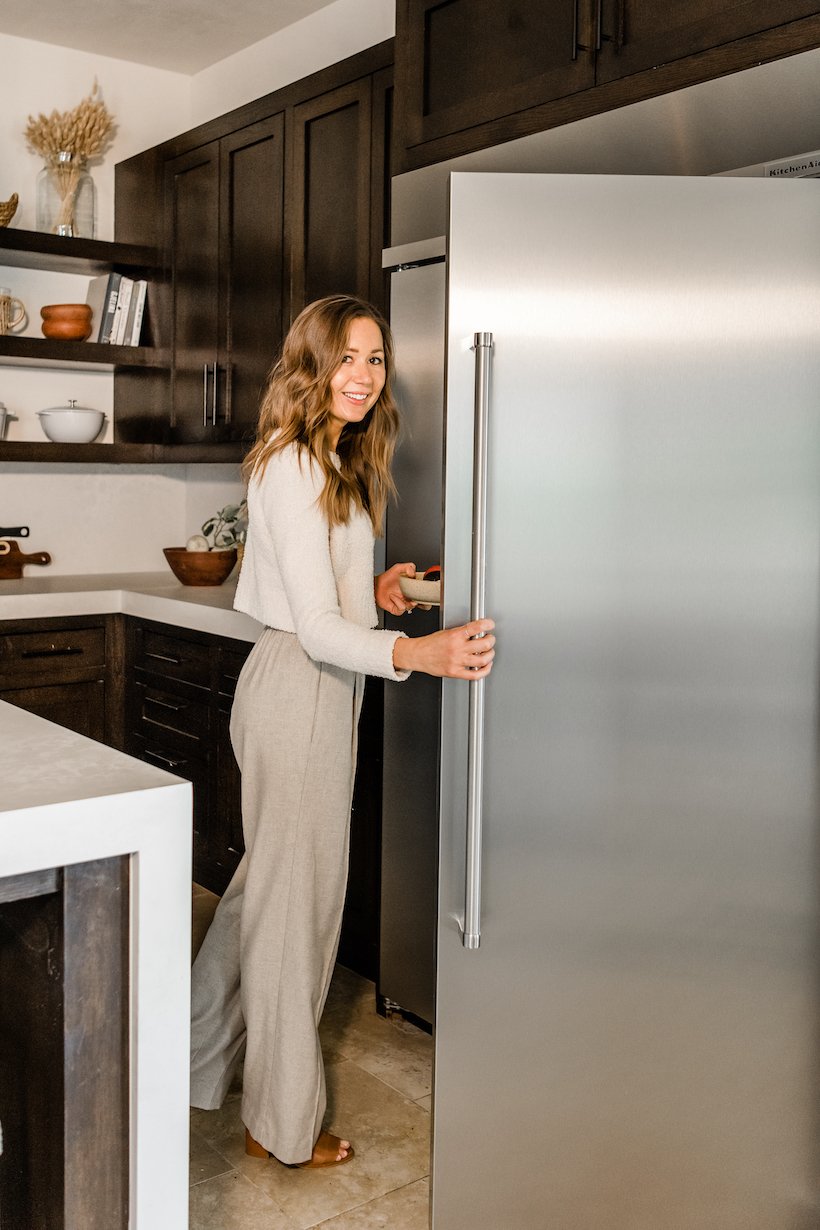
Our New KitchenAid® Fridge
As I learned with my pantry makeover a couple of weeks ago, when a space is designed efficiently, it suddenly feels so much bigger. Case in point: this KitchenAid® 30.0 cu. ft 48-Inch Width Built-In Side by Side Refrigerator with PrintShield™ Finish is so well-designed inside that my fridge went from (previously) bursting at the seams to being so streamlined, I actually have open space on the shelves. Sometimes Adam opens the door and asks, “Why is the fridge so empty?” and I get to go over and open drawers, smugly showing him that there’s actually tons of food in the fridge—it’s just so well-organized that it doesn’t feel cramped.
Aside from the design, there are a couple of things about this fridge that make it a standout. Its ExtendFresh™ Plus Temperature Management System helps the fridge maintain the perfect temperature for fresh ingredients. And my personal favorite: the PrintShield™ Finish, a fingerprint-resistant finish, which protects against smudges (huge for our house.)
In our wet bar area, we installed the KitchenAid® 24″ Wine Cellar with Glass Door and Wood-Front Racks, and it somehow manages to hold 46 wine bottles in such an efficient space – more than enough room for all the wine we keep on hand, even when parties become a thing again. The two temperature-controlled zones allow for white and red wines to be stored at a separate temperatures.
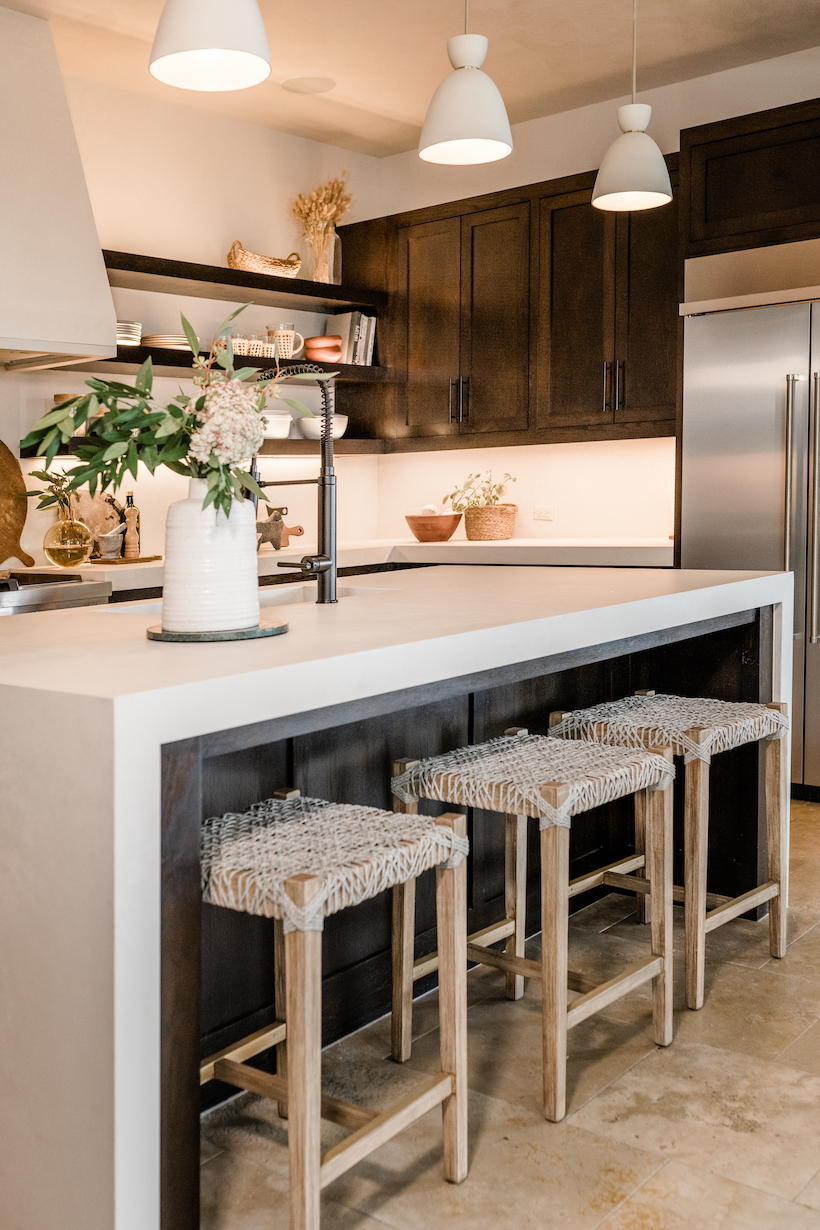
Caesarstone Countertops, Island, and Backsplash
We replaced our old countertops and backsplash with brighter white Caesarstone in Cloudburst Concrete. This is the third time I’ve used Caesarstone in a reno project: it’s so beautiful, durable, and stain-resistant—I just keep coming back for more.
This time, we decided to make the island feel cleaner and more substantial by adding a waterfall edge, which is where the countertop wraps all the way down the sides of the island (covering the cabinetry on the sides.) I also had this vision in my mind of a continuous sink made out of Caesarstone that would flow seamlessly from the countertop, down into a cutout sink, and back up to the other side.
I was a little nervous about whether or not this would work, only because I figured there was a reason that more people didn’t do sinks like this. But after talking with my countertop fabricator and plumber, I decided to just go for it—and I’m so glad I did. Here’s my advice if you’re interested in creating this “continuous sink” look at home:
- Make sure your countertop material is very durable (sink edges are prone to chipping) and stain-resistant (think about all that food it’s going to come into contact with.) This Caesarstone checks both boxes and so far, it still looks perfect.
- A piece of stone like this is much heavier than a standard sink, so you’ll need a carpenter to build support underneath the sink base to hold it up.
- Make sure you talk with your plumber about ordering the right type of drain and dish disposal, then drop it off to the fabricator who’s making the sink so that he can make sure his measurements are perfect before cutting the stone to fit.
Matte Black Sink Faucet and Cabinet Hardware
I’ve been wanting to switch out our stainless steel hardware for ages—I was over the high shine look that I chose over a decade ago. And now I don’t know why I didn’t do it sooner. I think this turned out to be my biggest money-saving win when it came to pulling off our kitchen makeover on a budget. The total price of our hardware was under $300 and totally changed the look of the space.
I ordered this sink faucet with the thought that it might have to be returned because it was so inexpensive. But I was pleasantly surprised at how beautiful and high-quality it was when it arrived, and so far I’ve been really pleased with it. Same with these cabinet and drawer pulls—so cheap, and so pretty. Matte black is an unusual combo with a dark, espresso stained wood (you’ve got to be a fan of the black-brown combo, which I wholeheartedly am), and I really love the way the hardware almost disappears and blends seamlessly with the wood.
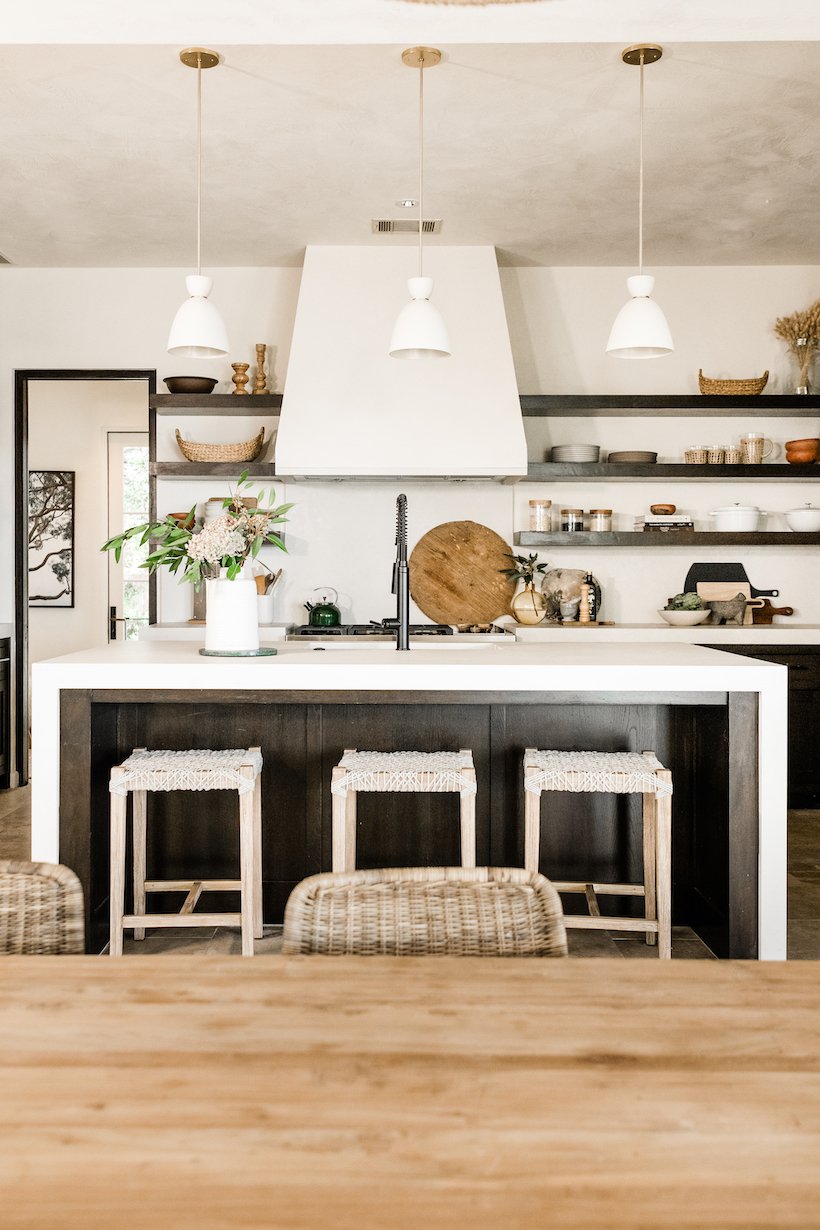
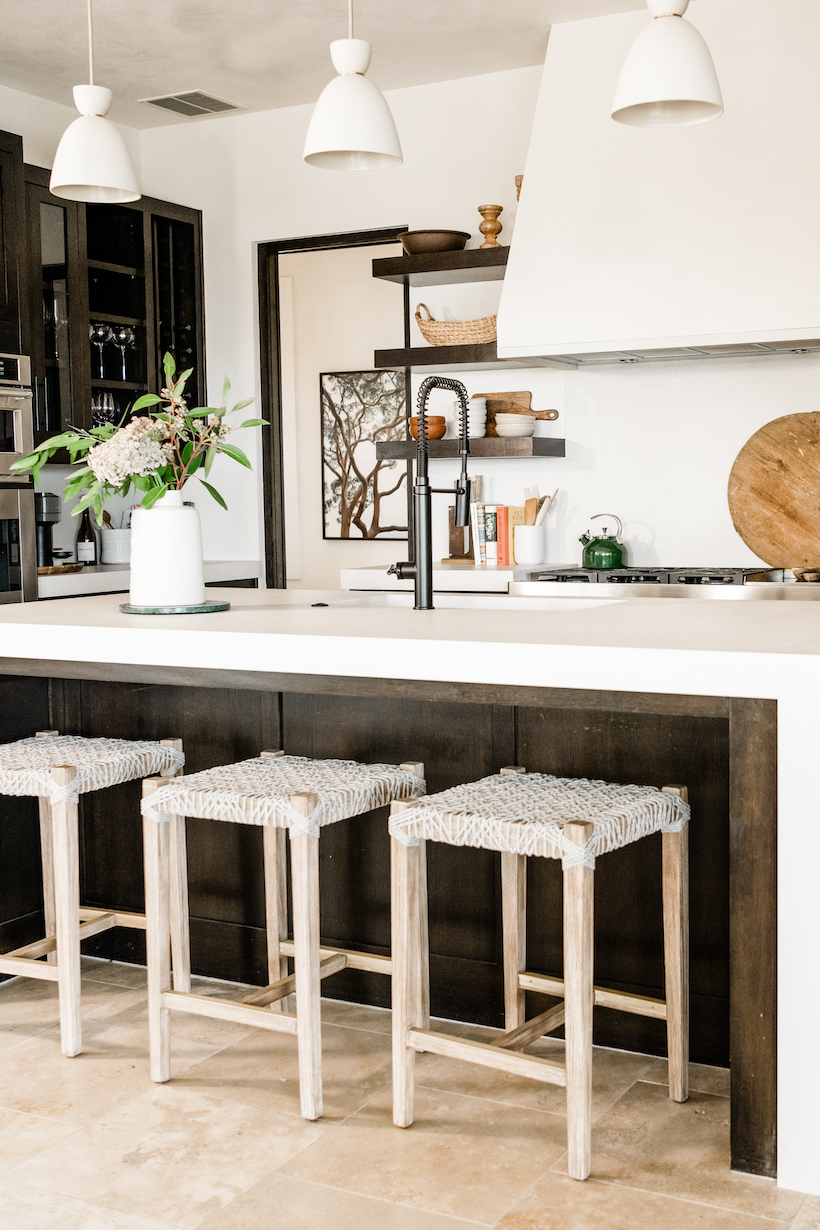
Casual, Beach-Inspired Barstools
I searched high and low for the perfect barstools before finding these beauties, the Carmel Counter Stools from Dear Keaton. I wanted something light and airy, but most of the ones I found were either too slick and modern for the space or too bright white and farmhouse-y. I love that these have a rope seat that feels a bit beachy and is also surprisingly comfortable. The whitewashed wood base is earthy and feels like just the right amount of contrast with the espresso stained island.

Simpler Shelf Styling
Chanel came over and we spent the afternoon tweaking and adjusting the way I was displaying my stuff on the open shelves. It was so valuable to have a fresh eye to challenge some of the ways I’d been previously doing things. Even if you’re styling solo, I highly recommend clearing everything off your shelves and not being afraid to add things back in a way that may feel weird at first. Just play! You’ll likely have a burst of inspiration for an approach to arranging that may not have occurred to you before. And there’s no easier (or cheaper) way to makeover your space on a weekend than by re-styling a few shelves.
Aside from dishes, think about what other objects might look great on your shelves. A vase with dried branches, canisters full of dry goods like rice and oats, a bowl full of lemons, that cool mortar and pestle that’s been gathering dust in a cabinet for years. The end result of my styling adventure was a freshened up, simpler approach to my open shelves, and for now, it feels perfect. That is until I rearrange it again in a few weeks. 🙂
 So, what do you guys think? Feel free to drop a comment with any questions about our new kitchen—I’ll do my best to answer them, and we’ll round up sources for any products y’all are curious about here on the site next week!